Need any help or advice?![]() +44 (0)1782 454499
+44 (0)1782 454499
PRODUCTS USED IN THIS PROJECT
Although not necessarily an exhaustive list, the following tools and materials, supplied by Easy Composites, were used in this project.
The quantity shown below is the approximate amount used in the project rounded up to the nearest available kit size or quantity.
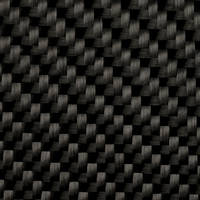
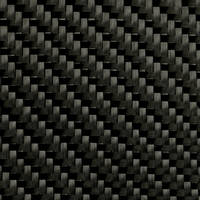
COMPONENT MATERIALS

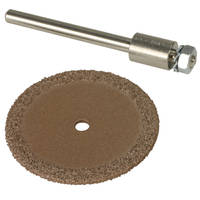
TOOLS & EQUIPMENT


INFUSION CONSUMABLES

ANCILLARIES


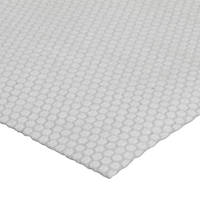
VACUUM BAGGING CONSUMABLES
MOULD MAKING MATERIALS
POLISHING
VIDEO TUTORIAL
Model Board Moulds and Resin Infusion for Faster, Lower Cost Prototypes
This tutorial covers in detail an end-to-end production process that can be used to save time and materials when making complex one-off or prototype composite parts on a constrained budget or tight timescale.
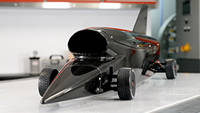
James Whomsley from Project-Air asked Easy Composites to help him design and manufacture a new carbon fibre monocoque for a world record attempt for the fastest jet-propelled RC car. With a tight budget and short timeframe, we were able to produce this complex part in just a few days and for a fraction of the cost of full-blown production techniques by directly machining the moulds from polyurethane model board and then producing the part using resin infusion.
The techniques demonstrated in this video can be adopted to save time and materials for any one-off or prototype projects where the precision and volume capability of full production moulds is not required.
WHAT YOU WILL LEARN
Overview
Over the course of this 33 minute tutorial, you will learn:
- Design Considerations for the mould and part.
- Machining and sealing the mould.
- Process Selection
- Reinforcement Strategies and Layup.
- Mould Closing, Infusion consumables and Vacuum Bagging.
- Resin Infusion and Initial Cure.
- Demould, Trim and Post Cure.
- Finishing & Painting.
STEP-BY-STEP GUIDE
1. Design
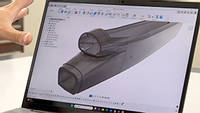
Before we can start making the moulds and the final part, we needed a design for the chassis. Having gone through requirements for the project with James, our Aerospace Engineer set to work designing the composite monocoque.
The final design is a long tubular structure that typically would need a split mould, and having some fine detail, would typically be made from prepreg. However, that would need a high temperature tool and an epoxy tooling board which would push it beyond the budget and time for this project as well as overkill for what it is. As such, the plan is to resin infuse this very complex part.
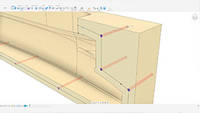
2. Designing the Mould
The main shortcut being used in this process is that, instead of machining a pattern then using it to create a mould, we are going to machine the mould directly itself. This can be done because, being a one off, there would only ever be the need for the mould to survive one or two uses.
The main difference in design terms is that, as the board is being used as the mould, it is designed and machined as a negative, not a positive. So this means the stock is created and the model is subtracted from it. Being a split mould, this is repeated for each side with some additional holes being drawn for locating dowels. A similar process is used to draw the moulds for the hatch and the nosecone. The Tool paths can then be generated ready for machining the moulds.
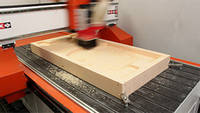
3. Machining the Mould
For this project, with the tight budget in mind, a lower density board, such as our PU240 is a much cheaper option compared to higher density PU or Epoxy tooling blocks. Also being a much lower density means it can be machined much quicker reducing machining time down from a full day to only a few hours. Further time can be saved by using an aggressive roughing strategy, a large step over and omit the fine finishing passes in favour of hand sanding to finish.
The completed moulds can then be sanded by hand to remove the machining marks from the faster machining. Being a lower density board, it hand sands very easily saving many hours time over machining it with a finer step over.
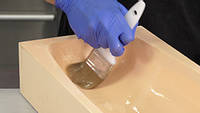
4. Resin Sealing the Mould
Now that we have the moulds sanded smooth, we need to seal the surface. Due to the lower density and higher porosity of the board, a board sealer such as our S120 will not work for this application. So it is necessary to use an epoxy coating resin such as our XCR coating resin. The XCR is ideal due its fast cure and good ability to be polished. However, the fast cure does mean a reduced pot life meaning that you may need to mix several batches for larger moulds.
As these moulds are to be used for resin infusion, it is essential to resin seal the whole of the surfaces not just the tool face as it would be very hard to release from unsealed board even with release agent. The thickness needs to be kept to the minimum, especially on the mating faces. Any more than a very thin layer is likely to reduce the ability to effectively close the mould and cause further resin tracking and untidy seams/parting lines.
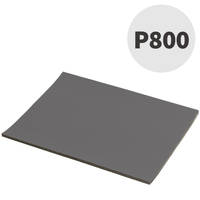
The resin is then left overnight to fully cure. The surface does have some ripples and imperfections, but that is part of a quicker process like this. It could be possible to spend many hours sanding and flatting the resin finish, but you risk cutting through into the board, necessitating further resin coating and more work. Thus, in this case, only a fine 800 grit sandpaper is used to remove any fine nibs that would transfer as low spots on the part.
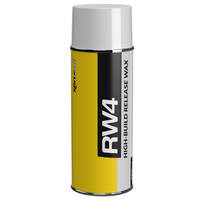
At this stage, 6 coats of CR1 Easy-Lease release agent is applied to the mould surfaces, mating faces and adjacent sides. RW4 Spray release wax is then also applied to the mating surfaces and sides of the mould for further help with release.

5. Process Selection
A part like this could be made in a number of different ways, depending on available equipment, experience and run size. With the complex split mould and demanding application, this would normally make prepreg the process for a part like this. However, prepregs need to be cured at high temperature necessitating high temperature moulds. This model board cannot be used in this way as it is not a homogenous material so may warp and distort. Also, the board and resin used are not suitable for the cure temperatures of the prepreg process. Finally, when used at elevated temperatures, PU model boards have a cure inhibiting property with epoxy which means they cannot be used for curing prepreg in this way.
Hand lay up and vacuum bagging could be another choice, however, the complex nature of the part and its performance requirements means that it would likely end up very resin rich and heavy. it would also be very difficult to avoid voids and defects in the fine details and contours. For similar reasons, hand lay up with vacuum bagging would be very difficult to achieve with difficulty closing the moulds and bagging in the contours making it very impractical.
This then leaves Resin Infusion as the only viable process that will give the desired high quality and high performance part. This shape is, however, very complex and will involve some careful planning and effort to lay up the reinforcement and infuse successfully.
6. Reinforcement Layup
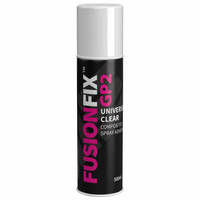
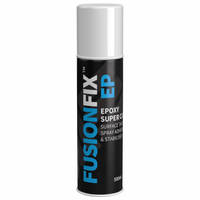
Starting with the hatch cover mould this, being more simple, is better suited to understanding the process involved before moving onto the more complex moulds. The layup starts with two plies of a 210g cloth. To help prevent fraying or excessive distortion, Fusion Fix EP spray adhesive is used to stabilise the fabric and help tack it to the mould. The slightly lower tack of the EP helps with gently positioning the first layer of fabric. For subsequent layers, the higher tack Fusion Fix GP2 is used to tack down those layers and the core material.
The core material is used to increase the stiffness of the part while not adding excessive weight. For this case, we are using Lantor Soric in 2mm thickness. This consists of small foam hexagons with gaps around them to allow the resin to flow. This means, once cured, the core also has a resin honeycomb adding further stiffness. Although not the lightest core material, its ease of resin flow for infusion and good conformability to complex shapes and contours makes it the ideal choice. Finally a further layer of 210g reinforcement is added to finish up the layup for this mould.
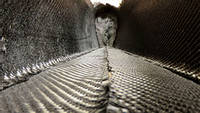
Moving onto the chassis split moulding, due to the complex shape, as much of the layup as possible will be done with the moulds spit, before then closing the mould halves and completing the rest of the layup. Using the spray tack to stabilise the fabric, it is possible to cut accurate shapes for the fine detail of the mould. A layer of the 210g cloth can then be spray tacked into position. The complex detail would normally be impossible to get the carbon to conform, but, using the spray tack it is possible to make relief cuts and use the stabilised fabric almost similarly to a prepreg.
A second ply of 210g cloth is added in much the same way, taking care to position any relief cuts in different places to the previous layer. Some Lantor Soric is then cut and positioned on the sides of the monocoque to add stiffness. Multiple thin strips of stabilised reinforcement are cut and then laid up around the edge of the core material to build up the reinforcement thickness in those areas. A further layer of 210g fabric is then used on top of the core. The excess fabric on the edge of the mould on the closing faces is then trimmed off.
Moving onto the nosecone, the process is very similar placing a layer of 210g cloth into each mould half. On one side the fabric is trimmed flush with the mould edge and the other an overlap is left for use when the mould halves are closed up.
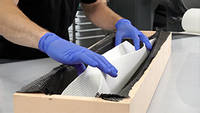
7. Closing the Moulds
The mould halves are now ready to be bolted together. For the monocoque mould, MDF stiffeners are added to reduce the flex on the model board as it is very thin in sections. This is not needed on the much thicker nose cone mould halves.
To avoid resin tracking along the flanges and bonding the fixing bolts on the threads, the threads are completely filled with filleting wax. A little more filleting wax is added where the bolts come through the flange making the locking in of the bolts even less likely. The mould halves are then assembled together and the bolts are tightened. The process is repeated for the nose cone mould, taking care that the overlapping reinforcement is not trapped between the mould halves.
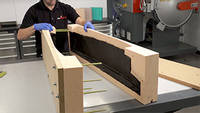
8. Joining Strategies
The nosecone has been designed with the lap joint, which you can now see with the two mould halves bolted together. This lap joint will provide a strong join to the two pieces of carbon once the part is infused. However, with the chassis mould, the carbon was cut flush and thus the fabric is only butt jointed. This would not provide a strong join. In this case, this is being resolved by adding additional reinforcement to the floor of the monocoque. This is done by adding thick reinforcement to a thickness of around 3mm. In this case, we have chosen not to use a core material as, with the number of fasteners going through the floor, the extra strength and rigidity of solid laminate is preferable. A core material may crush when a bolt is clamped tightly.
The solid floor is made up of a much thicker 650g carbon fibre - again stabilised with Fusion Fix EP to enable accurate and neat templates to be cut for the floor section. Five layers are needed to make the desired thickness. A patch is cut to reinforce the rear of the monocoque and also thin strips are used as tape over the seams to strengthen the joins. A light application of spray tack is used to hold the fabric in place in the mould.
9. Resin Infusion Setup
Now that the moulds have had the reinforcement laid up, it is time to prepare them for the infusion. Starting with the simpler hatch cover mould, before moving over to the more complex moulds. The first stage is to use Flash Release tape over the sides of the mould so that if resin tracks there, it will not stick to the mould and can be easily removed.
The first material in the stack is the ML3 which is a combined peel ply and infusion mesh. A normal infusion mesh would have the tendency to spring up making it hard to conform to the shapes and contours, The ML3 is more flexible in this sense. A few relief cuts are used to help in the tighter areas and it is not a problem if these cut sections overlap, however you do not want to leave any gaps. The ML3 can be held in place with higher tack spray tacks such as the Fusion Fix GP2.
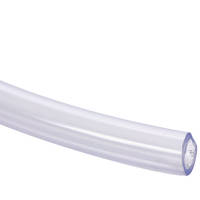
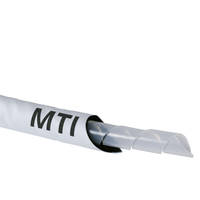
Next, the infusion spiral is placed down the length of one side of the mould, held in place with duct tape. The infusion silicone connector is placed at one end. On the opposite side, a length of MTI hose is used, sealed at one end, with the PVC hose inserted and sealed at the other end. This is then held in place on the mould using duct tape again.
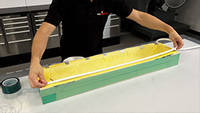
The next step is vacuum bagging the mould - this is where it differs to a conventional infusion as an envelope bag is used - in essence the entire mould is placed inside the vacuum bag. Great care needs to be taken to avoid puncturing the bag. You must work on a padded surface and the technique is to lift an tilt the mould and carefully work the bag along in stages. Do not work without a padded surface or try and drag the bag over the mould as it is likely to damage the bag. At the end of the bag, sealant tape is wrapped around the vacuum hose and more sealant tape used to seal the end of the bag. At the resin connector, the bag is pierced, the PVC hose inserted and more gum tape is used to seal it.
The vacuum line is clamped off and the pump is connected to the resin feed line. This is done as the MTI hose heavily restricts air flow so it is much quicker to do the initial pull down through the resin feed line. It will be swapped back for the infusion itself. The vacuum is slowly applied in stages to allow time to carefully position the bag in all the recesses, corners and detail of the mould, taking care to avoid any bridging of the bag over these details.
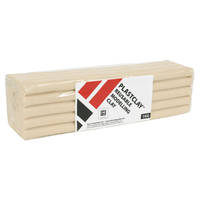
Moving onto the more complex chassis mould, ML3 is again cut and spray tacked into place, avoiding any gaps which could cause problems. Flash Release tape is also applied to the unsealed edges much like with the hatch mould. Modelling clay is then applied and moulded over all the exposed bolt heads to smooth the surface ensuring the bolt heads do not puncture the vacuum bag. In this case, the MTI is run in a horseshoe shape around the top of the mould, sealed at one end, with the vacuum hose at the other. To keep the resin flow distance under 500mm, the Infusion Spiral is positioned along the floor of the mould. Extra duct tape is used to hold the media in place so it does not fall off the vertical sides during the bagging process. A very large vacuum bag is created and the mould carefully placed within it. The excess bagging film is needed to be pressed down into the very large mould cavity. As before, vacuum is pulled through the resin line with even more care needed to ensure the bagging material is positioned properly within the mould cavity.
The nosecone is prepared in much the same way, with the MTI Hose around the perimeter and the resin feed at the front of the nose cone. Again, care is needed to ensure the vacuum bag fully reaches the end of the nose cone as the vacuum is gradually pulled down.

10. Resin Infusion
Typically for an infusion like this, our IN2 Infusion resin would be the best choice. However, as this is a jet powered car, some of the parts may get very hot, so in this case the EL160 High Temp Resin is chosen for its better high temperature performance.
To get going, the resin is measured out and mixed as per the instructions in the TDS, then the resin feed line is looped through the mixing stick and the mixing stick taped in place so it does not move. You are then ready to open the line clamp and start the infusion.
The slightly higher viscosity of the EL160 means it takes about 20 minutes to infuse the hatch mould, but this is still well within the 5 hour pot life. Once fully infused, the vacuum line is clamped and the pump can be switched off. A couple of minutes later, the resin feed line is clamped off. Next, the process is repeated for the main chassis mould. With a similar flow distance, this also takes about 20 minutes. The smaller nose cone takes about 10 minutes to infuse.
Now that the infusion is complete, the moulds are loaded into an oven for the initial cure. Using the normal IN2 infusion resin, this would not be needed and the parts would normally be cured at room temperature. However, the specialist nature of the EL160 needs an initial elevated temperature cure. The parts are initially cured at 40 °C for 24 hours.
11. Demould & Trim
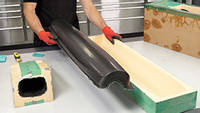
Now that the initial cure is complete, the parts can be demoulded. A bit more care is needed at this stage as these moulds are a little bit more fragile. The ML3 does remove easier than a typical mesh and peel ply, but is still quite hard to remove in some of the tight detail meaning this part of demoulding took around 20 minutes. The split moulds can be unbolted and separated and the parts removed.
Now that the parts have been demoulded, the high quality can be seen. Despite the complex nature of the infusion, it has been possible to get a void and pinhole free finish even around the complex details and contours. However, due to the rapid tooling process and resin finishing of the mould, the surface of the parts do have a slight texture to them. However this is not a problem and should easily flat out during the finishing process. The moulds themselves have stood up very well. There is some expected damage from demoulding wedges due to the soft nature of the board, but it would be reasonable to expect these moulds to last another two or three uses.
The basic shape is trimmed using a Perma-Grit cutting disc on cut lines that have been marked out using pinstripe tape for ease of visibility. The flash lines and details are trimmed off and sanded back using a Perma-Grit sanding block before being finished off with abrasive paper.
The parts are then placed back into the oven for the full high temperature post cure that the EL160 resin needs to achieve the maximum heat resistance and performance.
12. Painting
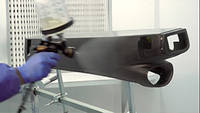
The final stage is to clear coat the parts. At this point, we can correct the texture caused by the shortcut moulding process we used to make the parts. Using a DA sander fitted with a soft interface pad and working through 240 and 400 grit sanding discs, the texture is very quickly removed from the surface. Wiping over the surface with water or alcohol is a good way to highlight any low spots as they will show up glossy.
Painting is done with our Fantom Clear carbon fibre clear coat. Despite its good pinhole filling and high build properties, painting a raw finished carbon part will take several rounds of painting, curing in an oven and flatting the surface. Finally the paint is flatted and polished to give a perfectly smooth high gloss finish. With the painting complete, the floor is drilled to fit the suspension.
13. Analysis
Now that this part of the project is complete, using this method of machining a temporary mould has saved a lot of time and material cost. Using the resin infusion process has allowed us to produce a high performance, high temperature capable part without the need for expensive high temperature tooling.
The whole process from design to finished part was very quick, taking only 3 days of hands on time. It was also relatively cheap costing under £1000, which, compared to using epoxy tooling, prepreg moulds and prepreg parts could cost 3 or 4 times as much.
The final step was to deliver the car to the Project Air workshop where it could be finished off ready for the world record attempt.
DISCUSSION (9)
Please share any questions or comments you may have about this video tutorial.
The CNC machine used is a FourSun branded machine.
3D printed moulds can be used, as you may have seen on some of our other videos. However, for larger parts like this, machining the model board is a quicker and easier option due to material cost and physical size of the moulds. The model board is also better suited to vacuum based processes like resin infusion. The porosity of a 3D printed mould would likely cause issues during the infusion process and potentially, depending on print infill level, there is the risk of the mould being compressed and damaged under vacuum.
Yes, you could do this. You could also use more resin coating or even some lightweight glass reinforcement in these areas. We only needed one release for this project so these additional steps weren’t necessary.
Traditionally many infusions are clamped resin line first for optimal resin fibre ratio for structural parts. However, in some cases this can lead to pinholes which affect the cosmetic finish. In our experience, clamping the vacuum line and allowing a little bit of extra resin often improves the cosmetic finish but only adds a small amount of extra weight. The actual vacuum level does not change as air is not entering the bag.
It's not really recommended as the surface would be left with a peel ply textured and also dimensional control would be a lot more difficult due to the differing number of layers and core materials.
We started quite coarse on a P240 because there was quite a bit of 'flatting' to do in order to remove the imperfections from the mould.
For a project of this scale, I'd say that CNC machining is more practical than multiple 3D printed moulds bonded together. For projects that are of a scale where moulds can be printed in one or two pieces, 3D printing can be another good solution for temporary moulds. We have done a video dedicated to 3D printing moulds, how to best finish and coat them etc. In that video, we used an epoxy coating, rather than vapour smoothing, to refine the surface.
Yes, especially with the higher density PU600 and EB700 boards. The EB700 could also be used for prepreg work for low volume runs too.
The fin is made of bonded together prepreg carbon sheet to get the desired thickness. It was then passed through the hatch cover, bonded into place using a structural adhesive, then layers of carbon tape were laminated over the join on the inside to give strength and rigidity to the join.
LEAVE A COMMENT OR QUESTION
PRODUCTS USED IN THIS PROJECT
Although not necessarily an exhaustive list, the following tools and materials, supplied by Easy Composites, were used in this project.
The quantity shown below is the approximate amount used in the project rounded up to the nearest available kit size or quantity.
COMPONENT MATERIALS
TOOLS & EQUIPMENT
INFUSION CONSUMABLES
ANCILLARIES
VACUUM BAGGING CONSUMABLES
MOULD MAKING MATERIALS
POLISHING
DISCUSSION (9)
Please share any questions or comments you may have about this video tutorial.
The CNC machine used is a FourSun branded machine.
3D printed moulds can be used, as you may have seen on some of our other videos. However, for larger parts like this, machining the model board is a quicker and easier option due to material cost and physical size of the moulds. The model board is also better suited to vacuum based processes like resin infusion. The porosity of a 3D printed mould would likely cause issues during the infusion process and potentially, depending on print infill level, there is the risk of the mould being compressed and damaged under vacuum.
Yes, you could do this. You could also use more resin coating or even some lightweight glass reinforcement in these areas. We only needed one release for this project so these additional steps weren’t necessary.
Traditionally many infusions are clamped resin line first for optimal resin fibre ratio for structural parts. However, in some cases this can lead to pinholes which affect the cosmetic finish. In our experience, clamping the vacuum line and allowing a little bit of extra resin often improves the cosmetic finish but only adds a small amount of extra weight. The actual vacuum level does not change as air is not entering the bag.
It's not really recommended as the surface would be left with a peel ply textured and also dimensional control would be a lot more difficult due to the differing number of layers and core materials.
We started quite coarse on a P240 because there was quite a bit of 'flatting' to do in order to remove the imperfections from the mould.
For a project of this scale, I'd say that CNC machining is more practical than multiple 3D printed moulds bonded together. For projects that are of a scale where moulds can be printed in one or two pieces, 3D printing can be another good solution for temporary moulds. We have done a video dedicated to 3D printing moulds, how to best finish and coat them etc. In that video, we used an epoxy coating, rather than vapour smoothing, to refine the surface.
Yes, especially with the higher density PU600 and EB700 boards. The EB700 could also be used for prepreg work for low volume runs too.
The fin is made of bonded together prepreg carbon sheet to get the desired thickness. It was then passed through the hatch cover, bonded into place using a structural adhesive, then layers of carbon tape were laminated over the join on the inside to give strength and rigidity to the join.
LEAVE A COMMENT OR QUESTION
100% SECURE
PAYMENT METHODS


Easy Composites Ltd, registered in England 7486797. All content copyright (C) Easy Composites Ltd, 2025. All rights reserved.