Need any help or advice?![]() +44 (0)1782 454499
+44 (0)1782 454499
VIDEOS IN THIS SERIES
This video is part 5 of a 5 part series: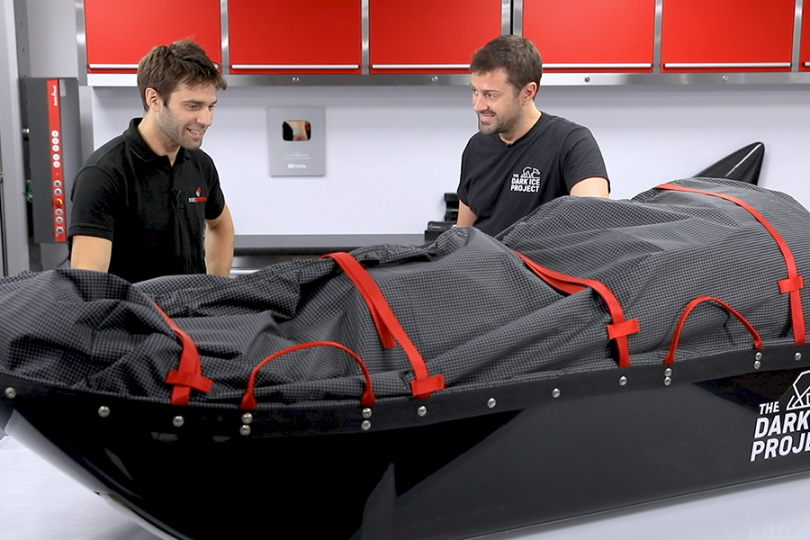
PRODUCTS USED IN THIS PROJECT
Although not necessarily an exhaustive list, the following tools and materials, supplied by Easy Composites, were used in this project.
The quantity shown below is the approximate amount used in the project rounded up to the nearest available kit size or quantity.
ANCILLARIES


TOOLS & EQUIPMENT

COMPONENT MATERIALS
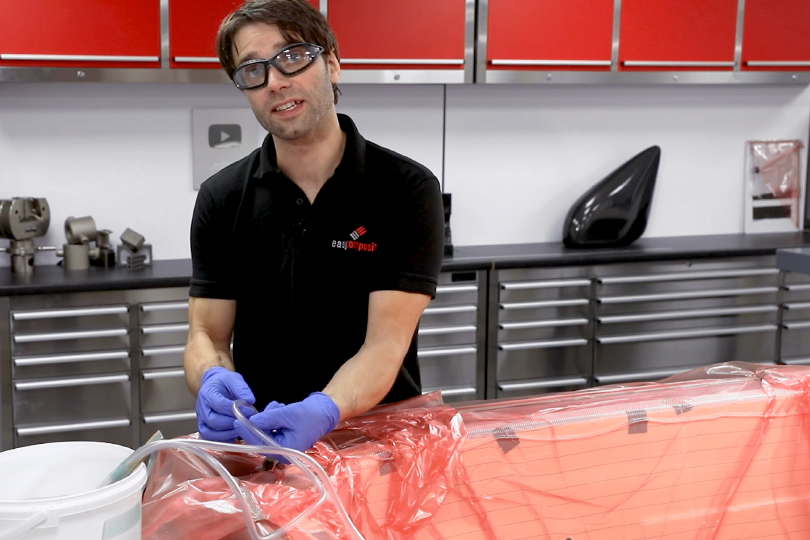
VIDEO TUTORIAL
In-Depth Guide to Resin Infusion
In this fifth and last video in our Dark Ice Project tutorial series, we take a really deep-dive into the practical techniques of resin infusion.
WHAT YOU WILL LEARN
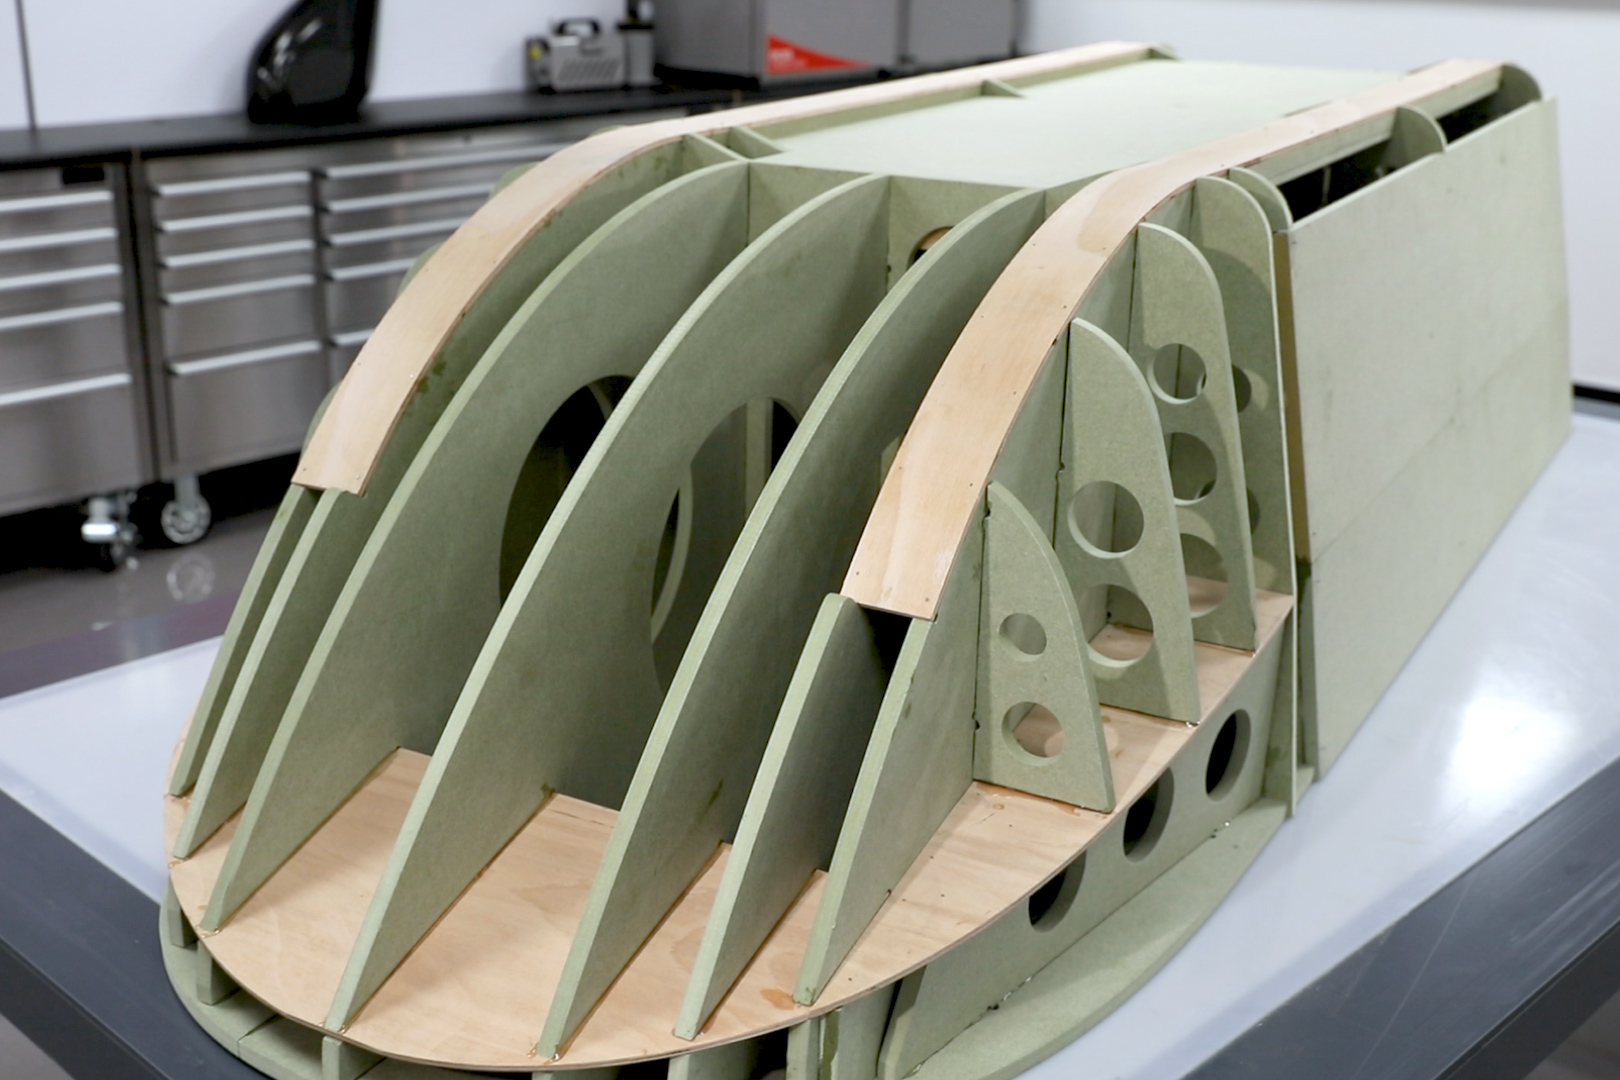
Using the large 3 metre sledge mould that was made during the series, this final tutorial covers the resin infusion of the Kevlar reinforced mouldings.
The tutorial includes guidance on:
- Best practices for placing the reinforcement
- Including '3D Core' core material in a laminate
- Determining where to position feed lines and spiral
- Where to position vacuum lines
- Vacuum bagging technique and drop-testing
- Running the infusion itself
INTRODUCTION
Introduction
Resin infusion is a sophisticated technique for manufacturing high performance, void free composites even on large or complicated moulds. The process is ideally suited to the manufacture of carbon fibre and other advanced material composites and is widely used by professional manufacturers for the production of carbon fibre body panels such as bonnets and by marine manufacturers for the production of boat hulls, making this process ideal for this project.
Reinforcement is normally laid into the mould 'dry', i.e. without any resin, however with the sled, it is desirable to have a coloured gelcoat finish. So in this case the GC50 Epoxy Compatible Polyester Gelcoat, pigmented black, is used on the release coated mould first before we lay up the Kevlar reinforcement. It is then enclosed in a specially configured stack of bagging materials (such as peel ply, infusion mesh and bagging film) before being subjected to vacuum pressure using a composites vacuum pump. Once all the air has been removed from the bag and the reinforcement has been fully compressed under atmospheric pressure, liquid epoxy resin (mixed with hardener) is introduced to the reinforcement through a pipe which then infuses through the reinforcement under the vacuum. Once the resin has fully infused through the reinforcement, the supply of resin is cut off (using a pipe clamp) and the resin is left to cure, still under vacuum.
WHAT YOU WILL NEED
Materials and Equipment Needed for the Infusion
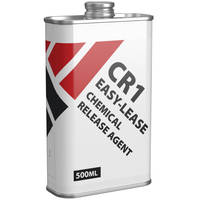
Release Agent
Our CR1 Easy-Lease Release agent is ideal for infusion projects due to the very good release properties on a range of mould surfaces.
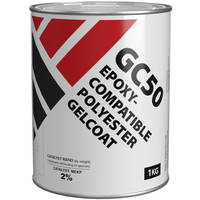
GC50 Gel Coat
The GC50 gelcoat is pigmented black and sprayed onto the mould surface to provide an even tough gelcoat finish to the finished sled.
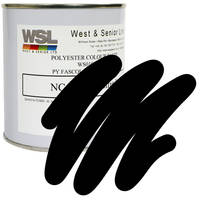
Polyester Black Pigment Paste
This is mixed with the GC50 to give a opaque black colour to the surface of the sled.
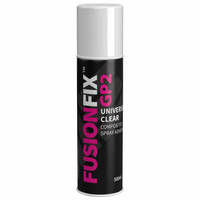
FusionFix GP Spray Adhesive
This spray adhesive is used to help position and hold the fabric in place during lay up on the vertical surfaces and in the fine detail in some areas of the sled.
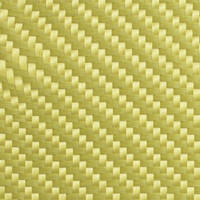
300g 2x2 Twill Weave Kevlar Cloth
This heavyweight Kevlar cloth was chosen for its impact resistance and overall general strength.
3DCORE PET 100 Infusion Foam
3D core was chosen in a 5mm thickness to add extra stiffness to the flat areas of the sled design. 3D core is ideal for use in resin infusion due to the hexagonal structure allowing the resin to flow between the core to the fabric underneath.
PP180 Economy Peel Ply
The economy peel ply is used as the first layer of the bagging stack to aid removal of the mesh once the part has been infused.
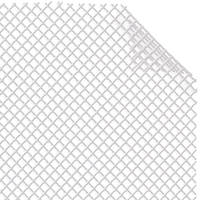
FM100 Infusion Mesh
This medium flow infusion mesh is perfect for distributing the infusion resin over the fabric surface. The Medium flow rate is ideal for infusions of this size and even bigger.
Resin Infusion Spiral Medium Flow
The Infusion spiral is used to distribute the resin as it enters the vacuum bag to allow very easy flow of resin from the resin feed tube into and around a resin infusion project. Infusion spiral is typically positioned underneath the feed line directing resin flow into the further corners of the part.
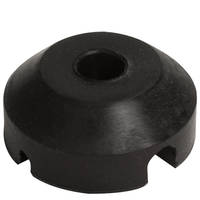
Resin Infusion Silicone Connector
Re-usable silicone connector designed specifically for the resin infusion process. The connector sits inside the vacuum bag and accepts the vacuum hose or resin infusion spiral.
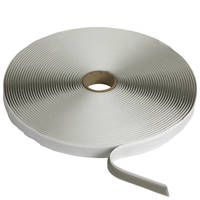
ST150 Vacuum Bagging Sealant Tape
High performance vacuum bagging gum sealant tape (also known as tack-tape or pressure tape) used to create strong and reliable seals between pieces of vacuum bagging film.
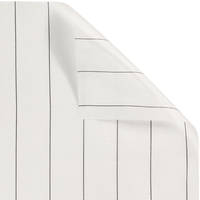
VB160 Vacuum Bagging Film
VB160 is a high quality, general purpose vacuum bagging film with excellent elongation, flexibility and puncture resistance. Suitable for ambient temperature, oven and autoclave curing up to a maximum temperature of 160°C.
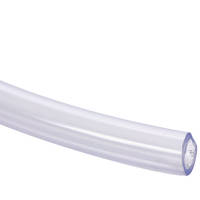
6mm ID Budget PVC Vacuum Hose
6mm ID (internal diameter) clear PVC vacuum hose for general use in composites vacuum bagging and resin infusion. This low-cost hose is ideal resin lines and vacuum lines in resin infusion where resin will cure in the hose meaning it cannot be reused.
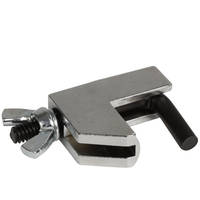
Resin Infusion Line Clamp
Resin Infusion Line Clamp used to clamp vacuum hoses and resin feed hoses shut during certain parts of the resin infusion or vacuum bagging processes.
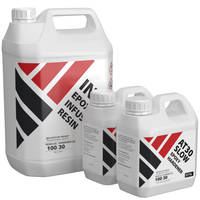
IN2 Epoxy Infusion Resin SLOW
As an infusion epoxy it is ultra-low viscosity ensuring that is able to quickly infuse through a range of reinforcements. Its excellent mechanical strength makes it ideally suited for use with high performance reinforcements such as carbon fibre and aramids like Kevlar.
CP1 Resin Infusion Catch-Pot
A resin infusion catch-pot acts as a resin trap and sits between the vacuum pump and the infusion project to prevent resin accidentally being drawn into the vacuum pump.
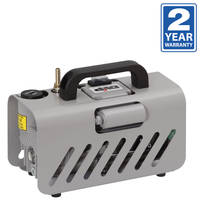
EC.4 Compact Composites Vacuum Pump
The pump is ideally suited to use in vacuum bagging (including prepregs), vacuum bonding, resin infusion and vacuum degassing.
TUTORIAL BREAKDOWN
1. Prepare the mould
Before the process can be started, it is essential to release coat the mould so that the part will not stick. The release agent of choice for infusions is the CR1 Easy-Lease Chemical Release agent. Being a liquid, the method of application is to use a lint free cloth to wipe a thin coat over the whole surface. On a new mould like this, 6 coats are needed. Allow 15 minutes between coats and after the last coat, 1 hour before using the mould.
2. Applying the Gelcoat to the Mould
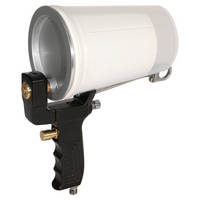
As the mould is going to have the GC50 applied by spray cup gun, the flanges are masked off to prevent any issues with overspray. The GC50 is a special epoxy compatible polyester gelcoat. In this case we are pigmenting it black using a polyester compatible black pigment paste. To achieve an opaque finish, 5% by weight of pigment was needed.
Once the pigment was thoroughly mixed, 2% MEKP catalyst by weight, was added to the GC50 and the Gelcoat was loaded into the cup gun. The cup gun is fed by a compressor and you can vary the pressure and spray technique to get the best results. It is worth spending time practicing on a spare panel to get the right settings and technique. Then the mould was sprayed with the gelcoat using the cup gun. A systematic and consistent approach will lead to a nice even layer over the whole mould.
The GC50 gelcoat is then left to fully cure to a tack free finish. The special formulation of the GC50 is such that, unlike normal polyester gelcoats, it cures tack free which is what makes it suitable for being backed up with an epoxy resin as part of the infusion.
3. Preparing the Laminate
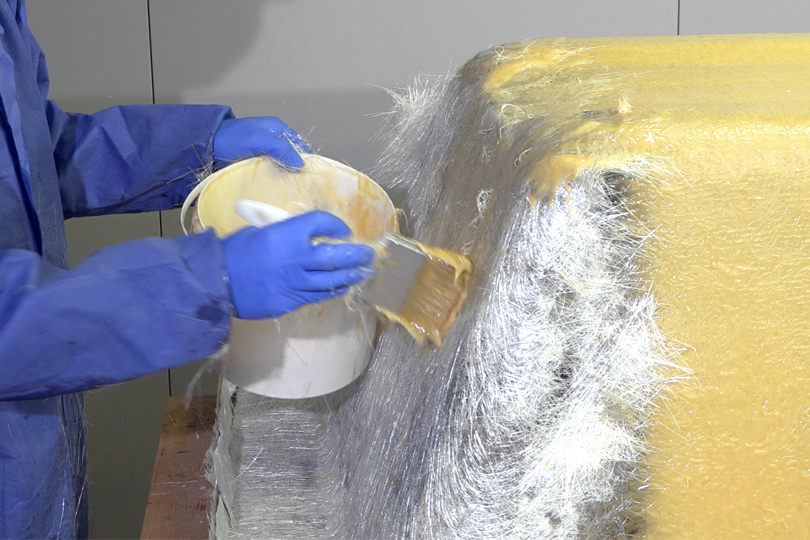
For this sled, in the previous video it was decided to use Kevlar for the main part of the laminate. We are also using 3D Core as a structural core in all the flat areas for added stiffness. The core is easily cut from the stock sheets and can be joined by using the hexagon structure to aid alignment. The edges of the foam core need to be sanded to a chamfer. This ensures that when the Kevlar is laid over, there are no sharp edges that could bridge and cause voiding or other issues during the infusion.
For this project, in the cored areas we are using 2 layers of Kevlar either side of the 3mm 3D core. For the rest of the layup, 3 plies of Kevlar is being used with a few key localised areas having extra plies where needed. The Kevlar is cut using a set of dedicated Kevlar sheers as other forms of scissors are less effective and quickly blunt when trying to cut through the very tough Kevlar material.
4. Laying up the Laminate
As this project uses a coloured gel coat, Fusion Fix spray adhesive can be used to tack the materials into place during the lay up. On a Clear gel or no gel infusion, use of spray tack adhesives should be avoided where possible on the visible cosmetic surface as the adhesive can cause milkyness and leave an imperfect surface finish. Using the spray tack sparingly for the backing layers is perfectly fine in almost all cases.
Once the mould has been sparingly coated in Fusion Fix, the first layer of Kevlar is laid into the mould. Great care needs to be taken to ensure the fabric is carefully laid into all the detail and corners to avoid any risk of bridging. Due to the size of the mould, several pieces of fabric are laid and overlapped to ensure a strong join. The fabric cutting has been planned such that the overlaps are in the corners, runners and shoulders as the added thickness will be beneficial in these highly loaded areas. Two layers of Kevlar are initially applied
The core is then applied to the flat areas of the part to add further stiffness on the sides, base and back of the sled. It is not used on the shoulders or front as these areas are subject to high impact and thus a solid Kevlar laminate is more beneficial. Strips of Kevlar are cut and placed around the edges of the core in those high load areas before the rest of the Kevlar is laid up.
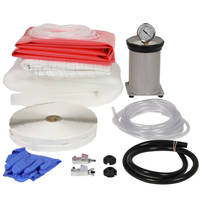
5. Resin Infusion Consumables and Bagging Stack
For the successful infusion to take place, it is essential to use a set bagging stack of materials in the right order and place. The Stack starts with the gum tape, then the peel ply against the laminate, then the infusion mesh, the placement of resin feed, spiral and vacuum connectors and finally the vacuum bag itself.
Gum Tape - This special sticky, gum‐like tape is used to create perfect seals between the vacuum bag and the mould flange when bagging a mould.
Peel Ply - This thin woven fabric is the first removable layer between the composite and the vacuum bag. Peel‐ply allows the resin to flow easily into the fabric and provides an easy way to peel off the bagging stack which, otherwise, would stick to the fabric.
Infusion Mesh - Infusion mesh is a plastic mesh pattern designed to promote resin flow during the infusion process. The gaps created once the bag is pulled under vacuum gives a flow path across the laminate surface for the resin
Resin Infusion Spiral - This plastic spiral tube is used to provide a very free‐lowing channel through which the resin is distributed near the point where the resin is first fed into the composite. Resin flows freely through the centre of the spiral tube, but just as easily out of the spirals in the side making it easier to distribute resin around the mould.
Infusion Silicone Connectors - The connectors form the join between the vacuum hoses and the vacuum bag and also between the resin feed pot and the bag. Silicone connectors are used because they will become coated in resin during the infusion process. The resin can easily be cracked off them after the process is complete and used again.
Vacuum Bagging Film - This film is used to create the outer vacuum bag from which the air is evacuated by the pump. The film is tear resistant and sticks extremely well to the bag sealing tape.
PVC Vacuum Hose - The vacuum hose connects the vacuum pump, catch pot and resin feed pot to the bagged composite.
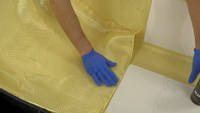
6. Laying the Peel Ply
The peel ply is laid into the mould in a similar way to the Kevlar fabric. Care needs to be taken to ensure the material will not bridge over the detail and corners when the vacuum is pulled. The peel ply can easily be cut and overlapped to ensure it conforms where needed. However try and avoid leaving any gaps in the peel ply.
7. Laying the Infusion Mesh
The Infusion mesh is laid into the mould in a similar way. Cut the mesh slightly smaller than the peel ply and just cover the edge of the material. Due to its springy nature, Flash Release Tape often won't hold it in place so duct tape can be used. As the tape is on top of the mesh, it will have no impact on the infusion. Again take care to get it into the corners as best as possible and ensure there is enough mesh so that bridging will not occur. It can also be cut and overlapped to help with conformity.

8. Choosing how to set up the Resin Infusion Spiral
With any infusion, especially a large infusion like this, placement of the resin feed lines, spiral and vacuum ports are critical to a successful infusion. When planning where the resin is to flow, it is often easy to decide to go from one end to the other, but on a large part, this can make the infusion very slow indeed. A sled this size, if infused down its length could take 4 hours or more, which is longer than the IN2 Infusion resins pot life.
So in such cases, shortening the distance the resin has to flow will speed up the infusion. You could use a large U shape spiral which would cut the flow distance to around 500mm speeding things up considerably. Even more so you can add extra spiral down into the mould to half that distance again.
Also consider on large infusions, the silicone connector will ultimately limit the flow. As a general rule of thumb, you would not want to flow more than 2kg of resin through a connector as it would then become restrictive. In this case as approximately 4kg is to be infused, 2 silicone connectors are to be used.
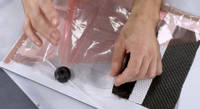
9. Fitting the Infusion Spiral and Silicone Connectors.
Once the lay up of the spiral has been planned, it can be laid up in the mould. To hold it in place, again, duct tape can be used to hold it to the mesh. Ideally the spiral should be positioned on the edge of the part to avoid any print through onto the finished part. On a non-cosmetic part like this, it is not such a concern and the added spiral down the middle of the part is helpful in reducing the distance of the resin flow.
The silicone connectors fit over the spiral and will sit in place during the lay up prior to the bagging film being applied. In this case, two connectors are being used for the resin feed and one for the vacuum line. The connector for the vacuum line is fitted on the flange of the mould just off the material edge. In this case, the mesh has been cut out around the connector to create a resin break, The area without mesh will significantly slow down the flow of the resin which will limit the resin going into the catch pot. This is useful if the resin flow is at an angle as it allows the rest of the resin to catch up without too much resin ending in the catch pot.

10. Applying the Vacuum Bagging Film
First it is essential to ensure there is enough bagging film to ensure it can reach to all parts of the mould. The mould surface needs to be measured to give a minimum figure. It is wise to add a reasonable amount extra so there is plenty of film to work with.
To seal the extra film on the mould edge, it is necessary to make pleats in the film. Cut strips of the bagging tape to make the pleats. Ensure each pleat is long enough and there is enough to account for all the film needed. To make the pleat, fold the gum tape back on itself leaving small legs of tape at the bottom. Then peel back the backing tape on the flange where the pleat is to be placed and attach the pleat. Often it can be wise to put pleats into each corner of the flange to ensure there are no tight spots on the film in that area.
The film can then be systematically applied to the gum tape. It is essential to keep the work area clean and ensure there are no creases or gaps between the film and gum tape. Work from one side of the tape and apply the film gently then press it to stick in place. At the pleats, work up one side of the pleat, then work down the other side back to the mould flange. It is likely that by the time the bag is stuck down around the whole mould, the final pleat may need lengthening or shortening to ensure that the bag is fully sealed.
11. Connecting the PVC hose to the Silicone Connectors
The process of connecting to the silicones is relatively simple and is the same for the resin feed lines and the vacuum line. Adjust the vacuum bag so it is in the right position for the connector. Using composite snips or the end of a pair of scissors, carefully snip a small hole over the top of the silicone connector for the hose to pass through. Get the piece of hose, cut the end at a slight angle so it cannot seal itself on a flat surface, then press it through the hole and firmly into the hole on the silicone connector.
The hose is sealed to the vacuum bag using strips of gum tape. Wrap the strips of gum tape around the hose and bag area to seal off the join. Care needs to be taken to ensure that no gaps are left and also that there are no folds or creases in the bagging film under the tape which could cause a leak.

12. Setting up the hoses
Once the hose has been connected to the silicone connector, the other end needs to be set up for the infusion. At the vacuum end, the hose should be connected first to the Resin Catch Pot. This is designed to protect the pump ensuring any resin that goes up the vacuum line is caught in the Catch Pot. The Catch pot uses a disposable paper cup as a liner to keep the catch pot itself free of resin. This is replaced after every infusion. The hose is inserted into the Gland fitting and pushed down into the cup. It is essential that the hose is several inches into the cup. This is necessary to prevent resin spatter contaminating the top of the catch pot and, more importantly, going into the pump line. If the hose is only just under the catch pot lid, the force of the pump can be enough that resin will trickle straight from the gland to the pump line and then up into the pump causing damage. Pushing the pipe into the cup ensures this won't happen.
The resin feed lines will be going into the same resin bucket. Ensure they are both long enough to reach where the bucket is going to be positioned. It is good practice to tape the hose ends to a wooden stick or similar to prevent them moving. It is quite common for the hoses to move and if the end of the hose comes out of the resin, air will be sucked into the mould potentially ruining the whole infusion. The stick with hoses can then be inserted into the resin feed bucket. Finally the resin feed lines are clamped off ready for the initial vacuum to be pulled.
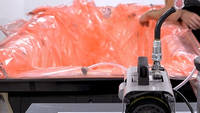
13. Pulling the Initial Vacuum
Switch on the pump and begin to draw the air out of the bag. As the air is pulled out the bag, carefully adjust the bagging stack to ensure the bag is pulled into all the detail, corners and check for bridging. The pump can be stopped and vacuum backed off to help manipulate the bagging film and stack. The creases in the excess film can be placed and moved around to help avoid bridging in complex parts of the mould. Once the positioning of the bag is perfect, the vacuum can be fully pulled. At this stage, carefully work around the gum tape seal pressing it down and ensuring the film is properly sealed. If using a Leak Flow Indicator, when the rotor stops moving, that will indicate that a full vacuum has been achieved.

14. Vacuum Drop Test
It is essential to perform a leak test prior to the infusion as any leaks will likely ruin the finished part. This is done generally by clamping off the vacuum bag and allowing 45 minutes before checking to see if the gauge moves. If the gauge moves when you open the bag, that indicates that there is a leak. A quicker method can be done in 10 minutes using the leak flow indicator. Clamp off the bag and wait 10 minutes. Then open the clamp. Any air in the vacuum bag would rush up the pipework and through the leak flow indicator making the rotor spin and thus showing there is a leak. If there is a leak, systematically check the bag gum tape and seals until you eliminate the leak. Once the leak test is complete with no movement of the rotor on the leak flow indicator, then you know the bag has no leaks and the infusion itself is ready to begin.
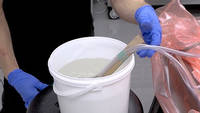
15. Mixing the Infusion Resin
The resin being used for this project is the IN2 Epoxy Infusion resin. The amount of resin that your project will need will vary upon its size and the amount of reinforcement you have used; more layers of reinforcement will be able to support more resin. With Resin infusion you are normally looking to achieve a 60/40 fibre/resin ratio, this means for every, say, 100grams of cloth you will need 66 grams of resin, all of the reinforcements are listed by weight e.g. carbon fibre 2/2 twill 200gsm, the 200gsm refers to the actual weight of the fabric in grams per square meter, so 1 square meter of this cloth will need 133g of resin to achieve the 60/40 ratio. You also need to account for the amount of resin used by the mesh which is 700grams per square meter of laminate, regardless of thickness. Another 100grams of resin will be required by the feed lines and in the bottom of the feed jug.
This equation will help you calculate the quantity needed per square meter based on the above rules.

The resin is measured out on a set of scales to the mix ratio specifically for this resin. In this case all the resin for the project is being mixed in one hit, but for bigger or slower projects, it can be mixed in smaller batches to ensure the resin in the pot does not run out of pot life.
The resin is then thoroughly mixed for several minutes ensuring that the bottom and sides of the bucket are scraped to ensure there is no unmixed resin. Then the resin is poured into a second clean bucket and mixed again. This is to ensure no traces of unmixed or part mixed resin left on the sides and bottom of the first bucket can make it into the infusion. Once the second bucket has been thoroughly mixed it is ready to be used. Insert the resin feed lines into the bucket and tape into place. Then slightly crack open the resin feed line allowing the resin to go only as far as the clamp, then retighten the clamp. Then leave the bucket for a further minute. This allows any air drawn from the pipework into the bag to evacuate via the pump and also allows a little bit of settling of the mixed resin in the bucket to help it self degas any bigger bubbles.

16. Infusing the Part
Now the resin is at the clamps, the pump is running and are sure there are no leaks, we are ready to start the infusion. Opening the two line clamps on the resin feed lines allows the resin to begin to flow into the part. Straight away the resin will flow down the Infusion Spiral and begin to spread into the fabric.
Do not worry if there is a stream of bubbles down the resin line and at the leading edge of the resin flow line. As the resin has not been degassed, this will be the tiny bubbles in the resin expanding exponentially as they reach the near full vacuum in the bag.
Carefully monitor the progress of the infusion. If you did see a small leak, it can often be sealed with a small piece of gum tape. However the source can be hard to find and it should never be relied upon as opposed to ensuring you have a leak tight bag to start with.
As the resin approaches the vacuum port, the benefit of the resin break will show through with the resin flow slowing considerably on the edge of the break, allowing the rest of the part to infuse fully.
Once the resin has reached the vacuum port, the vacuum line is clamped off and the pump can be switched off. The resin feed lines on a part this size will need to be left open for another couple of minutes to ensure the right amount of resin has infused into the part - based on the earlier resin calculations. Once the resin feeds have been clamped off, the part can be left to fully cure.
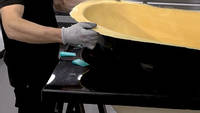
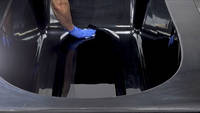
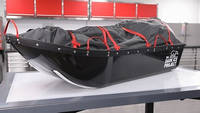
17. Demoulding the Sled
The part was allowed to cure for 48 hours to ensure it is ready to demould. A good indicator of cure is the resin in the resin feed lines. If the tube is bent, the resin should crack and snap when ready. If it flexes or bends considerably then the part needs further cure time before attempting to demould.
First remove the line clamps and pull out the hoses. The bagging film can then be removed from the mould. The next step is to remove the peel ply. Starting at the edges, the peel ply can be carefully ripped off the part. Cutting it into thin strips on the edges and ripping it off in strips will make the process much easier. Once the Peel Ply has been removed, the part is ready to be demoulded.
With the Application of CR1 EasyLease and the careful mould design, it should be relatively simple to demould the part. Carefully slide demoulding wedges under the edge of the part, adding wedges and working around the perimeter until it begins to lift. Depending on the shape of the part, keep inserting wedges until the part can be carefully prised from the mould and fully demoulded.
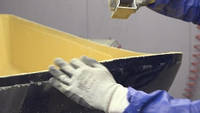
18. Trimming the finished Sled
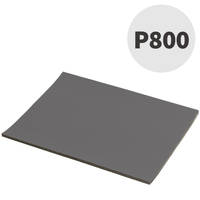
Mark up the cut lines on the sled so that it is easy to see where to cut. Kevlar is very tough to cut in raw or resin infused format. However Perma-Grit tools and many power tools will cut the cured material. A slitting disc can be used to make the rough cuts. The edges are then finished off by sanding smooth with a Perma-Grit sanding block
Typically aramid based fibres will leave a bit of fluff on the edges once cut. An effective way to remove this is to use an 800 grit sand paper to remove the fluff once the edges have been sanded back to shape with the sanding block.
19. Fitting out the Sled
In this case, a further 2 sled shells were manufactured bringing the total to 3 as there are 3 members of the team. The sleds were then fitted out with the rails, covers and fittings to finish them off to a finished usable product.
DISCUSSION (3)
Please share any questions or comments you may have about this video tutorial.
In terms of the suitability of PP (polypropylene) and PE (polyethylene), it would be possible to use either of these materials as a mould surface; epoxy resin would not stick to either of these plastics.
As for the suitability of the infusion process around a plastic mandrel, in theory it would be possible but there are some important obstacles to consider. The most obvious one being that the plastic pipe mandrel would be impossible to extract from inside the tube without cutting (down its length from the inside) and folding it in on itself. This means you would need cutting gear that could work down the inside of the tube, cutting the plastic pipe but not the carbon fibre tube, and then you need to either bend the tube or make a second cut so that you can remove it it two or more pieces.
The second consideration would be the fact that if you use the tube as a mandrel (i.e. the tube is on the inside and you're infusing onto the outside) then you will have your good surface on the inside and your 'b-side' (the less consistent peel-ply finish) will be on the outside. This is fine if it's the inside that matters most but would mean significant finishing work if the outside needs to be a cosmetic or accurate finish.
Hi Beau, yes, we do use that technique sometimes. In the case of this project, the bag is so big that we need a relatively efficient pleat scheme so as not to need to join the bag. I'm not sure but I suspect big corner tail pleats would need more than the 3m width of bagging film that we have on the VB160 and adding a join in the bag would take more time than that saved by a less bag-efficient (but more time efficient) corner pleat.
No problem! Glad you found it helpful.
LEAVE A COMMENT OR QUESTION
PRODUCTS USED IN THIS PROJECT
Although not necessarily an exhaustive list, the following tools and materials, supplied by Easy Composites, were used in this project.
The quantity shown below is the approximate amount used in the project rounded up to the nearest available kit size or quantity.
ANCILLARIES
TOOLS & EQUIPMENT
COMPONENT MATERIALS
DISCUSSION (3)
Please share any questions or comments you may have about this video tutorial.
In terms of the suitability of PP (polypropylene) and PE (polyethylene), it would be possible to use either of these materials as a mould surface; epoxy resin would not stick to either of these plastics.
As for the suitability of the infusion process around a plastic mandrel, in theory it would be possible but there are some important obstacles to consider. The most obvious one being that the plastic pipe mandrel would be impossible to extract from inside the tube without cutting (down its length from the inside) and folding it in on itself. This means you would need cutting gear that could work down the inside of the tube, cutting the plastic pipe but not the carbon fibre tube, and then you need to either bend the tube or make a second cut so that you can remove it it two or more pieces.
The second consideration would be the fact that if you use the tube as a mandrel (i.e. the tube is on the inside and you're infusing onto the outside) then you will have your good surface on the inside and your 'b-side' (the less consistent peel-ply finish) will be on the outside. This is fine if it's the inside that matters most but would mean significant finishing work if the outside needs to be a cosmetic or accurate finish.
Hi Beau, yes, we do use that technique sometimes. In the case of this project, the bag is so big that we need a relatively efficient pleat scheme so as not to need to join the bag. I'm not sure but I suspect big corner tail pleats would need more than the 3m width of bagging film that we have on the VB160 and adding a join in the bag would take more time than that saved by a less bag-efficient (but more time efficient) corner pleat.
No problem! Glad you found it helpful.
LEAVE A COMMENT OR QUESTION
100% SECURE
PAYMENT METHODS


Easy Composites Ltd, registered in England 7486797. All content copyright (C) Easy Composites Ltd, 2025. All rights reserved.