Need any help or advice?+44 (0)1782 454499

VIDEO TUTORIAL

USED IN THIS PROJECT

Although not necessarily an exhaustive list, the following tools and materials, supplied by Easy Composites, were used in this project.

The quantity shown below is the approximate amount used in the project rounded up to the nearest available kit size or quantity.

TOOLS & EQUIPMENT
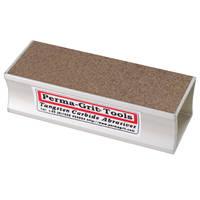
Perma-Grit Sanding Block Small Thumbnail
SB140Perma-Grit Sanding Block Small£16.66 /each

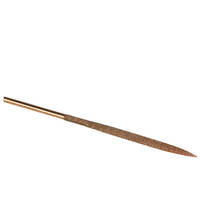
Perma-Grit 180mm Needle File Half Round Thumbnail
LNFHROUNDPerma-Grit 180mm Needle File Half Round£8.33 /each

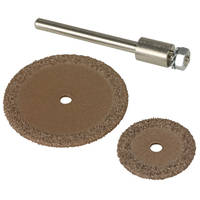
19mm + 32mm Cutting Discs with Arbor Thumbnail
RD319mm + 32mm Cutting Discs with Arbor£16.66 /each

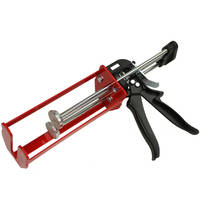
400ml Twin Tube Cartridge Gun Dispenser 1:1 Ratio Thumbnail
CG-400ML-11400ml Twin Tube Cartridge Gun Dispenser 1:1 Ratio£52.50 /each

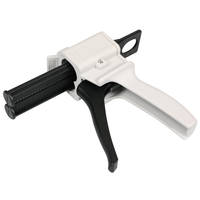
50ml Twin Tube Cartridge Gun Dispenser Thumbnail
CG-50ML50ml Twin Tube Cartridge Gun Dispenser£16.95 /each

Total £0.00
MATERIALS & CONSUMABLES
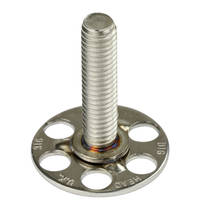
BigHead Threaded Stud M6 x 25mm Thumbnail
BH-S-M6-25BigHead Threaded Stud M6 x 25mm£2.45 /each

Mirka P240 Wet and Dry Abrasive Paper 10 Sheets Thumbnail
WPF240-10Mirka P240 Wet and Dry Abrasive Paper 10 Sheets£6.45 /pack

Mirka P120 Wet and Dry Abrasive Paper 10 Sheets Thumbnail
WPF120-10Mirka P120 Wet and Dry Abrasive Paper 10 Sheets£6.95 /pack

Nitrile Gloves Thumbnail
NG[P]Nitrile Gloves* /each

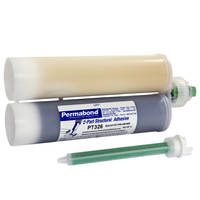
PT326 20min Rigid Polyurethane Adhesive 400ml Twin Tube Thumbnail
PT326-400PT326 20min Rigid Polyurethane Adhesive 400ml Twin Tube£49.95 /each

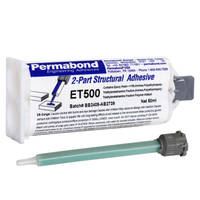
ET500 Rapid Clear Epoxy Adhesive 50ml Thumbnail
ET500-50ET500 Rapid Clear Epoxy Adhesive 50ml£11.95 /each

Type 1 Static Mixing Nozzles for 50ml Twin Tube Thumbnail
SMN-50-T1Type 1 Static Mixing Nozzles for 50ml Twin Tube£0.65 /each

Type 2 Static Mixing Nozzle for 400ml Twin Tube Thumbnail
SMN-400-T2Type 2 Static Mixing Nozzle for 400ml Twin Tube£1.80 /each

Total £0.00

VIDEO TUTORIAL

Trimming and Assembling a Carbon Fibre Bonnet (or Similar Panel)

Part 3 - Trimming, adding bonding fasteners and assembly

In the 3rd part of the series we trim and finish the parts, add bonding fasteners and assemble the finished bonnet.


TUTORIAL BREAKDOWN
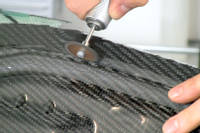
Trimming lower skin

1. Trimming lower skin

First of all don PPE to protect yourself from the dust and also potential flying hazards.

Using a Dremel style cutting tool fitted with a Perma-Grit cutting wheel, the edge of the lower skin was then roughly trimmed. Care was taken to not take off excess material.

Once the initial rough cut is complete, the edges are finished by first cutting back with a sanding block and files, before finishing off with 120 grit sandpaper to give a nice clean edge
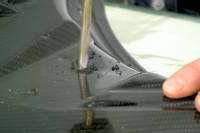
Drilling & cutting for fasteners

2. Drilling & cutting for fasteners

Special load spreading "BigHead" fasteners are used for the hinge areas. These consist of threaded studs welded to a special load spreading plate.

Holes are marked out for the fasteners studs to come through the lower skin, then carefully drilled. Holes are also cut with the Dremel for the bonnet front latch. That hole is also neatened up with files and sandpaper like the edges of the skin.

The bonnet hook was specially fabricated for this project to fit into the opening. It includes good sized bonding tabs so it can be boned onto the lower skin.
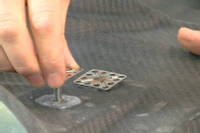
Bonding on fasteners

3. Bonding on fasteners

The fasteners are going to be bonded to the lower skin with the Permabond ET500 structural adhesive. The underside of the skin does not need any preparation due to the peel ply finish. The bonding flanges of the bonnet latch have been heavily keyed with a grinder to aid adhesion.

Using the supplied mixing nozzle, the ET500 is dispensed around the stud holes taking care not to get any on the hole itself. The fasteners are inserted stud first into the hole, avoiding getting adhesive on the threads, then pressed down flat onto the lower skin. The holes in the fastener baseplate allow the adhesive to squeeze through meaning as well as a bond metal to carbon, the fastener will be mechanically locked into place by the adhesive.

Similarly, adhesive is carefully applied to the latch flanges and the latch is pressed into place. The lower skin is then left for 10 minutes to allow the adhesive to achieve initial handling strength.
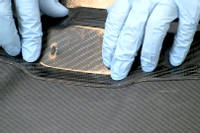
Bonding together the upper and lower skins

4. Bonding together the upper and lower skins

At this stage the upper and lower skins are being bonded together. To aid alignment, the upper skin is placed back into it's mould. At this point, if needed, any measurement or alignment marks are made on the skin so that the lower skin ends up perfectly positioned on the upper skin.

To bond the skins together, Permabond PT326 is used as the structural adhesive. A large bead is placed in the inner and outer edges of the lower skin - there may be some slight gap filling in places. Once applied, the lower skin is mated to the upper skin. Great care is need to ensure the skins are properly aligned at this stage otherwise the shut lines and upper skin placement may not fit properly on the car.

Once happy with placement, a protective layer of bagging film is used and a lot of weights are applied to hold the skins together properly while they cure.
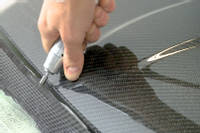
Cutting & finishing the bonnet/hood

5. Cutting & finishing the bonnet/hood

Now the two skins are bonded together, the final stage is to trim and finish off the edge of the upper skin.

The edge of the upper skin is also cut with the Dremel and Perma-Grit rotary cutting tool. Even more care is taken to ensure too much material is not taken off. The edge is then progressively sanded back using a Perma-grit sanding block before being finished with 120 grit and finally 240 grit sandpaper for a neat edge.

A quick dust off and the bonnet/hood is now complete and ready to be fitted to the car.


DISCUSSION (11)

Please share any questions or comments you may have about this video tutorial.


Rodrigo Zanatta
What about temperature? Once this dark hood is parked outdoors under the a hot sun for hours, won't the resin become soft? Should it go through a high temp post-cure?
Easy CompositesMatt
Good question; it's certainly well worth thinking about the Tg of the resin that's used, the Tg is the 'glass transition', or in layman's terms, the temperature where it starts to go 'soft'. The IN2 Infusion Epoxy we use here has a maximum Tg of 98°C which is pretty high, especially compared to polyester resin (such as might be used for a fibreglass bonnet or a low-cost carbon fibre one). In our experience of making vehicle panels (which is quite a bit) we've found that this Tg is sufficient for panel to not have any problems even finished in black, in direct sunlight. However, the important thing is that to achieve this high Tg an elevated temperature post-cure *is* required. At lower temperatures, the panel would be OK without the post-cure but to protect against any softening or distortion at higher temperatures a post cure is recommended, as per the IN2 datasheets.

gfootsurfer808
Is there any UV protection in resin ?
Easy CompositesMatt
Most modern epoxies (including IN2) have a good level of UV resistance, although no epoxies are 100% UV stable.

Dipper 964
Do you need to put it in an oven to cure?
Easy CompositesMatt
No, the entire bonnet was made at room temperature with room temperature curing resins.

davidgruty
No material in between the two halves? just air?
Easy CompositesMatt
Correct. The stiffness comes from the bond between the two skins and the geometry of the reinforcement structure (as it does on the steel original). A core would add almost no stiffness and quite a bit of extra weight so is not recommended in this configuration.

ken bradley
Just wondering if there is a colour tinted clear gel-coat!!?
Easy CompositesMatt
If you're looking for a coloured, translucent colour effect then actually, tinting the gelcoat would not be the best way to go about it. Instead, you should do the infusion without any gelcoat (so just lay the dry carbon straight into the mould) and then achieve the colour effect using a tinted clear coat, sometimes known as a 'candy lacquer'. I believe 'House of Kolor' do a range of these.

Jonathan Harrison
How strong is this hood? Especially in comparison to the original??
Easy CompositesMatt
It's pretty strong Jonathan. 'Strength' of a composite component is difficult to compare like-to-like with a steel part but it's probably easier to say in terms of stiffness the finished carbon part was comparable (i.e. similar) in stiffness to the original.

Greg Brightwell
When bonding the inner skin to the outer, could you have vacuum bagged it?
Easy CompositesMatt
You could use a vacuum bag to help hold the two parts together, however in this case there was no need for such additional force when the simple weights were enough to hold the parts in place during the cure. Also, if you were to use a vacuum bag to press the two halves together you would need to use a vacuum regulator to reduce the vacuum level to just a few percent, otherwise the pressure would be far too much for the structure; full vacuum pressure would distort it massively.

David Xu
The final step, just bonding the two pieces together… is that really strong enough?
Easy CompositesMatt
Yes, a good adhesive will create a strong, permanent bond between the sections. Since making this tutorial, we have another adhesive which is our VM100B Methacrylate Adhesive. Unlike Epoxy and Polyurethane adhesives, Methacrylates etch the surface so promote an exceptionally strong, long-lasting bond. In testing when bonding composite to composite with this type of adhesive, the composite tore apart before the bond failed and so for sure, adhering the two sections is no problem at all.

Secretcha Lolsian
What is the difference in weight between the original, and the carbon fiber version?
Easy CompositesMatt
The original steel bonnet weighed 20kg, this carbon fibre version weighs 3kg, so 17kg lighter!

Octy Mocty
Wouldn't it have been better to use a vacuum bag to hold the two halves together during bonding? - Surely better than bricks!
Easy CompositesMatt
Vacuum bonding is definitely an option but the main problem is limiting the vacuum level sufficiently so as to not distort the components during cure. If you just used the vacuum pump at full vacuum then the pressure it would put on the (hollow) reinforcement structure would be massive and would severely distort that structure. This means you need a vacuum regulator, which is quite an expensive bit of kit, along with the added work of setting up the vacuum bag, as well as needing the get the bagging done before the adhesive starts to cure. The bricks looked a bit too basic, we accept that, but they did the job and didn't cause other problems which vacuum bagging could have very easily done.

Scott Yohman
When you do the final trim and edge sanding it appears that you would be sanding right into the joint where the two panels are adhered together. Wouldn't that leave a pretty poor looking edge? On commercially produced carbon fiber bonnets their edges appear to be rounded.
Easy CompositesMatt
Hi Scott, actually the edge still looks quite tidy because it is just solid carbon fibre. This can either be polished (just by compounding it) or you can choose to further seal the edge with the application of some resin onto the cut edge or finally you could choose to clear-coat the whole part which would do the job of sealing and glossing the edge at the same time. I would be very surprised if any commercially produced parts wrapped the carbon around an edge like this, no matter how you make a part you still have to have a cut edge somewhere!

LEAVE A COMMENT OR QUESTION

Note: Your name will be abbreviated and your email address will only be used to email you the answer directly

USED IN THIS PROJECT

Although not necessarily an exhaustive list, the following tools and materials, supplied by Easy Composites, were used in this project.

The quantity shown below is the approximate amount used in the project rounded up to the nearest available kit size or quantity.

TOOLS & EQUIPMENT
Perma-Grit Sanding Block Small Thumbnail
SB140Perma-Grit Sanding Block Small£16.66 /each

Perma-Grit 180mm Needle File Half Round Thumbnail
LNFHROUNDPerma-Grit 180mm Needle File Half Round£8.33 /each

19mm + 32mm Cutting Discs with Arbor Thumbnail
RD319mm + 32mm Cutting Discs with Arbor£16.66 /each

400ml Twin Tube Cartridge Gun Dispenser 1:1 Ratio Thumbnail
CG-400ML-11400ml Twin Tube Cartridge Gun Dispenser 1:1 Ratio£52.50 /each

50ml Twin Tube Cartridge Gun Dispenser Thumbnail
CG-50ML50ml Twin Tube Cartridge Gun Dispenser£16.95 /each

Total £0.00
MATERIALS & CONSUMABLES
BigHead Threaded Stud M6 x 25mm Thumbnail
BH-S-M6-25BigHead Threaded Stud M6 x 25mm£2.45 /each

Mirka P240 Wet and Dry Abrasive Paper 10 Sheets Thumbnail
WPF240-10Mirka P240 Wet and Dry Abrasive Paper 10 Sheets£6.45 /pack

Mirka P120 Wet and Dry Abrasive Paper 10 Sheets Thumbnail
WPF120-10Mirka P120 Wet and Dry Abrasive Paper 10 Sheets£6.95 /pack

Nitrile Gloves Thumbnail
NG[P]Nitrile Gloves* /each

PT326 20min Rigid Polyurethane Adhesive 400ml Twin Tube Thumbnail
PT326-400PT326 20min Rigid Polyurethane Adhesive 400ml Twin Tube£49.95 /each

ET500 Rapid Clear Epoxy Adhesive 50ml Thumbnail
ET500-50ET500 Rapid Clear Epoxy Adhesive 50ml£11.95 /each

Type 1 Static Mixing Nozzles for 50ml Twin Tube Thumbnail
SMN-50-T1Type 1 Static Mixing Nozzles for 50ml Twin Tube£0.65 /each

Type 2 Static Mixing Nozzle for 400ml Twin Tube Thumbnail
SMN-400-T2Type 2 Static Mixing Nozzle for 400ml Twin Tube£1.80 /each

Total £0.00

DISCUSSION (11)

Please share any questions or comments you may have about this video tutorial.


Rodrigo Zanatta
What about temperature? Once this dark hood is parked outdoors under the a hot sun for hours, won't the resin become soft? Should it go through a high temp post-cure?
Easy CompositesMatt
Good question; it's certainly well worth thinking about the Tg of the resin that's used, the Tg is the 'glass transition', or in layman's terms, the temperature where it starts to go 'soft'. The IN2 Infusion Epoxy we use here has a maximum Tg of 98°C which is pretty high, especially compared to polyester resin (such as might be used for a fibreglass bonnet or a low-cost carbon fibre one). In our experience of making vehicle panels (which is quite a bit) we've found that this Tg is sufficient for panel to not have any problems even finished in black, in direct sunlight. However, the important thing is that to achieve this high Tg an elevated temperature post-cure *is* required. At lower temperatures, the panel would be OK without the post-cure but to protect against any softening or distortion at higher temperatures a post cure is recommended, as per the IN2 datasheets.

gfootsurfer808
Is there any UV protection in resin ?
Easy CompositesMatt
Most modern epoxies (including IN2) have a good level of UV resistance, although no epoxies are 100% UV stable.

Dipper 964
Do you need to put it in an oven to cure?
Easy CompositesMatt
No, the entire bonnet was made at room temperature with room temperature curing resins.

davidgruty
No material in between the two halves? just air?
Easy CompositesMatt
Correct. The stiffness comes from the bond between the two skins and the geometry of the reinforcement structure (as it does on the steel original). A core would add almost no stiffness and quite a bit of extra weight so is not recommended in this configuration.

ken bradley
Just wondering if there is a colour tinted clear gel-coat!!?
Easy CompositesMatt
If you're looking for a coloured, translucent colour effect then actually, tinting the gelcoat would not be the best way to go about it. Instead, you should do the infusion without any gelcoat (so just lay the dry carbon straight into the mould) and then achieve the colour effect using a tinted clear coat, sometimes known as a 'candy lacquer'. I believe 'House of Kolor' do a range of these.

Jonathan Harrison
How strong is this hood? Especially in comparison to the original??
Easy CompositesMatt
It's pretty strong Jonathan. 'Strength' of a composite component is difficult to compare like-to-like with a steel part but it's probably easier to say in terms of stiffness the finished carbon part was comparable (i.e. similar) in stiffness to the original.

Greg Brightwell
When bonding the inner skin to the outer, could you have vacuum bagged it?
Easy CompositesMatt
You could use a vacuum bag to help hold the two parts together, however in this case there was no need for such additional force when the simple weights were enough to hold the parts in place during the cure. Also, if you were to use a vacuum bag to press the two halves together you would need to use a vacuum regulator to reduce the vacuum level to just a few percent, otherwise the pressure would be far too much for the structure; full vacuum pressure would distort it massively.

David Xu
The final step, just bonding the two pieces together… is that really strong enough?
Easy CompositesMatt
Yes, a good adhesive will create a strong, permanent bond between the sections. Since making this tutorial, we have another adhesive which is our VM100B Methacrylate Adhesive. Unlike Epoxy and Polyurethane adhesives, Methacrylates etch the surface so promote an exceptionally strong, long-lasting bond. In testing when bonding composite to composite with this type of adhesive, the composite tore apart before the bond failed and so for sure, adhering the two sections is no problem at all.

Secretcha Lolsian
What is the difference in weight between the original, and the carbon fiber version?
Easy CompositesMatt
The original steel bonnet weighed 20kg, this carbon fibre version weighs 3kg, so 17kg lighter!

Octy Mocty
Wouldn't it have been better to use a vacuum bag to hold the two halves together during bonding? - Surely better than bricks!
Easy CompositesMatt
Vacuum bonding is definitely an option but the main problem is limiting the vacuum level sufficiently so as to not distort the components during cure. If you just used the vacuum pump at full vacuum then the pressure it would put on the (hollow) reinforcement structure would be massive and would severely distort that structure. This means you need a vacuum regulator, which is quite an expensive bit of kit, along with the added work of setting up the vacuum bag, as well as needing the get the bagging done before the adhesive starts to cure. The bricks looked a bit too basic, we accept that, but they did the job and didn't cause other problems which vacuum bagging could have very easily done.

Scott Yohman
When you do the final trim and edge sanding it appears that you would be sanding right into the joint where the two panels are adhered together. Wouldn't that leave a pretty poor looking edge? On commercially produced carbon fiber bonnets their edges appear to be rounded.
Easy CompositesMatt
Hi Scott, actually the edge still looks quite tidy because it is just solid carbon fibre. This can either be polished (just by compounding it) or you can choose to further seal the edge with the application of some resin onto the cut edge or finally you could choose to clear-coat the whole part which would do the job of sealing and glossing the edge at the same time. I would be very surprised if any commercially produced parts wrapped the carbon around an edge like this, no matter how you make a part you still have to have a cut edge somewhere!

LEAVE A COMMENT OR QUESTION

Note: Your name will be abbreviated and your email address will only be used to email you the answer directly

100% SECURE

    Secured by Digicert Payments by Adyen

PAYMENT METHODS

    Mastercard logo Visa logo Maestro logo PayPal logo Bank Transfer logo
    Staffordshire Chambers of Commerce member Composites UK member

Easy Composites Ltd, registered in England 7486797. All content copyright (C) Easy Composites Ltd, 2024. All rights reserved.