Need any help or advice?![]() +44 (0)1782 454499
+44 (0)1782 454499

Downloads (7)
| Safety Datasheet (SDS) - NL | ||
| Safety Datasheet (SDS) - EN | ||
| Technical Datasheet (TDS) | ||
| Resin Countertop Handbook | ||
| Resin Plank Table Handbook | ||
| Penny Floor Handbook | ||
| Resin Plank Table Handbook |
Specification
Product Data
| Colour | Clear | |
|---|---|---|
| Density | 1.11 | g/cm³ |
| Chemistry / Material | Epoxy | |
| Viscosity | 1200 | mPa.s |
| UV Resistance | Very Good | |
| Brand | GlassCast | |
| Tg Onset (DMA) | 45 | °C |
| Maximum Casting Thickness | 5 | mm |
| Shelf Life | 12 | Months |
Cured Mechanical Properties
| Max Service Temp | 45 | °C |
|---|---|---|
| Hardness | 83 (Hard) | Shore D |
| Flexibility | Hard / Rigid |
Pot Life and Cure Times
| Pot Life (Typical) | 30 | mins |
|---|---|---|
| Initial Cure Time | 24 | Hrs |
General Properties
| Gross Weight | 0.58 | kg |
|---|---|---|
| Brand | GlassCast® |
Shipping Information
Restrictions
This product is not classed as dangerous goods for transport and can be shipped to all destinations without restriction.
Shipping to EU countries is now done through our European subsidiary based in the Netherlands. All EU customers should use www.easycomposites.eu.
Package Size
There are no package size restrictions or surcharges for this product.
Delivery Cost
To find the delivery cost of this item to your address, add it to your basket and then use the instant shipping calculator on the basket page.
GlassCast 3 Clear Epoxy Coating Resin
- GlassCast®
- EP-GC-05-V2
- 4.5/5 Average rating
New and improved 'Version 2' of our incredibly popular clear surface coating resin designed to create a smooth, glossy, hard wearing clear resin coat on floors, counters, bar-tops, artwork and much more.
GlassCast 3 is easy-to-use, UV resistant, self-levelling, hard-wearing and cures bubble-free; no wonder it's the #1 choice for thousands of professional installers, contractors and makers around the world.
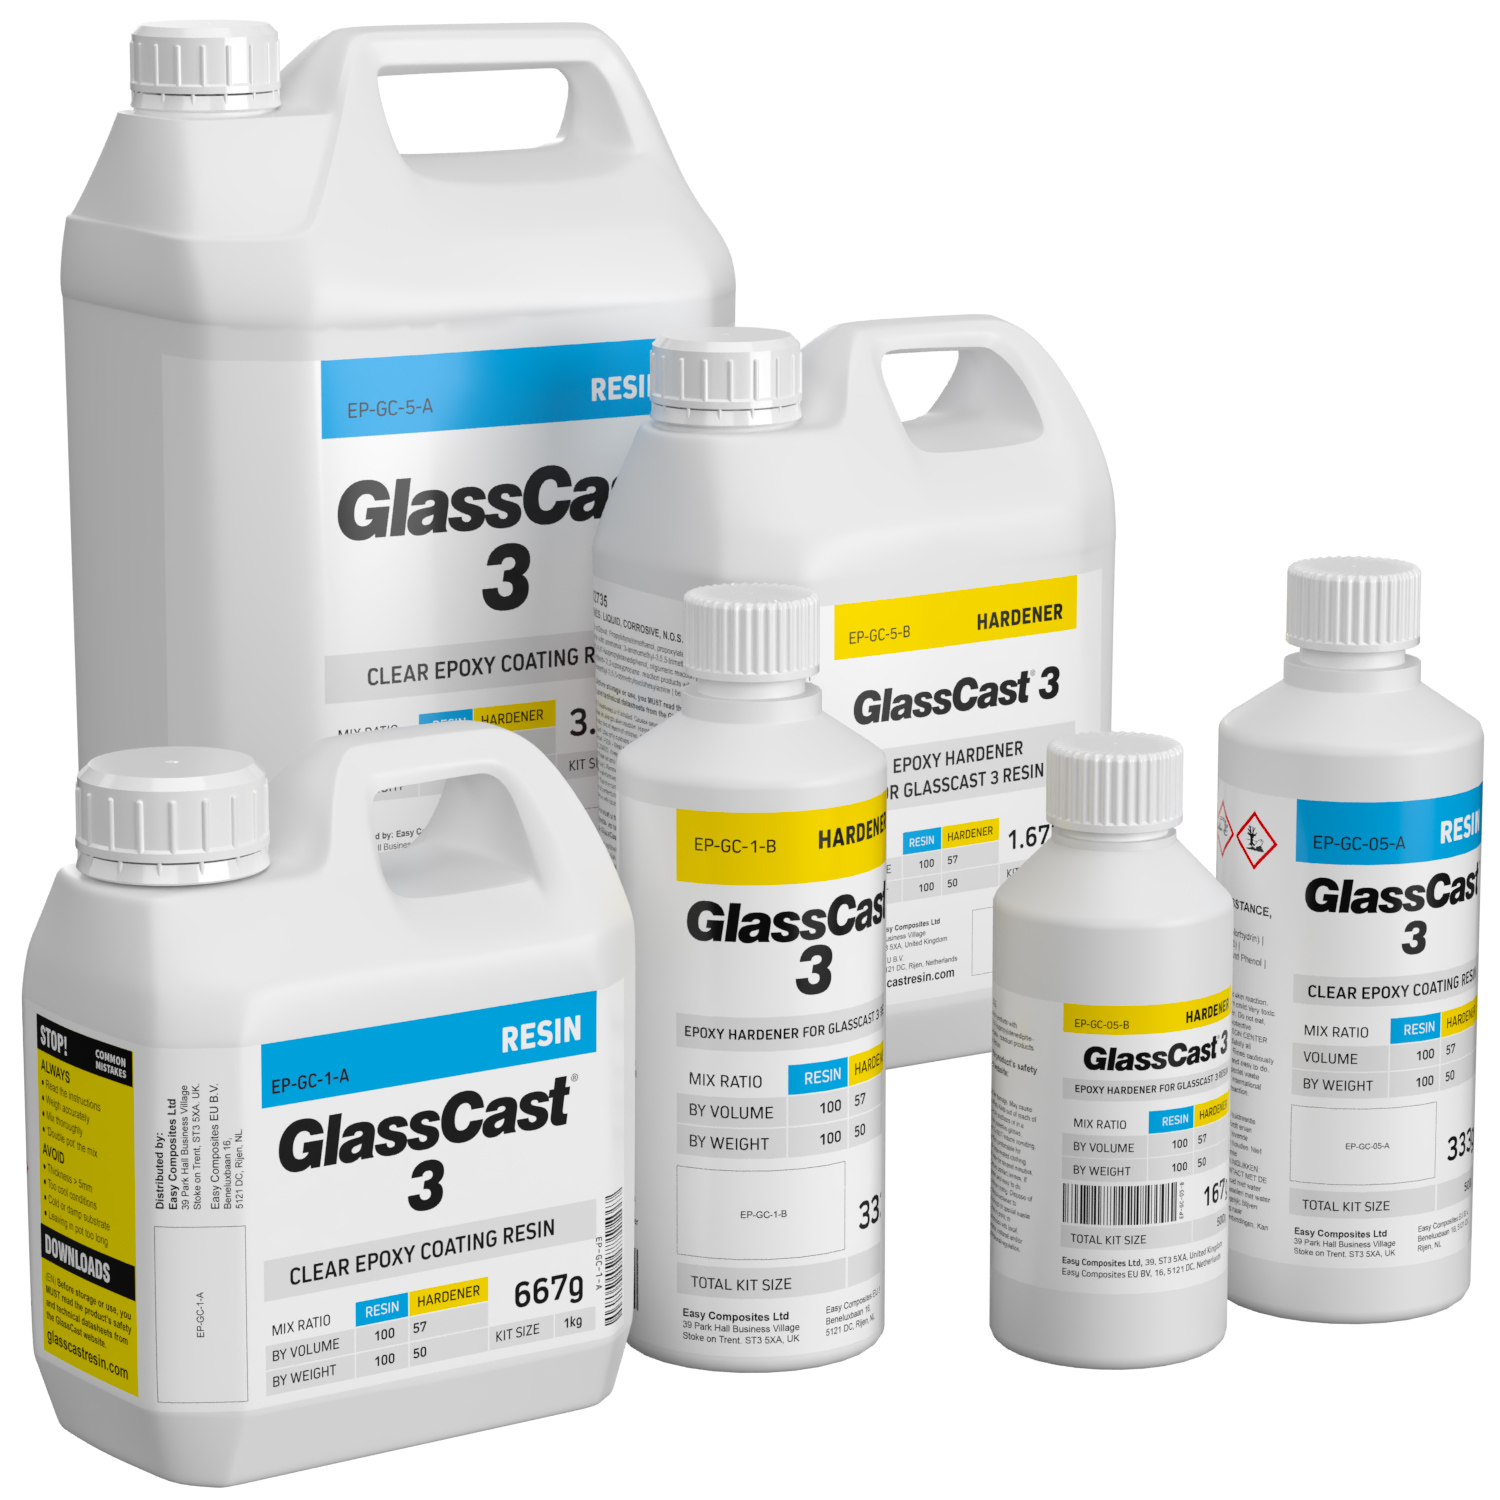
Available in 500g, 1kg, 5kg, 15kg and 30kg kits to suit all projects.
PRODUCT VERSIONS
Kit Size
AVAILABILITY:More than 20 availablefor immediate shipping
We won’t be beaten on price!
If you believe you’re buying an equivalent product cheaper elsewhere, contact us to discuss your requirements.
New and improved 'VERSION 2' of our best-selling GlassCast® 3 for super-flat, clear, glossy coatings on penny floors, bartops, counters and furniture. GlassCast® is UV resistant, hard-wearing, self-levelling and recommended for pouring at thicknesses up to 3mm.
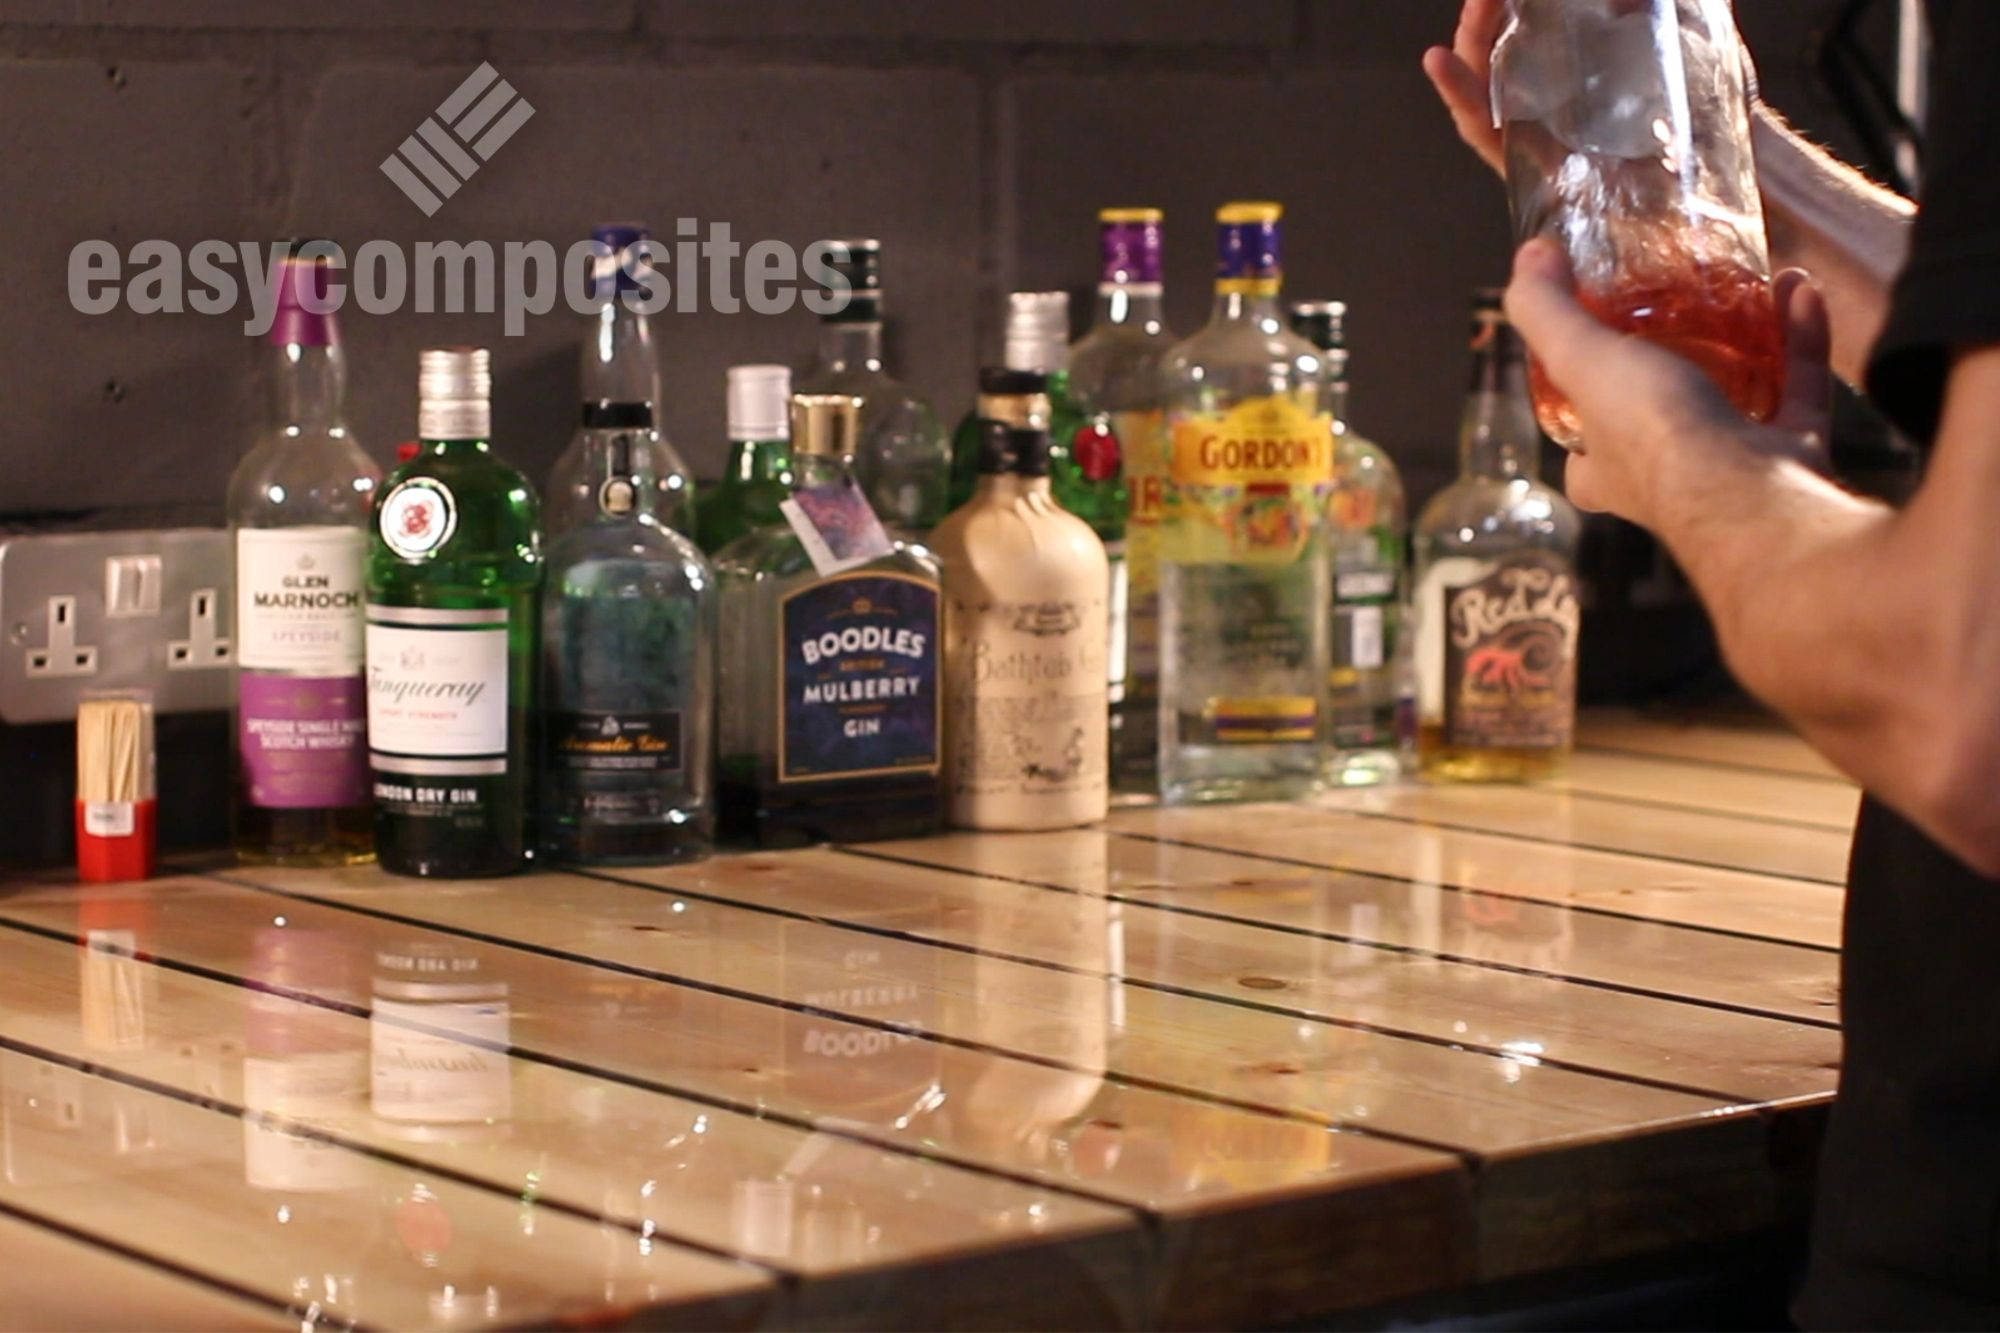
Glass Cast 3 epoxy resin can be poured at thicknesses from just 1mm up to 5mm or more but is recommended for coatings between 1mm and 3mm making it perfect for creating a glossy resin coating over furniture as well as creative ideas like bottle tops, crushed glass, pebbles and of course the incredibly popular pennies.
New and Improved 'VERSION 2'
GlassCast 3 has now been updated to a new and improved 'version 2' formula. The new formula delivers even flatter, glossier surfaces with updated UV resistant technology and the added benefit of more environmentally-friendly chemistry.
Users should note that the resin used in the new formulation is particularly thick, especially when cold, and so should always be warmed to 20-25C before mixing for best results. 'Version 2' resin and hardener are not compatible with the original GlassCast 3 formula.
Casting Vs Coating
GlassCast 3 has been developed as a coating resin, not a casting resin. This means that whilst it is specially designed to cure with the best possible finish on the open face, it does not have the total clarity of a clear casting resin, especially when used in thick section.
If the priority for your project is the clearest possible epoxy resin, especially if you're casting thicker sections, then our GlassCast 10 or GlassCast 50 products may be a better choice.
Typical Uses
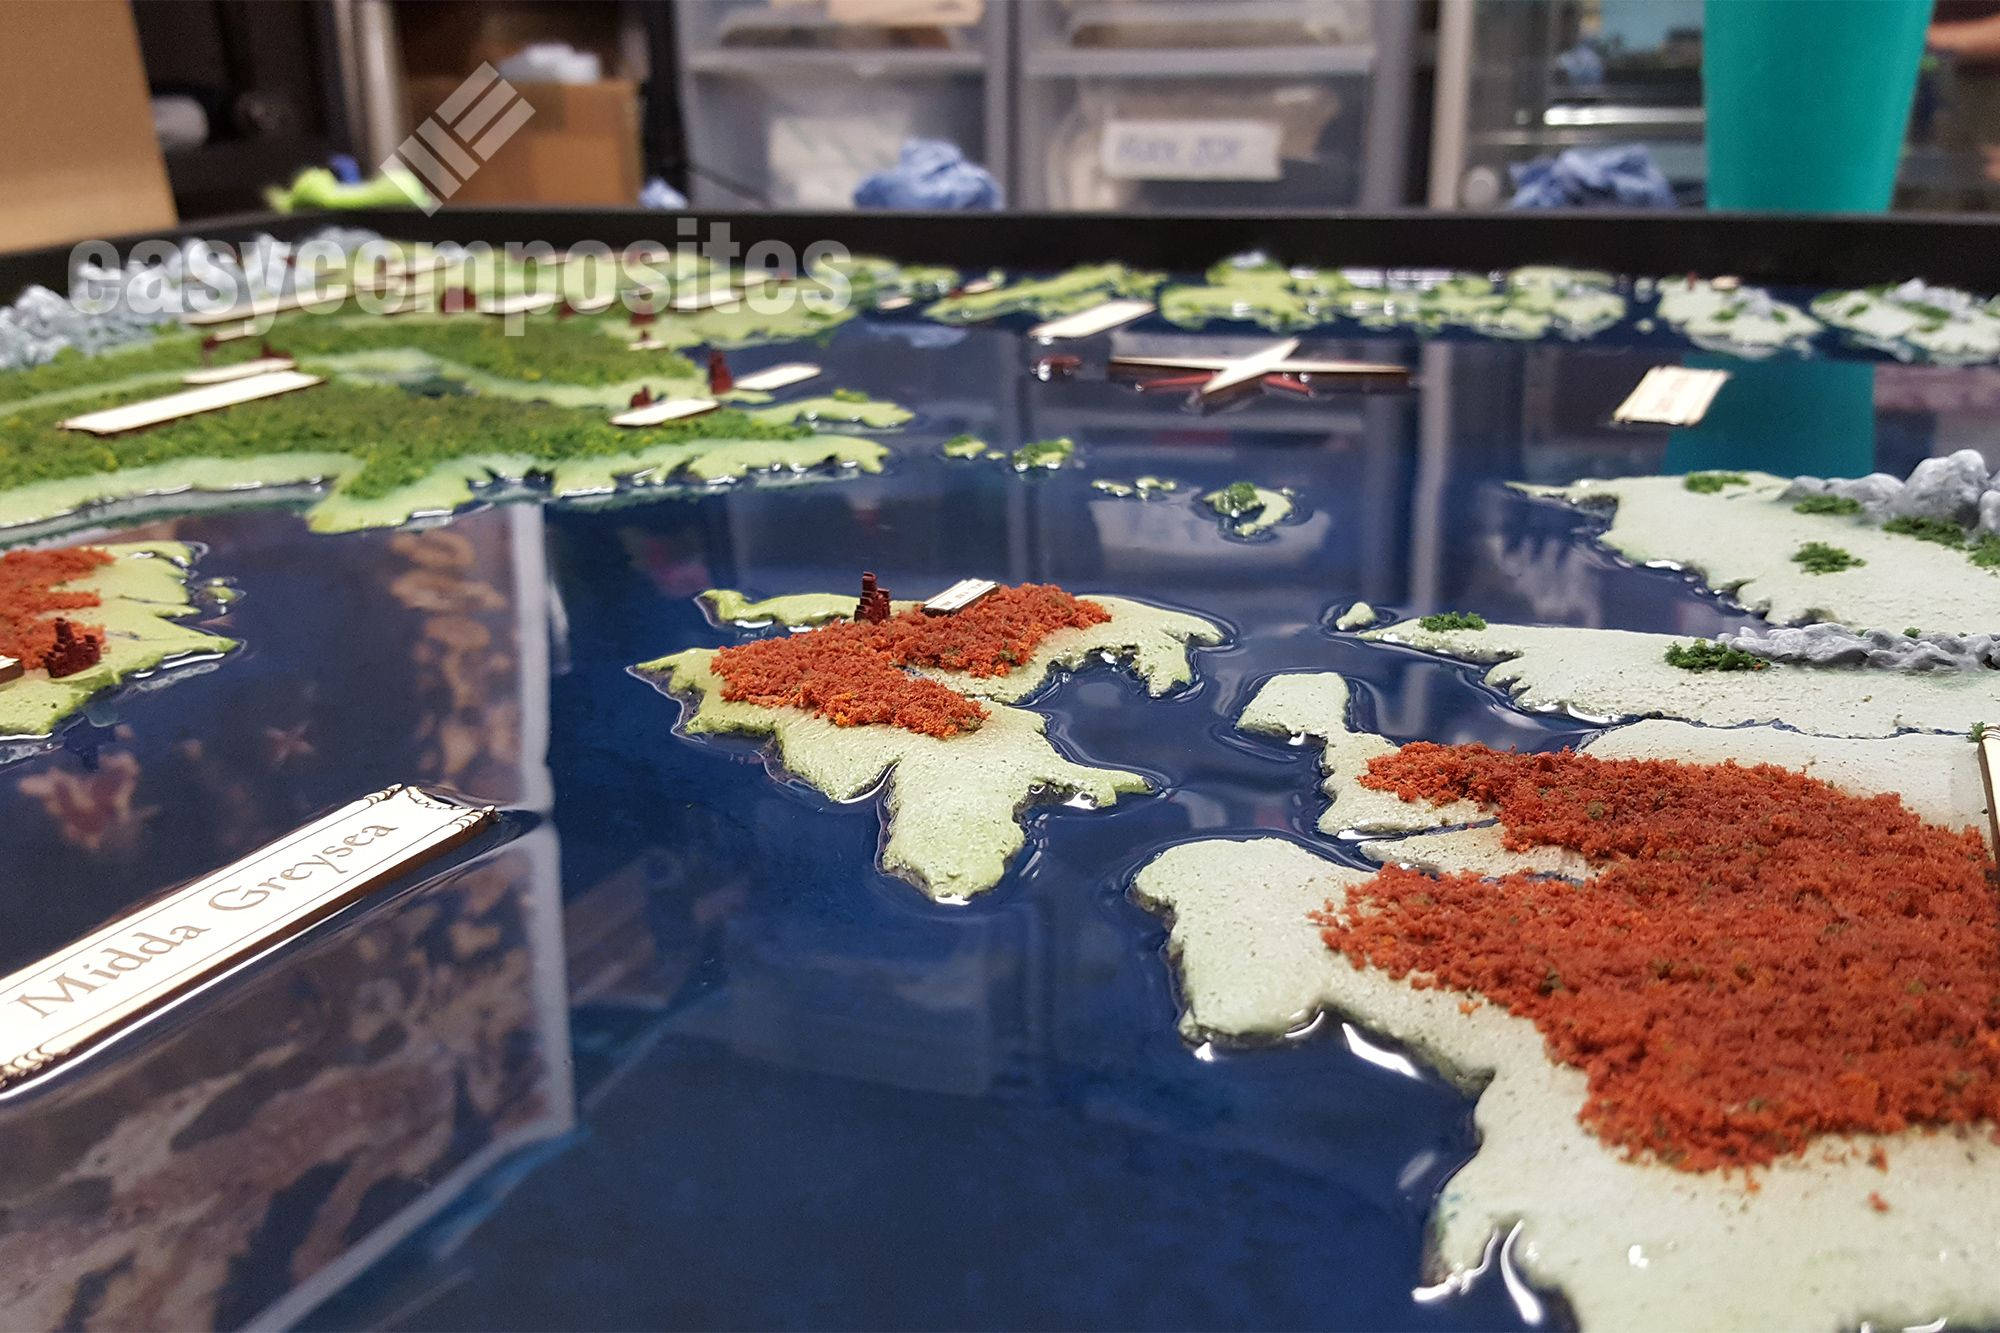
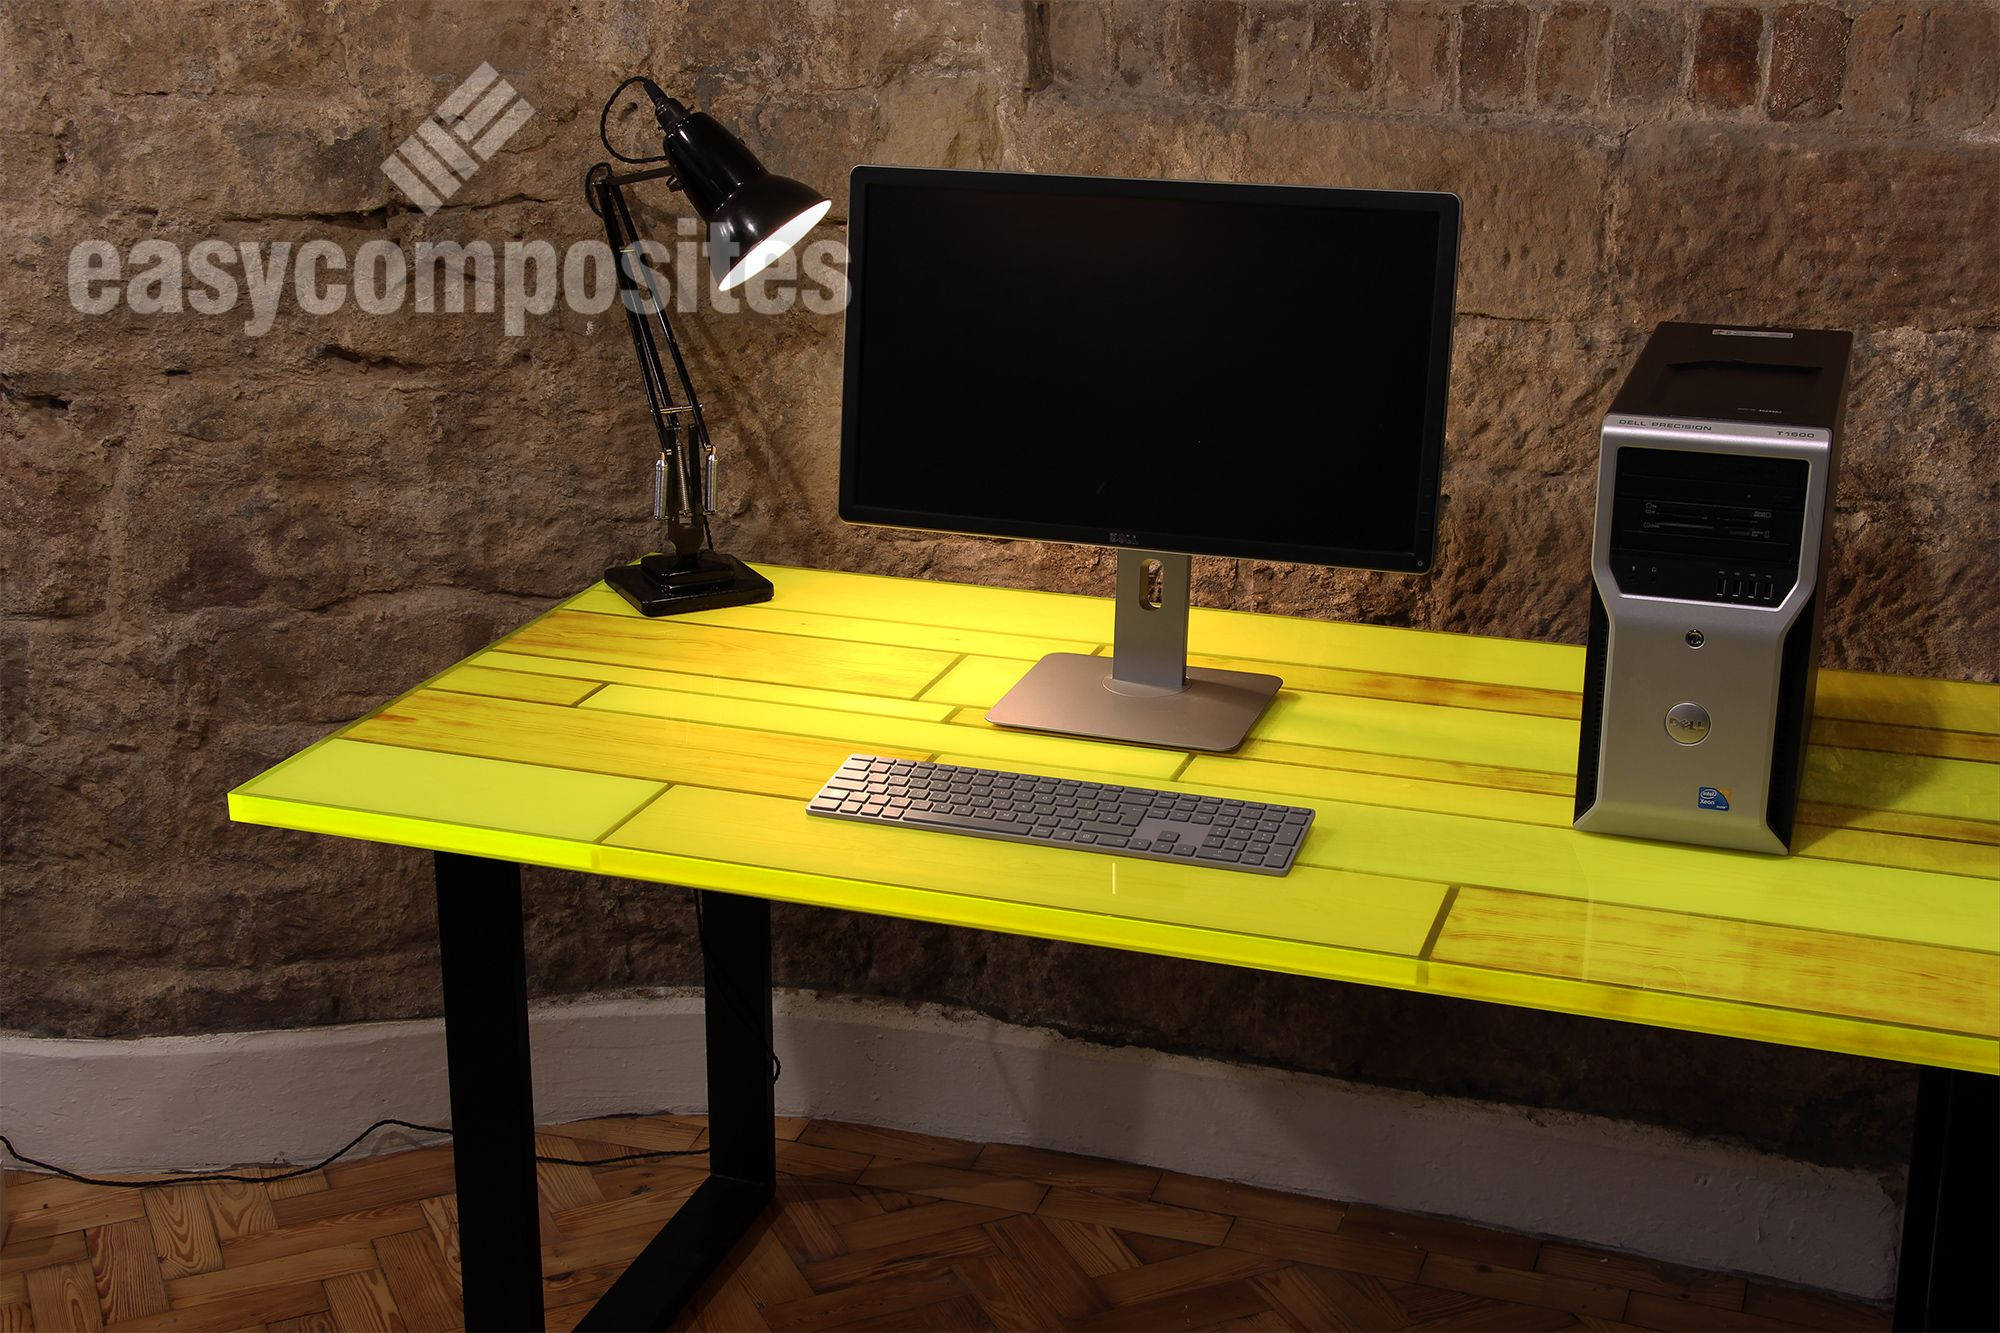
- Tabletops* (including embedments like bottletops, corks, pebbles, glitter, gravel)
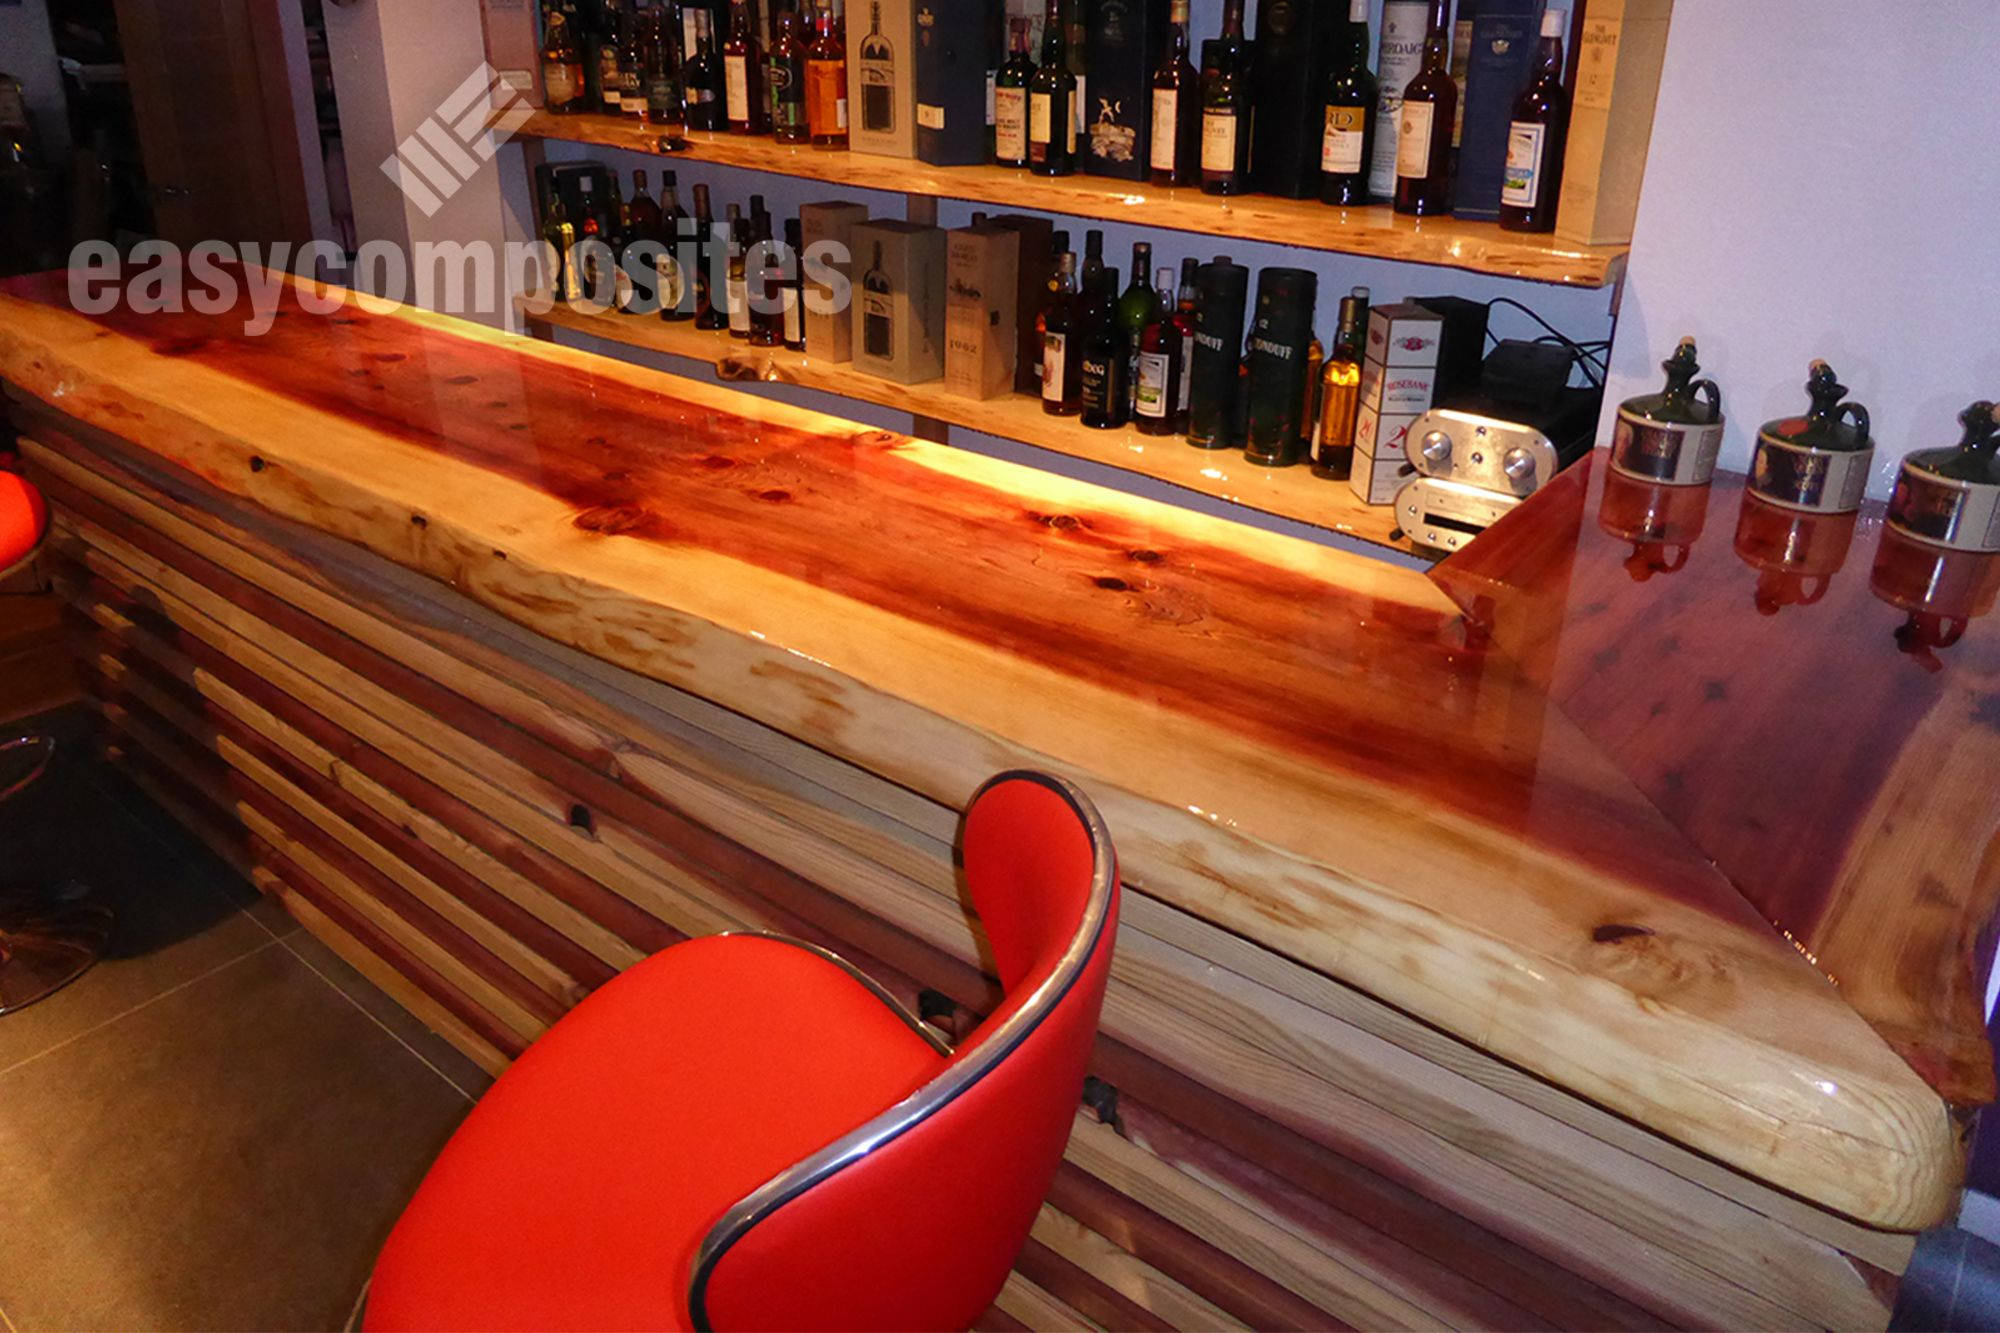
- Bartops* (including crushed glass, beer mats etc.)
- Furniture (including reclaimed wood, driftwood, decoupage etc.)
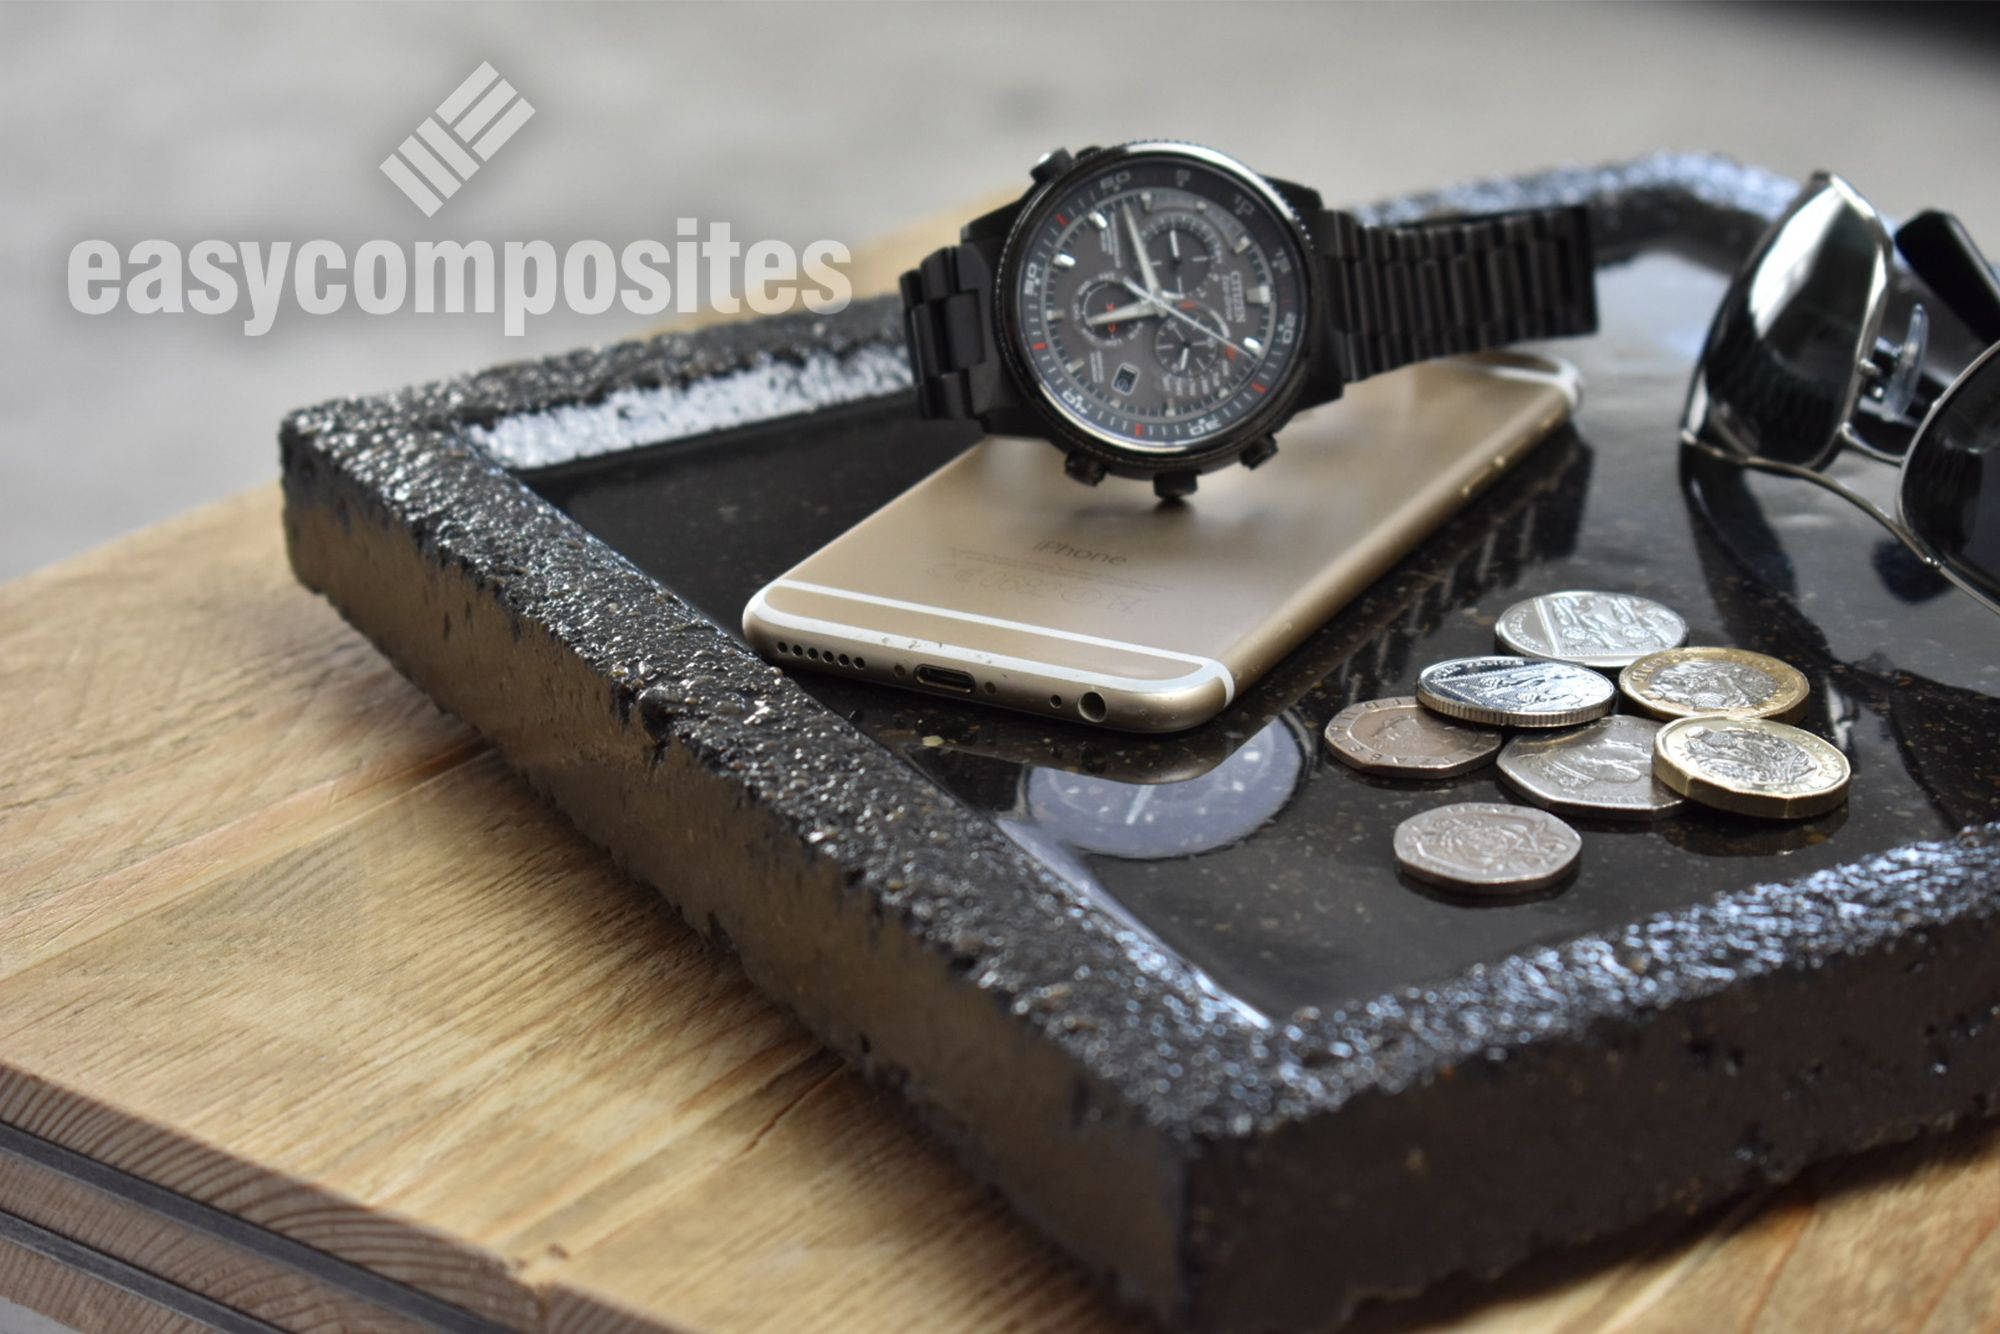
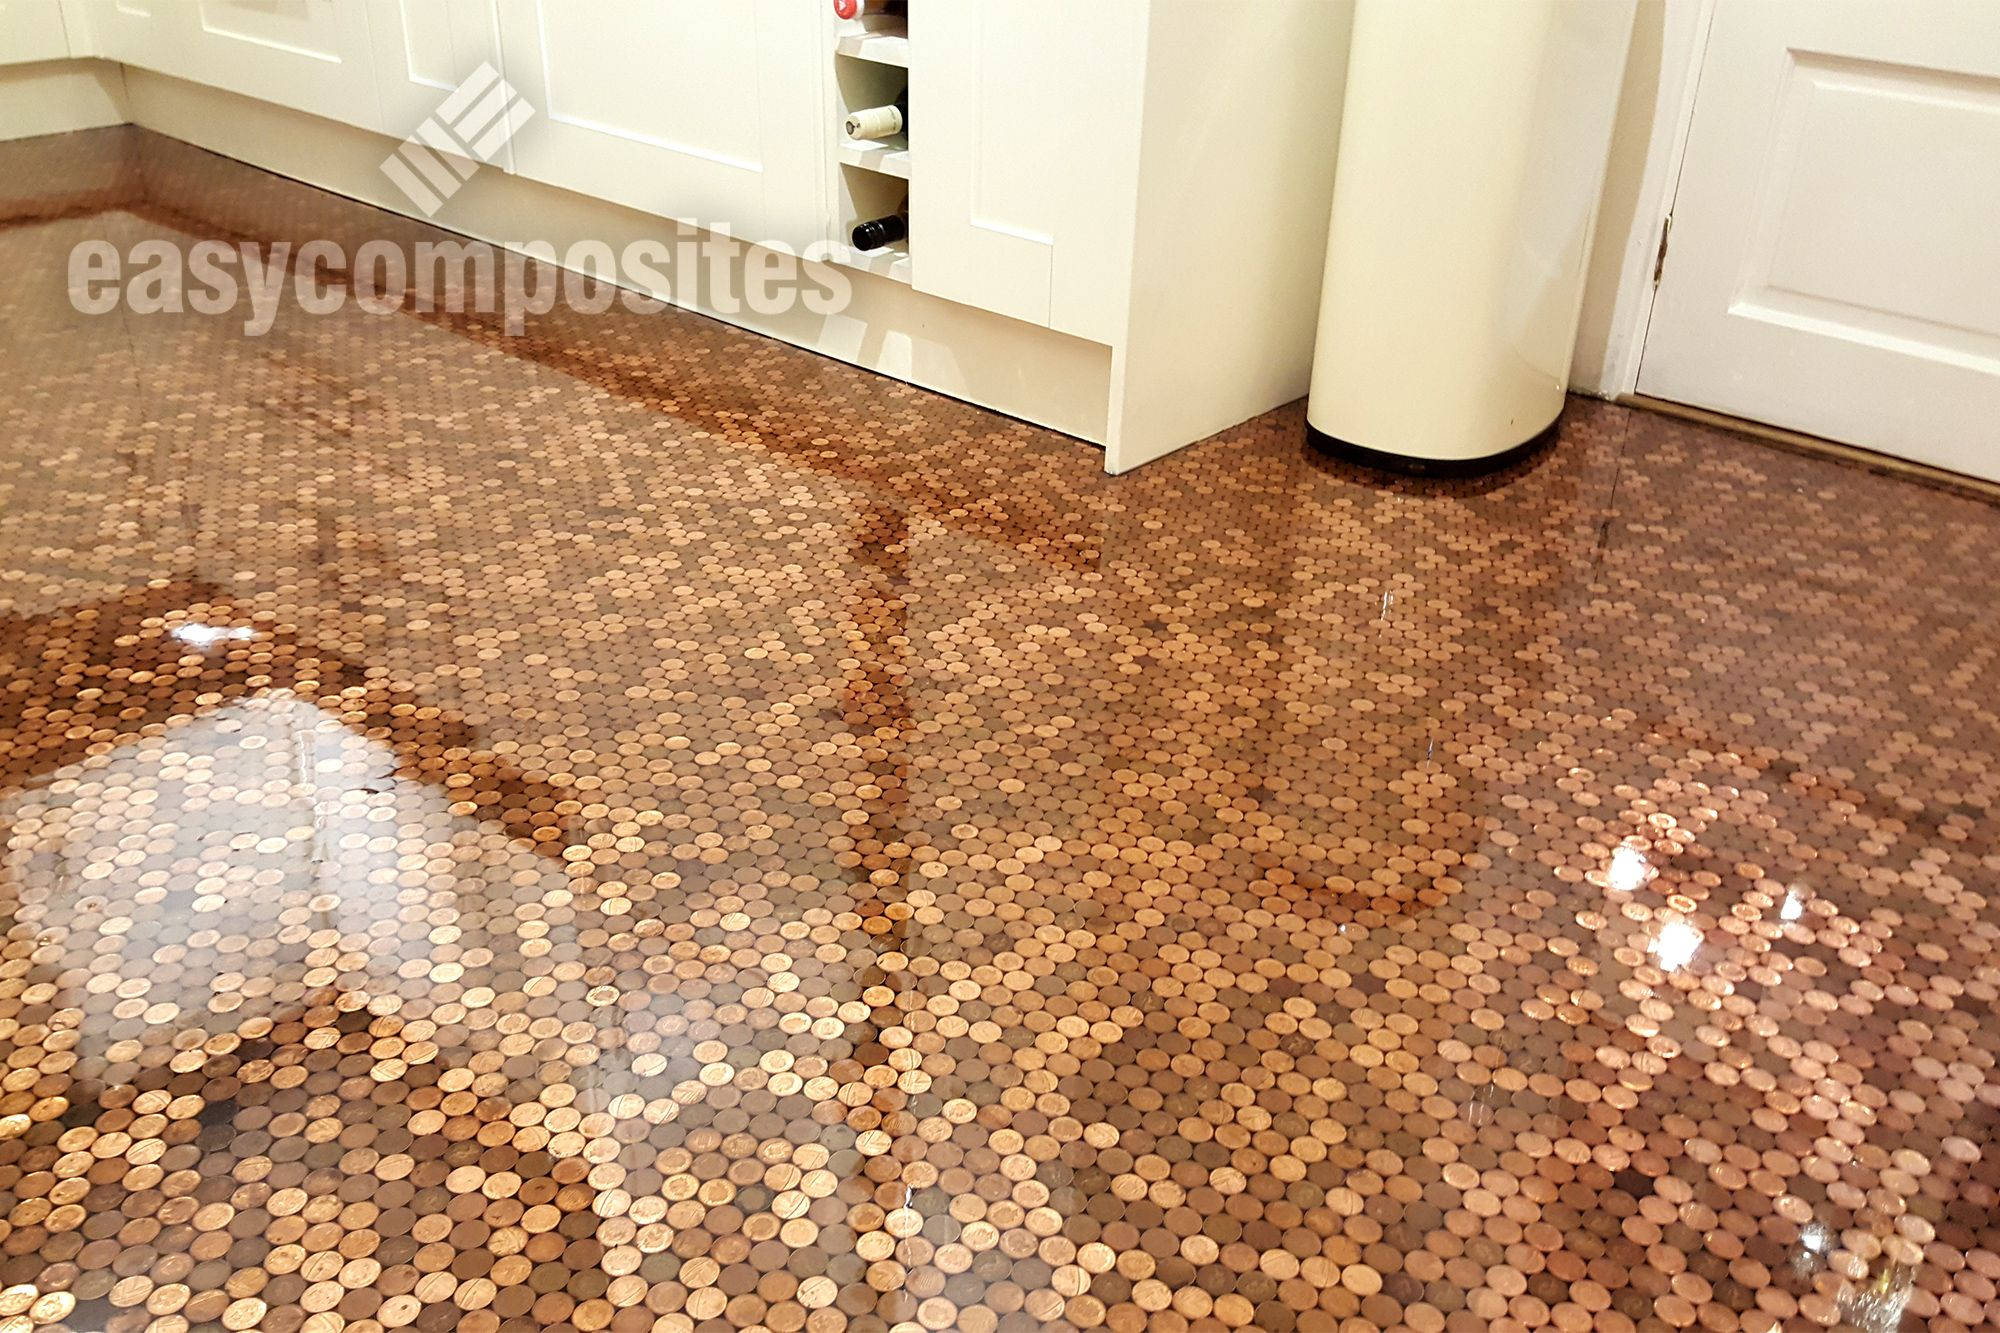
- Penny floors
This amazing resin is self-levelling and cures to leave a stunning smooth, glossy surface which requires no flatting, polishing or further finishing - a true 'pour and leave' process. If you do need to polish the resin however, to remove scratches or add a soft radiused edge to a cast surface for example, Glass Cast 3 is very easy to polish using simple abrasive paper and polishing compounds to restore a full gloss.
Special additives in the resin help to expel trapped air after mixing meaning that in most circumstances there is no need to pop bubbles with a torch or heat-gun.
The advanced 'UV' resistant formulation of Glass Cast means that it has non-yellowing properties far superior to those conventional epoxies meaning that it will start beautiful and stay beautiful for years to come.
*All epoxy resin systems will be marked by hot objects. To improve the heat resistance of your Glass Cast surface, an elevated temperature post-cure should be undertaken. Even after which, you should avoid placing particularly hot plates or cups on your Glass Cast surface.
GlassCast 3 is ideal as a clear floor resin making it the perfect choice for a resin penny floor or to include other embedments. To date, GlassCast 3 has been successfully used for thousands of penny floor projects in the UK and around the world.
Further Information
Ambient Temperature, Pot-Life and Pour Depth
The GlassCast range of resins, in common with all epoxies, generate heat as part of the curing process. The amount of time the mixed resin can spend in the pot, as well as the maximum depth it can be poured at, will vary depending on the ambient temperature.
For best results, we recommend working in a consistent room temperature of 18-20°C. GlassCast can be used in temperatures from 15 to 25°C but higher temperatures will reduce the pot-life and the maximum pour-depth of the resin significantly, as shown in the table below.
| Ambient Temperature | 15°C (minimum) | 20°C (recommended) | 25°C (maximum) |
|---|---|---|---|
| Maximum Time in Pot (Pot Life) | 45 mins | 30 mins | 22 mins |
| Maximum Pour Depth | 9mm | 6mm | 3mm |
| Initial Cure | 36 hrs | 24 hrs | 18 hrs |
Outdoor Use
Despite the very good advanced 'UV' resistant formulation of our Glass Cast resins, we don't suggest using the GlassCast range of resins for permanent, outdoor applications. This is down to epoxy chemistry meaning that eventually, over time, depending on UV exposure, environmental conditions etc, the resins will always eventually yellow in outdoor conditions. How visible this is depends on factors such as the underlying colour and conditions experienced.
We simply don’t have the longevity of testing to be able to guarantee how long it will be before the resin may start to deteriorate in direct sunlight, adverse weather conditions (freezing in winter, high temps in summer), water pooling or sitting on top, etc. We have got customers who have used it for such applications but the advice would be to either put the outdoor projects away between uses or to have a cover to protect it if no other product (yacht varnish, etc.) would suit your project.
Other GlassCast Versions
GlassCast 3 is the original GlassCast product which has now been renamed to GlassCast 3 having been joined by two new versions; GlassCast 10 and GlassCast 50. The number in the name is the suggested thickness that each product should be used for; GlassCast 3 is recommended for coatings up to 3mm in thickness whereas the new products are recommended for castings up to 10mm and 50mm.
For resin penny floors, counter tops or similar, GlassCast 3 is the right product.
For smaller clear resin castings such as jewellery or resin art (up to 10mm) in thickness, choose GlassCast 10
For infills into knot holes or distressed wood or if you're doing a waney-edge river table then GlassCast 50 is the right choice.
Pigments and Tints
Our Glass Cast range of resins are compatible with many pigments and colouring powders on the market today. This includes epoxy compatible pigment pastes, various pigment powders and translucent tinting pigments. If the pigment manufacturer is not sure if the pigment is epoxy compatible then a small test should give you the answer you need. We stock a range of pigments that have all been tested and work great with all of our Glass Cast resins. You can find our range of pigments at the links below.
Compatibility Information - Dos and Don'ts
Although by no means an exhaustive list, the mould materials, pigments and additives listed below have all been tested and are known to work well with Glass Cast.
Compatible Moulds
- Addition/platinum cureand Condensation cure RTV silicone rubbers*
- Epoxy gelcoat based moulds
- Polypropylene and polyethylene sheet
- Toughened Glass (eg. flat sheet manufacture)
Compatible Moulds
- Epoxy Colour Pigment (for vivid opaque colours)
- Translucent Tinting Pigment (for less vivid opaque colours)
- PearlEx® powder pigments
Compatible Fillers
- All dry filler powders **
- All metal powders (for realistic cold castings)
- Photoluminescent (glow in the dark) powders
*Unlike most water clear resins, Glass Cast can be cast into Condensation/tin cure RTV silicone rubber moulds without any problems.
** Use dry filler powders with caution as in most cases they will reduce the clarity of the Glass Cast, with the more filler used resulting in a greater negative impact on clarity
Key Processing Information
- Ease of Use: Suitable for professional and hobby use (follow SDS advice).
- Odour: Glass Cast is almost odourless.
- Safety Precautions: Wear gloves and goggles and work in a well ventilated area. Always read the SDS before use.
- Ambient Conditions: Can be used from 15 to 30°C although pot-life and cure time will be affected significantly. For best results casting at an ambient of 20-25°C is required.
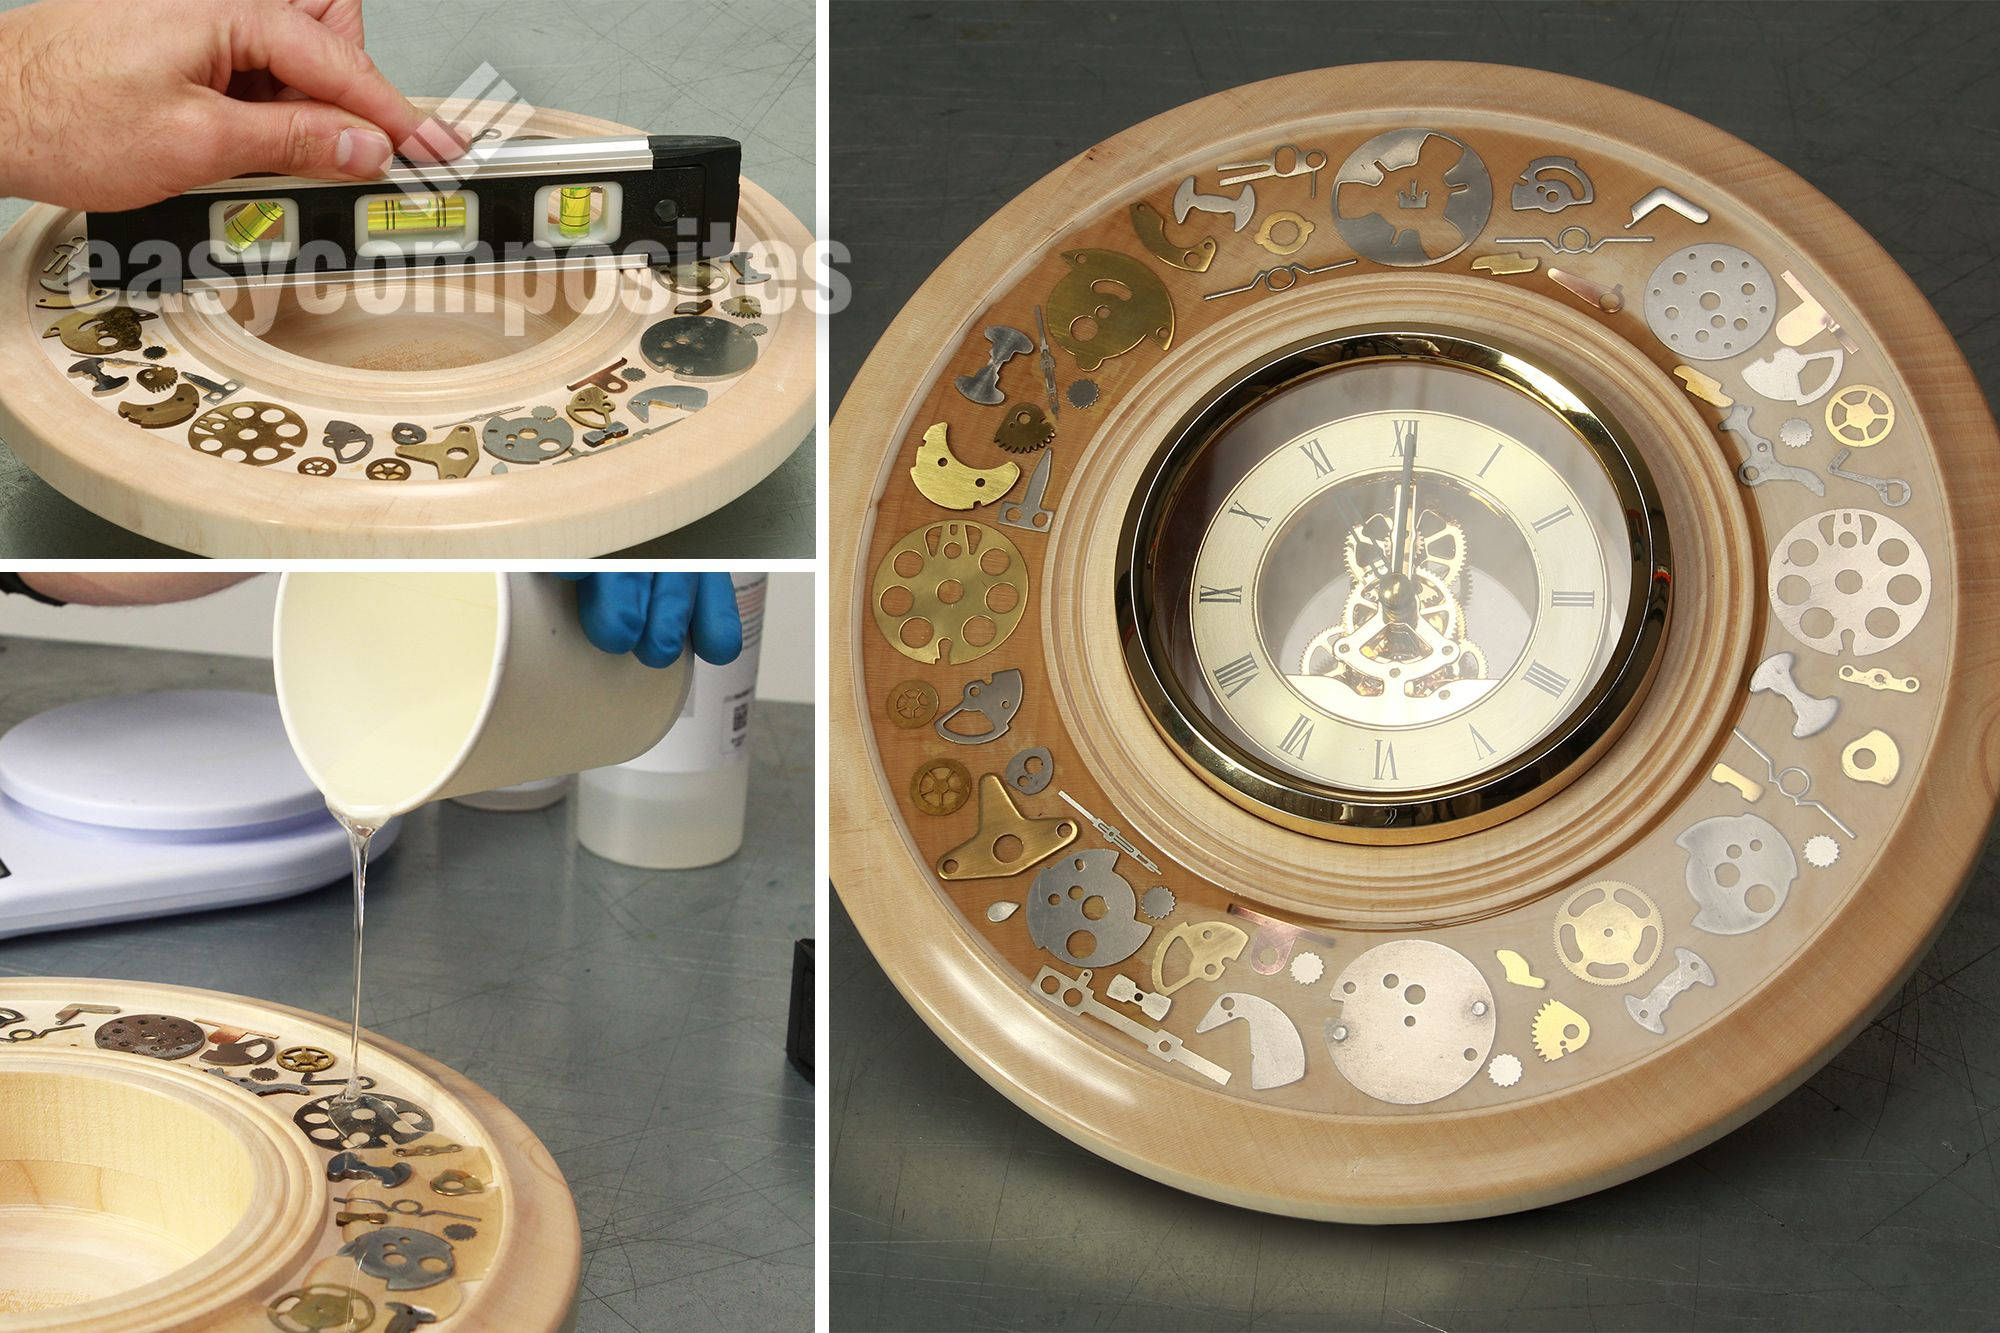
- Degassing: Not necessary. Simply mix and pour.
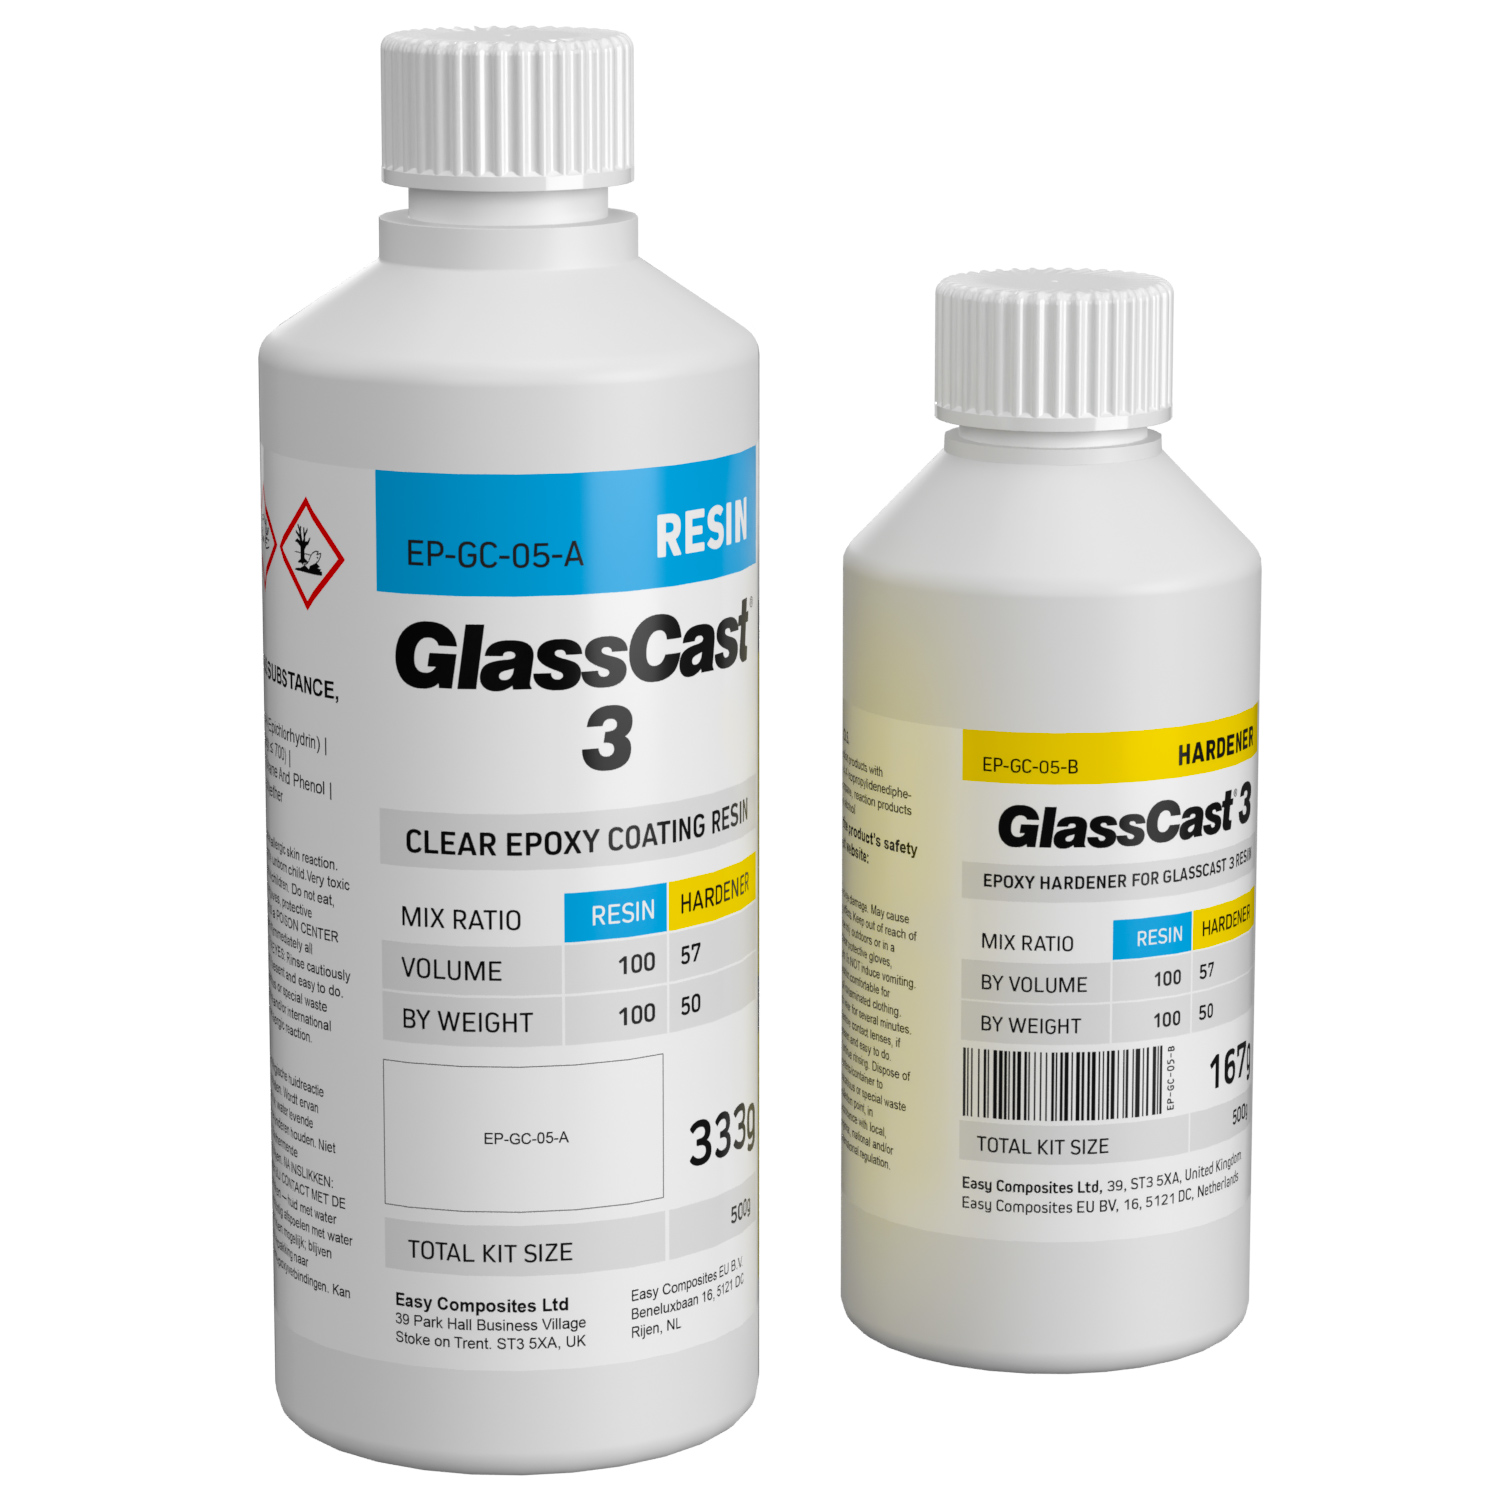
- Mix Ratio: Mix 'Resin and 'Hardener' 2:1 by weight. Use digital scales.
- Mixing: Mix thoroughly by hand for at around 3 minutes.
- Pot-Life: 30 minutes. Be sure to pour your casting(s) before this time.
- Shelf Life: Shelf Life is 12 months from date manufacture.
- Exotherm (Over-Heating): Resin will heat-up whilst it cures. Very large batches of mixed resin in a pot will quickly overheat (exotherm) and can smoke/ignite. Never leave mixed resin unattended.
- Self levelling: Typically for the resin to self level to a smooth finish, such as on a grouted penny floor or a table top, a minimum of 2mm layer is needed which is 2kg of resin per square meter.
- Maximum Thickness: Maximum thickness per layer is 15mm. Thicker projects will require multiple pours to a maximum recommended thickness of 25mm.
- Cure Time/Demould: Initial cure time is 24 hours to touch dry. Full hardness achieved over several days, ambient temperature dependent.
- Pigments and Fillers: A wide range of pigments and fillers (including metal powders) can be added to change the appearance of castings.
How much resin will I need?
For solid surfaces, it's easy to calculate the amount of resin you’ll need to cover a given area. For uneven surfaces or those including embedments like pennies, crushed glass or bottle tops; some compensation will be required.
1kg = 1mm over 1sqm
You will require 1 kilo of resin per millimetre of thickness required over a 1 sqm area. Therefore, to calculate how much resin to mix, simply multiply the thickness you require (in millimetres) by the area of your surface (in square metres). Don't forget that porous (absorbent) materials like wood should be sealed before the main pour. Typically for the resin to self level to a smooth finish, such as on a grouted penny floor or a table top, a 2mm layer is needed which is 2kg of resin per square meter. Other projects the depth may vary.
Shelf Life
Shelf Life is 12 months from date manufacture. GlassCast should be stored in its original container and out of direct sunlight. It is recommended that the storage temperature should be between 15ºC and 25ºC. Ideally, containers should be opened only immediately prior to use. KEEP THE PACKING TIGHTLY SEALED WHEN NOT IN USE. When stored correctly, the resin and hardener will have a shelf-life of 12 months. Although it may be possible to use the resin and hardener after a longer period, a deterioration in the performance of the resin will occur.
GlassCast is a registered trademark of Easy Composites Ltd
New and improved 'VERSION 2' of our best-selling GlassCast® 3 for super-flat, clear, glossy coatings on penny floors, bartops, counters and furniture. GlassCast® is UV resistant, hard-wearing, self-levelling and recommended for pouring at thicknesses up to 3mm.
Glass Cast 3 epoxy resin can be poured at thicknesses from just 1mm up to 5mm or more but is recommended for coatings between 1mm and 3mm making it perfect for creating a glossy resin coating over furniture as well as creative ideas like bottle tops, crushed glass, pebbles and of course the incredibly popular pennies.
New and Improved 'VERSION 2'
GlassCast 3 has now been updated to a new and improved 'version 2' formula. The new formula delivers even flatter, glossier surfaces with updated UV resistant technology and the added benefit of more environmentally-friendly chemistry.
Users should note that the resin used in the new formulation is particularly thick, especially when cold, and so should always be warmed to 20-25C before mixing for best results. 'Version 2' resin and hardener are not compatible with the original GlassCast 3 formula.
Casting Vs Coating
GlassCast 3 has been developed as a coating resin, not a casting resin. This means that whilst it is specially designed to cure with the best possible finish on the open face, it does not have the total clarity of a clear casting resin, especially when used in thick section.
If the priority for your project is the clearest possible epoxy resin, especially if you're casting thicker sections, then our GlassCast 10 or GlassCast 50 products may be a better choice.
Typical Uses
- Tabletops* (including embedments like bottletops, corks, pebbles, glitter, gravel)
- Bartops* (including crushed glass, beer mats etc.)
- Furniture (including reclaimed wood, driftwood, decoupage etc.)
- Penny floors
This amazing resin is self-levelling and cures to leave a stunning smooth, glossy surface which requires no flatting, polishing or further finishing - a true 'pour and leave' process. If you do need to polish the resin however, to remove scratches or add a soft radiused edge to a cast surface for example, Glass Cast 3 is very easy to polish using simple abrasive paper and polishing compounds to restore a full gloss.
Special additives in the resin help to expel trapped air after mixing meaning that in most circumstances there is no need to pop bubbles with a torch or heat-gun.
The advanced 'UV' resistant formulation of Glass Cast means that it has non-yellowing properties far superior to those conventional epoxies meaning that it will start beautiful and stay beautiful for years to come.
*All epoxy resin systems will be marked by hot objects. To improve the heat resistance of your Glass Cast surface, an elevated temperature post-cure should be undertaken. Even after which, you should avoid placing particularly hot plates or cups on your Glass Cast surface.
GlassCast 3 is ideal as a clear floor resin making it the perfect choice for a resin penny floor or to include other embedments. To date, GlassCast 3 has been successfully used for thousands of penny floor projects in the UK and around the world.
Further Information
Ambient Temperature, Pot-Life and Pour Depth
The GlassCast range of resins, in common with all epoxies, generate heat as part of the curing process. The amount of time the mixed resin can spend in the pot, as well as the maximum depth it can be poured at, will vary depending on the ambient temperature.
For best results, we recommend working in a consistent room temperature of 18-20°C. GlassCast can be used in temperatures from 15 to 25°C but higher temperatures will reduce the pot-life and the maximum pour-depth of the resin significantly, as shown in the table below.
| Ambient Temperature | 15°C (minimum) | 20°C (recommended) | 25°C (maximum) |
|---|---|---|---|
| Maximum Time in Pot (Pot Life) | 45 mins | 30 mins | 22 mins |
| Maximum Pour Depth | 9mm | 6mm | 3mm |
| Initial Cure | 36 hrs | 24 hrs | 18 hrs |
Outdoor Use
Despite the very good advanced 'UV' resistant formulation of our Glass Cast resins, we don't suggest using the GlassCast range of resins for permanent, outdoor applications. This is down to epoxy chemistry meaning that eventually, over time, depending on UV exposure, environmental conditions etc, the resins will always eventually yellow in outdoor conditions. How visible this is depends on factors such as the underlying colour and conditions experienced.
We simply don’t have the longevity of testing to be able to guarantee how long it will be before the resin may start to deteriorate in direct sunlight, adverse weather conditions (freezing in winter, high temps in summer), water pooling or sitting on top, etc. We have got customers who have used it for such applications but the advice would be to either put the outdoor projects away between uses or to have a cover to protect it if no other product (yacht varnish, etc.) would suit your project.
Other GlassCast Versions
GlassCast 3 is the original GlassCast product which has now been renamed to GlassCast 3 having been joined by two new versions; GlassCast 10 and GlassCast 50. The number in the name is the suggested thickness that each product should be used for; GlassCast 3 is recommended for coatings up to 3mm in thickness whereas the new products are recommended for castings up to 10mm and 50mm.
For resin penny floors, counter tops or similar, GlassCast 3 is the right product.
For smaller clear resin castings such as jewellery or resin art (up to 10mm) in thickness, choose GlassCast 10
For infills into knot holes or distressed wood or if you're doing a waney-edge river table then GlassCast 50 is the right choice.
Pigments and Tints
Our Glass Cast range of resins are compatible with many pigments and colouring powders on the market today. This includes epoxy compatible pigment pastes, various pigment powders and translucent tinting pigments. If the pigment manufacturer is not sure if the pigment is epoxy compatible then a small test should give you the answer you need. We stock a range of pigments that have all been tested and work great with all of our Glass Cast resins. You can find our range of pigments at the links below.
Compatibility Information - Dos and Don'ts
Although by no means an exhaustive list, the mould materials, pigments and additives listed below have all been tested and are known to work well with Glass Cast.
Compatible Moulds
- Addition/platinum cureand Condensation cure RTV silicone rubbers*
- Epoxy gelcoat based moulds
- Polypropylene and polyethylene sheet
- Toughened Glass (eg. flat sheet manufacture)
Compatible Moulds
- Epoxy Colour Pigment (for vivid opaque colours)
- Translucent Tinting Pigment (for less vivid opaque colours)
- PearlEx® powder pigments
Compatible Fillers
- All dry filler powders **
- All metal powders (for realistic cold castings)
- Photoluminescent (glow in the dark) powders
*Unlike most water clear resins, Glass Cast can be cast into Condensation/tin cure RTV silicone rubber moulds without any problems.
** Use dry filler powders with caution as in most cases they will reduce the clarity of the Glass Cast, with the more filler used resulting in a greater negative impact on clarity
Key Processing Information
- Ease of Use: Suitable for professional and hobby use (follow SDS advice).
- Odour: Glass Cast is almost odourless.
- Safety Precautions: Wear gloves and goggles and work in a well ventilated area. Always read the SDS before use.
- Ambient Conditions: Can be used from 15 to 30°C although pot-life and cure time will be affected significantly. For best results casting at an ambient of 20-25°C is required.
- Degassing: Not necessary. Simply mix and pour.
- Mix Ratio: Mix 'Resin and 'Hardener' 2:1 by weight. Use digital scales.
- Mixing: Mix thoroughly by hand for at around 3 minutes.
- Pot-Life: 30 minutes. Be sure to pour your casting(s) before this time.
- Shelf Life: Shelf Life is 12 months from date manufacture.
- Exotherm (Over-Heating): Resin will heat-up whilst it cures. Very large batches of mixed resin in a pot will quickly overheat (exotherm) and can smoke/ignite. Never leave mixed resin unattended.
- Self levelling: Typically for the resin to self level to a smooth finish, such as on a grouted penny floor or a table top, a minimum of 2mm layer is needed which is 2kg of resin per square meter.
- Maximum Thickness: Maximum thickness per layer is 15mm. Thicker projects will require multiple pours to a maximum recommended thickness of 25mm.
- Cure Time/Demould: Initial cure time is 24 hours to touch dry. Full hardness achieved over several days, ambient temperature dependent.
- Pigments and Fillers: A wide range of pigments and fillers (including metal powders) can be added to change the appearance of castings.
How much resin will I need?
For solid surfaces, it's easy to calculate the amount of resin you’ll need to cover a given area. For uneven surfaces or those including embedments like pennies, crushed glass or bottle tops; some compensation will be required.
1kg = 1mm over 1sqm
You will require 1 kilo of resin per millimetre of thickness required over a 1 sqm area. Therefore, to calculate how much resin to mix, simply multiply the thickness you require (in millimetres) by the area of your surface (in square metres). Don't forget that porous (absorbent) materials like wood should be sealed before the main pour. Typically for the resin to self level to a smooth finish, such as on a grouted penny floor or a table top, a 2mm layer is needed which is 2kg of resin per square meter. Other projects the depth may vary.
Shelf Life
Shelf Life is 12 months from date manufacture. GlassCast should be stored in its original container and out of direct sunlight. It is recommended that the storage temperature should be between 15ºC and 25ºC. Ideally, containers should be opened only immediately prior to use. KEEP THE PACKING TIGHTLY SEALED WHEN NOT IN USE. When stored correctly, the resin and hardener will have a shelf-life of 12 months. Although it may be possible to use the resin and hardener after a longer period, a deterioration in the performance of the resin will occur.
GlassCast is a registered trademark of Easy Composites Ltd
Specification
Product Data
| Colour | Clear | |
|---|---|---|
| Density | 1.11 | g/cm³ |
| Chemistry / Material | Epoxy | |
| Viscosity | 1200 | mPa.s |
| UV Resistance | Very Good | |
| Brand | GlassCast | |
| Tg Onset (DMA) | 45 | °C |
| Maximum Casting Thickness | 5 | mm |
| Shelf Life | 12 | Months |
Cured Mechanical Properties
| Max Service Temp | 45 | °C |
|---|---|---|
| Hardness | 83 (Hard) | Shore D |
| Flexibility | Hard / Rigid |
Pot Life and Cure Times
| Pot Life (Typical) | 30 | mins |
|---|---|---|
| Initial Cure Time | 24 | Hrs |
General Properties
| Gross Weight | 0.58 | kg |
|---|---|---|
| Brand | GlassCast® |
The amount of resin needed is slightly different depending on if the bottle tops/pennies have been grouted level or not. For Penny Floors we always recommend grouting the floor as it seals the pennies in and helps provide a smoother overall finish to the floor. For other objects such as bottle tops, it may not always be practical to use grout.
If the floor has been grouted, you will need 2kg of resin per square meter coverage. This will give a layer approximately 2mm thick over the bottle tops/pennies.
For un-grouted floors, you will need 3kg of resin per square meter to be covered. Again, this will give a layer approximately 2mm thick over the bottle tops. The extra kilo of resin is to fill all the gaps surrounding the bottle tops.
Grouting between penny's and other embedded items is not necessary and doing so is usually down to personal preference. In terms of which type and brand of grout, any grout is fine although semi-flexible grouts might be preferable if there is any movement in the floor at all.
In all cases, you must ensure that the grout is fully dried before you apply the resin as excess moisture can cause resins to go cloudy and in extreme cases may effect the cure.
You need roughly 2716 one pence coins per square meter of floor. If you go for 2 pence coins instead, 1750 two pence coins are needed for every square metre of area. That is based on them being tightly configured together. Other patterns may need a different amount.
This rather depends on the environment the sculpture would be in because you will need to consider the UV stability of the resin you use. Also, it's not clear from your question whether you need the resin to be thick (like a filler) so that it can fill gaps or whether a normal liquid viscosity would be OK.
I'll assume that this is either an indoor or a semi-shaded environment (not permanent direct sunlight) in which case our XCR Coating Resin is a clear epoxy resin that would be liquid in its normal state, allowing you to direct it into cracks or gaps in the piece. It also has excellent UV stability (for an epoxy resin) so providing you're not looking at permanent direct sunlight then it should be fine.
If you need a thicker consistency then you'll find that anything you add to make the resin thicker will affect its clarity (making it milky) which may or may not be a problem. If you do want to make the resin thick (like a filler) then you could add Fumed Silica which is a white powder that can be added to resins to make them thick and self supporting.
Uncured resins are classed as dangerous goods and would need to be disposed of correctly. For domestic users, usually your local council recycling centre will have a disposal service for such chemicals or containers.
Because cured resins are inert and safe for disposal it's often easiest to mix un-needed or out-of-date resin and hardener together to cure them. Once cured they can be disposed of with general waste.
Unlike other resin systems such as polyester or vinylester, it's very important to get the mix ratios accurate with epoxies. If you get the mix ratio wrong by a small amount (let's say a couple of grams on a small mix) then the resin will still cure but the mechanical properties won't be quite as good as they would have been if the mix ratio had been exactly right. However, if you were to be out by anything more than a few grams then you might find that the resin would not be properly hard when cured and/or may have a tackiness to the finish. This would result in a much weaker repair and needs to be avoided by careful measurements.
No, we wouldn’t suggest Epoxy Resins for lining a fuel tank. In general, epoxies have good resistance to petrol and many of the chemicals and additives found within pump fuel however the ethanol in fuel is known to cause problems over time and so specialist tank lining resins (often novalac vinylester based) should be used instead. One such product is GTS 1750 which is sold by Caswell Europe.
No, this epoxy in common with other epoxies does not attack expanded polystyrene
We have not specifically saught FDA (or similar) approval for this resin system so if you were to make these plates commercially then you would either need to make a plate using this resin system and then have it tested and approved safe for food use or use a different resin system that has specifically been approved for food use. Mixed and cured fully and properly the resulting plastic should be stable and non-toxic but testing would be required to prove this. Regarding being dishwasher safe; a dishwasher is a very harsh environment (abrasive, high temperatures, caustic) and so I think it would be quite hard on any resin system. By all means conduct your own tests but I would strongly recommend that a carbon fibre plate was not marketed as 'dishwasher safe'.
Above the HDT of a resin system it will soften slightly and its mechanical properties will start to fall away however a thermosetting plastic (like epoxy) is NOT a thermoformable plastic so it will not start to flow again such that you could melt it out of your part. It's more likely to become slightly soft and then possible more brittle again before eventually starting to burn if you too the temperature high enough. It sounds to me like you need a thermoformable plastic (aka a thermoplastic) with a relatively low melting point. I'd suggest something like PCL.
An elevated temperature post-cure is not required for parts made with epoxy resin however, post curing parts will improve the mechanical properties of the resin (and therefore the part) and so if you have the means to do it then it's certainly recommended. One major advantage to post-curing epoxy is that you will raise the HDT (heat distortion temperature) of the part meaning that it's less likely to soften or distort in higher temperatures. This can be particularly important for parts like a vehicle panel (i.e. hood/bonnet) which could get very hot in the sun. Without a post-cure there is a good chance that the part would effectively post-cure itself 'in situe' when it's in direct sunlight which can cause the resin to soften, sink and then re-harden. When this happens to a fitted part it's likely to distort the surface finish. A part that had been post-cured prior to installation would not have this problem.
Epoxy resins have very little odour and so it's quite viable to use them indoors (i.e. in your house) without upsetting anyone. The resin is almost completely odourless and the hardener has an amonia smell which doesn't really carry or linger.
In this respect epoxies are very different to polyester and vinylester resin which has a very strong smell and cannot realistically be used indoors. As always, you should still follow safety precautions and ensure adequate ventilation of your work area.
Although generally cured epoxies are non-hazardous, none of the products we have are certified food safe and thus we cannot recommend their use with food products.
We recommend Acetone. The brushes must be cleaned before the resin has cured. If you can’t get hold of acetone it’s also possible to use methylated spirits or neat alcohol.
In really simple terms you can think of 1kg of the Epoxy Resin as being 1L. If you want to be really exact (for example if you want to mix the resin and the hardener by volume and not by weight (which we don't recommend because it's unnecessarily complicated) then the relative density of the resin and the hardener, and the mixed product, can be found on the technical datasheet.
We can send any quantity of resin to Portugal. We would use a TNT Road service. To find the shipping cost for any item, simply add it to your basket and then click the 'Estimate Shipping' button on the basket page. The price will then be shown once you chose your shipping country (Portugal).
The B stage of the cure is when the resin has cured enough to be firm but still tacky. When touching with a gloved finger, the resin should feel tacky but not leave any residue on the glove.
Epoxy is sensitive to low temperatures so we would not attempt to try and cure the resin at very low temperatures such as below 15 °:C. At those temperatures, the cure time will be lengthened considerably.
One of the most significant problems caused by low temperatures (much below 20°C) is that the resin will be considerably thicker which affects its ability to self-degas after pouring.
Also, curing epoxies are hydroscopic so the low temperature environment may well leave the resin vulnerable to absorbing moisture, especially if the environment is relatively damp or high in humidity as can be found in some outdoor workshops or home garages.
As a result, for best results we always recommend working in an environment that is 20°C or above.
We would not recommend this resin for casting over projects such as a penny floor. However, we do have the perfect resin designed just for this application, our GlassCast Clear Epoxy Surface Resin.
Our GlassCast is a remarkable clear epoxy resin developed specifically to provide a beautiful, hard wearing, clear gloss surface for tabletops, bartops, decorative floor effects, furniture and creative projects, including projects such as your coin floor. The finish is very clear and has a high level of UV resistance so should look amazing for years to come.
Any mild soap and detergents will be fine for cleaning GlassCast Resin. Try to avoid strong acids or bases or neat cleaning products as it is possible they may dull the surface finish.
In its in-mixed state (i.e. a bottle of resin and a bottle of hardener) then both parts should be considered toxic and handled appropriately (wear gloves and eye protection, work in a ventilated area, don't ingest etc.). Once the resin and hardener have been correctly mixed and fully cured then the end result is a stable and inert plastic that is not toxic. Being non-toxic is different from being FDA approved or 'food safe' however so we don't suggest making cups or plates but as a general description the cured end result is just a stable plastic material.
The GlassCast range of products are not designed for permanent outdoor use. Although the GlassCast resins have a very high level of UV resistance, the very high levels of UV exposure and the variety of inclement weather and environmental conditions experienced mean that the resin would degrade if permanently used outdoors.
Certainly, we can sell the resin and hardener separately if you need extra of either one one its own. Although not listed on the website we can do this over the phone or you can email us and we can send you an invoice with the correct amounts on it. The hardener for each of the GlassCast products is unique for that product. Using hardeners from other resin systems will cause serious curing issues or it may not cure at all.
All of our epoxy resins (including the GlassCast range) are safe to use on and will NOT dissolve or eat into styrofoam or any other polystyrene based foam.
Although fully cured epoxies are inert and unlikely to pose a hazard, none of the GlassCast range of resins are officially certified food safe and as such we cannot recommend their use where you would need the product to be certified food safe.
As long as the paint has fully dried then we would expect there to be no problems with the GlassCast range being applied over the water based paint.
Hi Nicole, this would slightly depend on how you'll be making up that total depth. Generally speaking, flower preservation castings are done in at least 2 pours often more. At the very least, the first pour is usually used to provide a clear 'shelf' on which to position the flow so that it appears suspended in the final casting.
If you're doing multiple pours on a casting that will be a total of 7cm thick then it will probably mean that no single pour exceeds the 50mm maximum (per pour) for GlassCast 50 (when pouring into a mould) and so you could use GlassCast 50.
If you wanted to do the whole depth (50mm or more) in a single pour however then you would need to choose the GlassCast 50 PLUS. 50 PLUS allows you to cast up to 100mm (into a mould) in a single pour with a lower risk of the resin over-heating during its cure. This makes it great for big/deep castings and would make it a good choice for 50-70mm flower preservations but the trade off is that it does mean that it takes a lot longer to cure; around 7 days compared to 48hrs for GlassCast 50.
Yes, you can do an oven post cure of the coasters. The reason a post cure is helpful is that epoxy resins like these have a very long tail end of the cure when cured only room temperature. This means that over several weeks, the properties of the resin - including heat resistance - will develop as the resin cures fully. Typically after 7 days most of the resin is cured, however the post cure process will improve on that further as well as speeding up the process.
To do the post cure, you need access to an oven which has a reasonably accurate temperature control. The actual post cure cycle is to initially cure the resin for 24 hours at room temperature, followed by curing in the oven at 60° for 16 hours. Once allowed to cool to room temperature, the coasters will then be ready for use. Doing this post cure will give a heat distortion temperature of around 55 - 58°C which means you even less likely to get rings or marks from hot cups or plates.
If you are unable to get access to an oven for post curing, the resin does still perform well after allowing the resin a full 7 day cure at room temperature. Following a full 7 day cure, a very subtle ring may still be left by leaving an extremely hot cup to stand on the surface of the resin, this mark is slight and can usually only be seen if the surface reflection is inspected closely. Customers who use this resin for drinks coasters report that the marking is almost un-noticeable in practical applications and continue to use GlassCast commercially for coaster applications.
Yes, GlassCast can be safely poured onto polystyrene without any risk of the polystyrene being dissolved.
Yes the resin can be drilled into/through without any difficulties, although it's worth pointing out that it doesn't hold a thread very well, in case that's what you are intending to do.
If you have some GlassCast left over from another project, then yes, there is no reason why you couldn’t brush apply it onto the worktop to waterproof it; however, in a brush coat, it might be very slow curing and you’d need to be sure that the temperature was kept up throughout to ensure it fully cured.
If you were buying an epoxy resin specifically for the project, I would suggest the XCR coating resin as a better option as it is faster curing (within a few hours) and still clear in thin coats. Either option will gain the same end result but the GlassCast3 will take much longer to cure.
We don’t specifically measure it but we do specify residual chlorine content (in the form of hydrolysable chlorine) in our raw epoxy materials (note, this is not free “pure” chlorine, which is not present). These are typically 300-500ppm in quantity.
No, not specifically although it does depend on what your substrate (the material you're pouring the GlassCast onto) is made from and what condition it's in.
For non-porous surfaces, like a laminate worktop, we wouldn't suggest any priming, just key the surface with abrasive paper to allow the resin to bond properly. Same with other non-porous surfaces like metal. For plastics, it's worth checking whether the resin will be able to bond properly to the plastic, some plastics are easy to bond to, others are almost impossible.
For porous surfaces like wood or MDF then we recommend using an application of GlassCast (mixed as normal with its hardener) as a primer/sealer coat. This will soak into the wood and stop it from breathing. Once cured, the surface should be keyed (with abrasive paper) and then you're ready to go, GlassCast can be poured onto this surface without fear of the wood/MDF swelling or breathing out air bubbles into the thicker resin coating.
As long as you reseal the bottles promptly after use and store them in accordance with the datasheet, then we would expect you to still achieve the full 12 months shelf life.
This rather depends on the type and condition of the varnish that's been used. If the varnish feels soft or greasy at all then it might not make a suitable substrate for the resin, in which case you would need to scrape or sand it away. If the varnish feels dry and hard then it's likely to be fine but it would certainly need 'keying' with coarse abrasive paper to provide a suitable surface for the GlassCast to bond to. If in doubt, it might be worth conducting a small test to check how well the GlassCast bonds to the keyed varnish.
...1mm or 2mm in diameter. Would the resin successfully fill all of the holes and would I still achieve a smooth surface ?This one is a bit difficult to say without testing or experimenting.
Due to the small diameter of the holes and depending how quickly the resin flows, you may find a significant proportion of the holes trap air when covered in the resin. You can help eliminate this by initially brushing a thin coat of resin over the sheet taking care to stipple into the holes to fill them with resin. You can also use cocktail sticks to help pop any stubborn trapped bubbles of air at this stage. You are then ready to do the main pour of resin over the top. If you use a spreader to help level out the resin, then you should still get a very smooth finish.
...would i be able to sand and use a satin lacquer as a final coat or will it fail?
Lacquers and clear coats are quite soft compared to the GlassCast epoxy and so it would be a shame to use such a relatively soft finish as the bartop surface. However, it's actually perfectly achievable to lightly sand the GlassCast 3 finish using a fine abrasive paper (such as an 800 or 1000 grit) to give the resin a satin finish. The finer the paper, the smoother and less matte the finish will become; you can choose how far you go according to how satin/glossy the customer wants. If you take a look at the video we did for the GlassCast 50 river table video, you can see the appearance of 1200 abrasive paper before we switch to polishing compound - this should give you a good idea of what you could achieve on the GlassCast 3.
When looking to finish the surface off to a high gloss, we would recommend using our NW1 White Super Cutting Compound due to its ease of use and great end results either by hand or by polishing machine.
To thicken the resin to a consistency suitable for vertical application would need the addition of Fumed Silica Thixotropic Powder. However a side effect of the powder is it makes the resin white (or at least milky) in colour which ruins the effect if clarity is desired. Also - it should go without saying - once you thicken a resin to the point where it can be applied on vertical surfaces you of course lose the 'self-levelling' property that makes the resin flat and glossy on a normal horizontal surface.
For vertical panels, often a simpler solution to get a good finish is to do the resin work on a flat surface then, once cured, install the panel vertically.
The ideal material for cleaning mixing sticks and buckets, before the resin hardens is Acetone. Here's a link to Acetone on our site. You can also use methylated spirits or white spirits.
There are no grip improving additives that maintain the gloss and clarity of the resin. A lot of grip enhancers work by adding particles to roughen the surface which would loose the gloss finish and reduce clarity. It's worth remembering that GlassCast, when wet, is not significantly more slippy than other gloss finish flooring surfaces (such as marble) and as such taking reasonable care walking on a wet surface could be fine in many applications.
I want to use GlassCast on a bathroom floor with a slight slope so any excess water would flow to the drain in the corner. How would that work - would I be able to apply even coat on the surface or would GlassCast flow to the lowest area?
GlassCast is self levelling which means it will try and flow to the lowest point of the room and level out, this means that it's very difficult to use the product on a sloped floor such as a shower or wet-room. You may be able to build up thin brush-applied coats but - because it won't be flowing and self-levelling as it normally would - you would need to flat and polish the brushed finish in order to achieve the normal perfectly flat gloss finish.
When doing multiple pours, we recommend you limit the casting depth to around 25mm. This is because, over this thickness, the clarity begins to suffer and the resin will begin to appear slightly cloudier. Where pigments and tints are being used, you can sometimes hide the loss of clarity for thicker casts, although we recommend doing a test piece to see if the cosmetic effect is acceptable for your desired end use.
Yes, I would certainly say so. I do have some experience of the Envirotex Lite product and I would say that anything you can do with that you would be able to do with GlassCast. There are sure to be some differences between them in terms of pot-life and cure time so it depends what you need in this regard but certainly have a go with GlassCast and I think you'll get on well.
We do have some other resins that are used by customers coating fishing lures, one of these being our XCR Coating Resin which you might also want to consider (particularly if you want something that will cure faster than the GlassCast).
Newspapers and most papers can be covered and sealed in with the resin. However, you may need to seal the paper itself first. The reason is because some lower grade and thinner papers will go translucent when saturated with a liquid, including resin. I would recommend doing a small test piece to check. If you need to seal the paper, then the best method is to brush a thin coat of PVA wood glue over the paper and allow to dry. The PVA glue will cure clear and seal the paper from the resin meaning you can coat the project and get the desired effect.
Regarding general suitability of the resin for a dining table, GlassCast 3 is a hard wearing surface and so not unsuitable for this purpose but do bear in mind that hot objects (such as hot plates) would mark the surface and so you would need to use mats to protect the resin from anything hot.
The best kind of materials to go for are generally inert plastics such aspolypropylene sheet , polyethylene and PTFE. This is because epoxy resin does not naturally stick to these plastics and as such no release agent is needed.
Yes, GlassCast can be machined and cut using a variety of powertools and equipment - including a router - no problem. We would recommend an initial cure period of 48 hours to allow sufficient hardening prior to any machining work.
The scratches left from keying the surface of the resin will be filled in with the fresh layer of resin and, as long as the surface was properly cleaned, will be invisible once the new layer of resin cures.
We would not envisage any problems with GlassCast ® being used on a typical Conservatory floor as the temperature is unlikely to get above the HDT of 45 °C. If the floor surface temperature did reach in excess of 45-50°C it is possible it may soften and therefore potentially be damaged - although realistically the floor would be too hot to walk on at this point.
One point to note during pouring of GlassCast is to pay special attention to ensuring that the temperature of the floor is as close to, or above, 20°C as possible throughout the cure. Some conservatory's are not insulated to the same standard as the main house and can be considerably cooler than expected.
Yes, from the testing that we've done it does seem possible to use acrylic (spray) paints to colour GlassCast although our suggested method for colouring GlassCast would still be to use our fully compatible CULR pigments and SHIMR powders.
If you do want to use a spray paint to pigment GlassCast then you should test a small area/amount first just to confirm that it works with your actual paint type and quantity.
Although GlassCast has very good UV resistance, it is still affected by UV light to some extent and as such is not recommended for outdoor use due to continuous high levels of UV exposure and also continuous exposure to moisture and adverse weather conditions.
However, if the table is brought indoors after use, then the reduced UV exposure would considerably improve the lifespan before yellowing may begin to occur.
The best product would definitely be this one, the GlassCast 3. This resin will provide a really smooth, shiny, hard-wearing finish to the tiles. One important thing you need to be aware of would be the heat stability of any epoxy, including this one, would not really make it suitable for HOT drinks as they could leave a small mark in the resin.
This is however true of all resin coatings, even those which claim to be high temperature suitable; they will - unfortunately - all still mark to some extent.
Although epoxies in general are inert once fully cured, GlassCast has not been tested or certified as food safe and as such we cannot recommend its use in situations where a food safe resin is needed.
If food-safe certification is critical to what you're doing then it might be worth considering our ArtResin clear epoxy resin which has been tested and approved for incidental (example serving from, not storing in) food contact.
Yes you can pour GlassCast over a print. However to prevent the paper soaking up the resin and appearing translucent, you need to first seal the paper images. This can be done with a thin layer of PVA glue. Take care to seal both sides and the edges. Once the PVA is dry, you can overcoat the paper prints in GlassCast and the results should look great.
GlassCast would be the right resin for this application if the finished item needed a tough, hard wearing surface (like a coffee table, counter, floor etc.) but if the end product is a piece of wall-mounted art for example then an even better resin choice would be ArtResin.
The best kind of materials to go for are generally inert plastics such as polypropylene, polyethylene, nylon and PTFE. This is because they do not naturally stick to epoxy resin and as such no release agent is needed
Yes... and no. GlassCast is capable of resurfacing a worktop in a kitchen no problem. With proper preparation, the end result should look amazing however it's important to consider the limitations of a resin coated work surface.
Generally kitchen work tops are subject to high levels of wear and tear which will in time may scratch and dull the surface finish of the GlassCast surface but this sort of wear and tear can usually be polished out to restore the finish.
The main consideration for a resin coated kitchen worktop is temperature, especially hot pans/plates etc. which would certainly mark the surface if they're placed directly onto it. As a result, you will need to use pot stands/trivets to prevent excess heat being conducted into the resin.
GlassCast is a great product to fill cracks and knots in wood as well as filling gaps between 'waney edge' reclaimed timbers, including colouring the resins with pigments.
Other than the practicality of reduced access during the application, there is no reason why in theory you could not use GlassCast on a staircase. Depending on the shape of the stair edge, you would need to build barriers to keep the resin contained during the pour. Once cured, the edge can be sanded and shaped as desired.
Be aware that GlassCast (and all polished smooth surfaces) can be very slippy, especially in socks or when wet which could be quite hazardous on a flight of stairs. Finally, staircases can be particularly high-traffic areas because they concentrate all footfall into a small area and therefore the accumulation of scratches and general wear on the surface could occur faster on stair treads.
Due to the low VOC content of the resin and its relatively long curing time, there is negligible shrinkage when poured up to its maximum recommended casting thickness (15mm).
We would not expect the substrate to warp as the resin cures, this is because the slower curing time means there is less heat build up so less likely to induce tension across the material which may cause warping. However, you can sometimes see warping of a flat sheet substrate not because of shrinkage of the resin but actually because of expansion and contraction of the substrate (for example, wood will do this depending on its moisture content).
Although GlassCast has very good UV resistance, it is still affected by UV light to some extent and as such is not recommended for outdoor use due to continuous high levels of UV exposure and also continuous exposure to moisture and adverse weather conditions.
Instead we would suggest a specialist 'driveway' resin designed for outdoor although we don't stock this type of resin ourselves.
Yes, in most cases the floor should be able to be repaired.
For most cases of daily wear & tear, scratches and occasional damage, using a polishing compound such as our NW1 White Super Cutting Compound is usually enough to remove the damage and bring the surface back to a high gloss
Deeper scratches and marks may need the use of wet and dry sandpaper to remove the damage, then working back through the grits to a smooth 1200 grit before polishing back to a gloss again.
In extreme cases you may need to re-coat in resin. To do this you would need to 'key' the whole surface of the floor ready for a fresh coat of resin. The sanded surface is essential to allow the new resin to bond properly to the existing surface; don't worry about visible scratches, they will disappear when the new resin is applied.
For very large floor areas we would recommend limiting the maximum amount mixed in one go to 5kg batches. That way you can sensibly weigh each part accurately and the volume is not too large to be able to mix by hand thoroughly. Mix each batch thoroughly then pour it into a second larger bucket before mixing again and pouring on the floor. You need to work quickly and pour from the second bucket as soon as possible to avoid the resin exotherming in the bucket.
When using this method on larger floors, the long pot-life means you should have enough time to mix up the resin into the large bucket and pour it with plenty of time left. As you are mixing several batches and pouring in one session, there will be no issues of joins between resin batches.
Once all wax and silicone floor sealants have been stripped off, we see no reason why GlassCast® can't be used on a granite floor, however, it's always possible you may encounter an incompatibility so it's always very important to make up a test-tile using the exact floor material, (on a hidden place if no spare tiles available) and then pouring the GlassCast on the sample. You can then check every part of the process before starting the main project - this is very important to ensure there are no unforseen problems with compatibility or your process.
Due to its low viscosity (runny) nature, it would be impractical to cast GlassCast onto vertical surfaces such as walls, so we would not recommend its use in such circumstances.
However, a solution would be to make flat panels on a flat surface using GlassCast and once cured, the finished panels can be mounted on a vertical surface.
As you have suggested, the only realistic method to produce a splashback or wall hanging display of this type is to produce it on a flat surface then mount it once dry. Good quality marine grade ply or similar should be suitable to lay the bottle tops/coins on. You can build a temporary dam around the outside edge for resin pouring them remove it to shape and finish the final product.
In general, once fully cured, water splashes should not cause any problems with the resin. The biggest concern is heat when being used as a kitchen splash back. GlassCast does not have a very high heat resistance with it being designed to operate permanently at up to 45 °C which means high levels of direct heat could damage the surface. There is a risk that hot oil or food splatter may leave a slight surface mark, however this should be able to be polished out.
In theory you do not need to bond down the pennies because the resin will flow under the pennies and bond them down at the same time. The coins are heavy enough to stay in place and will not float as long as you are careful pouring the resin. However in practice a lot of people like to bond them down to create patterns, ensure alignment and so they don't move while they work their way around the floor.
Bottle tops are best bonded into place, as being lighter, they are more prone to floating and moving around. A technique that can work quite well with bottle tops is to pour a very thin layer of mixed resin onto the surface, then manually place the bottle tops into the resin. The working time will be around 30-40 minutes to place the bottle tops onto the surface, so this method is more suited for smaller projects or you could mix and spread small batches at a time, ensuring you're staying within the gel time of each resin application.
Alternatively many DIY adhesives are likely to be suitable and may be easier to work with. In rare circumstance you may encounter an incompatibility so we would always suggest making up a test tile using the exact floor, pennies (etc.) and adhesive and then pouring the GlassCast on the sample. You can then check every part of the process before starting the main project - this is very important to ensure there are no unforseen problems with compatibility or your process.
GlassCast will bond fine to ceramic and porcelain tiles. The surface will need to be thoroughly cleaned, degreased and be free of loose debris and dirt to achieve the best bond.
Where tiled floors are not perfectly even, as long as the lips and tile edges are not too high, the resin will flow over the edge and the whole surface. Use a spreader to help initially spread the resin over the floor, then leave it to settle down and self-level.
Yes our GlassCast will work with glitter type materials. Without bonding it down, the glitter could potentially move around and float in the resin. A simple solution would be to use a thin layer of PVA wood glue as an adhesive or even a thin layer of the GlassCast itself. Paint on the glue (or resin), sprinkle on the glitter and allow to dry/cure. You would then shake or lightly brush off the loose glitter before doing the main pour of GlassCast.
For general purpose day to day cleaning, we recommend a mild soap in warm water to remove daily dirt and grime. We would avoid the use of strong chemicals or solvents as they may degrade the surface finish of the resin. You should certainly avoid any abrasive cleaners (like Cif) because these will certainly matte-off the glossy finish.
Yes, as long as the surface has been given a good key with sandpaper and a thorough clean then there should be no problem applying GlassCast over a varnished surface.
The compatibility and suitability of one material to another varies significantly and so with an unknown/untested material like an oil-based gloss paint it would be impossible to say without conducting a small trial first.
It would definitely be very important that the paint was fully cured (no softness or smell remaining) and as with any glossy surface you would need to 'key' the surface all over with an abrasive paper to allow the resin to bond mechanically to the paint surface.
Yes, GlassCast is fine over both wet and electric under floor heating systems. Most systems reach a maximum temperature of around 40°:C which is within the heat distortion temperature of the resin. However, it would be very important to not run the floor hotter than 40°C because it could soften the resin making it easier to mark.
A floor made with GlassCast will potentially be slippery when wet, but no more so than any other typical polished floor surface such as polished concrete or polished tiles. In all cases we recommend taking care on the wet floor to avoid any accidents.
Uncured or tacky patches of GlassCast are normally as a result of only a handful of occurrences, before suggesting a solution, it is important to identify the cause.
- Epoxy resin needs to remain at around 20°C + for the entire curing time. If the temperature is much below 20°C, it will stall the cure and could give rise to potential problems so keep the room nice and warm before and during pouring the resin. Worktops tend to be much colder than you imagine so I would recommend warming up the cabin before you pour the resin to make sure the worktop is up to temperature and also keep your resins in doors before use so they're at room temperature before mixing. 20°C is 68°F.
- The resin has a very specific mix ratio of 2:1 by weight. This means that you need to be accurate with your mix, and in essence for every 200g of resin, you need to mix in 100g of hardener – this does need to be weighed and not worked out by volume. If you're pouring the full contents of the containers out and mixing them together, that won’t be an issue as we weigh the two parts very accurately here; however, if you are only mixing some of the contents of the containers, you need to measure out the resin and hardener by weight.
- Make sure you thoroughly mix the resin, spend a good few minutes mixing, ensuring that you scrape the sides, bottom and corners of your mixing bucket. Any unmixed resin simply won't cure so you need to be through and spend time ensuring it is fully mixed. We often suggest that you don't try and scrape the last dregs out of the mixing bucket because this tends to be where any unmixed resin is and if unmixed resin ends up on the floor, it won’t cure.
- Finally and slightly related to the first point, if the floor you're working on is cold or damp in some patches or there is a high moisture content in the substrate (i.e. a stone floor which isn't thoroughly dried), the moisture and cooler temperatures can cause curing issues.
With all of these points covered, you shouldn't have any problems at all.
Almost certainly the problem you've had will be down to one of the above; if this is the case, there is very little that can be done to cure the resin now and I wouldn't recommend pouring new resin over the top of it whilst it is tacky. Instead, you need to remove any tacky patches back to hard, fully cured resin. If it is still very liquid, you could wipe up or scrape out everything that you're able to before cleaning the remnants with acetone. Once you're back to fully cured resin; you can abrade the surface with a 120-240grit abrasive sand paper.
Once sanded, remove any dust from sanding and when filled with new resin, it will cure seamlessly, filling all of the scratches left by the sandpaper to give a perfect finish between the old and new with no noticeable join line.
I don't know how deep the areas with problems are but you may need to flood coat the whole surface with a very thin layer to ensure a perfect, level surface finish.
Although you can in theory cast GlassCast® to a thickness exceeding 40mm by using the method of multiple pours, we would not recommend going thicker than 25mm in most cases. This is because the thicker you pour the resin, the more the clarity of the resin reduces. Up to around 25mm, the change is not significant but the thicker you go, the more noticable the reduction in clarity. Detailed embedments that were crystal clear at 10mm thickness will have fine detail beginning to blur as the thickness goes over 25mm.
GlassCast has very good clarity in castings up to around 25mm thick. When doing multiple pours to achieve this thickness, in most cases there is no noticeable line or impact on clarity from the join between the pours.
To ensure any impact on clarity is minimised, we recommend doing the second pour when the first pour is part cured and is firm but still tacky to the touch. At this stage the GlassCast will fully cross link and bond with the layer beneath, meaning there will unlikely be any impact on clarity at the join line.
If you need to leave it longer before doing the second pour, allow the resin to fully cure, then key the surface with 240 grit sandpaper followed by a thorough de-grease and clean. The surface is then ready for the second pour of resin, The rough key will ensure the second pour bonds as best it can to the first layer.
If you need to overcoat some existing GlassCast, you can do so fairly easily. As the resin has cured, you will need to key the surface with sand paper to ensure the fresh resin can achieve a good bond. Once sanded, ensure the surface is fully cleaned and de-greased before pouring the next layer of resin.
GlassCast, although very tough for a resin, is not really suitable for high traffic areas without accepting the fact that it will become scratched and need regular maintenance to keep the initial high gloss smooth finish. As such it is more suitable for use in a domestic environment where the traffic flow and wear is likely to be at a much lower level. Alcohol being spilled on the cured resin would not be a problem (providing it is incidental and periodically cleaned off).
For sealing the surface of a tiled shower room floor we would recommend a specialist shower tile/floor sealer rather than GlassCast® because those products have been developed specifically for that application and environment. GlassCast is fine for occasional/incidental water contact (like a bathroom floor) but was not developed or tested for regular/long term water contact such as a shower floor.
Due to the practicalities of mixing large quantities of the resin and the absolute essential need for very thoroughly combining the resin and hardener to ensure a proper cure, we would not recommend mixing such large batch sizes in one go. We would suggest breaking it down into manageable 5kg batch sizes then thoroughly mixing each batch before moving onto the next. Mixed batches can be transferred into a larger container and then mixed again, allowing you to pour from one single container but we would not suggest attempting to weigh and mix batches larger than about 5kg in one go.
Yes, cured GlassCast ® can be drilled and machined. Allow a minimum of 48 hours cure time before beginning. We recommend starting with a small drill bit then carefully opening out the hole size to the desired diameter, taking care not to apply too much pressure or build up too much heat.
One of the good features of GlassCast 3 is its naturally smooth and glossy finish on curing. This means you can, in nearly all cases, leave the GlassCast in its natural cured finish for a very nice overall finish. However, if required for any reason (such as a repair) it will sand and polish very well using abrasive papers and polishing compound.
Generally we tend to say as a rule of thumb, 1kg of resin over an area of 1 sqm will be 1mm thick. Typical coverage over 3D objects is 2-3mm which equates to 2-3kg per sqm.
Plasticine makes an ideal material to block up small gaps around pipes as it is flexible yet firm enough to be self supporting and also will not stick to the resin as it cures. This means that afterwards, the Plasticine can be easily removed and any remaining gap neatly dressed off with pipe collars.
Yes... and no! GlassCast is capable of being used on a worktop in a kitchen no problem. With proper preparation, the repair should look good, however it's important to consider the limitations of a resin coated work surface.
Generally kitchen work tops are subject to high levels of wear and tear which will in time may scratch and dull the surface finish of the GlassCast surface but this sort of wear and tear can usually be polished out to restore the finish.
The main consideration for a resin coated kitchen worktop is temperature, especially hot pans/plates etc. which would certainly mark the surface if they're placed directly onto it. As a result, you will need to use pot stands/trivets to prevent excess heat being conducted into the resin.
No, we would not recommend GlassCast for this application for a number of reasons. GlassCast is not intended to be used in very thick sections (such as cast into a vase) and would look cloudy at this thickness and would also be likely to over-heat during cure if you attempted to use it at this thickness. It's also recommended to use flexible resins when simulating water in an artificial flower arrangement to avoid the risk of cracking a glass vase if the temperature changes and the resin expands slightly. Unfortunately, we do not have a suitable water simulation resin in our range at the moment.
Can i paint a thin layer of glass resin and once set paint another thin coat and build the layers?
To seal pennies on a penny wall (rather than a penny floor) it would be better to use our XCR Epoxy Coating Resin which is designed to be applied in a thin film. You should be aware that on a vertical surface like a wall you will not be able to achieve a self-levelling effect and so the surface will be more like a thin shiny coating over the texture of the pennies, rather than a thick, flat glossy finish like you can achieve on a flat floor. However, using the XCR resin you should still be able achieve a really interesting result.
GlassCast 3 can be poured over GlassCast 10 and 50 once it has achieved the B stage cure and is firm but still tacky. No surface preparation is needed at this point and the mixed GlassCast 3 can be simply poured straight over the project.
Both parts of the material (the resin and the hardener) are in bottles which are much bigger than they really need to be but that is because we have to use special UN approved bottles and packaging for resins and other Dangerous Goods and there are only so many sizes of these available. The weight on the bottle applies to the weight of the contents and the combined weight of the resin (Part A) and the hardener (Part B) equal the total kit weight.
Yes, GlassCast 3 is perfect for us on OSB in this way. You'll need to do a 'sealing coat' of resin first before you do the main pour. Otherwise air in the OSB will come out during the cure and you'll end up with bubbles in the resin. So, mix a small batch of GlassCast 3, apply it all over the surface of the board and allow it to cure. Then 'knock it back' with some abrasive paper (P120 for example) and scuff the whole surface to provide a key. Don't worry, the scratches will dissappear when the main pour is done. After that, you mix up a bigger batch of GlassCast 3 (go for 2kg per square metre of OSB), mix and apply according to instructions and leave to cure; hey presto!
For your calculation, I'd suggest purchasing 3kg of GlassCast 3 per square metre of OSB. This allows 1kg to soak in and 2kg for the thick, self levelling coating.
If you want to create a thick, rigid coating such as a table top or similar surface with the canvas underneath then the GlassCast would make a very good resin for this purpose.
For more conventional artwork coating applications (such as simply adding a beautiful glossy coating to a canvas artwork) then ArtResin is the recommended product due to its slight flexibility, unsurpassed clarity and UV stability.
When Using GlassCast, there are a number of options for moulds. You can use off the shelf silicone moulds from art and craft stores, rigid plastic moulds or make your own silicone mould.
If you want to make your own mould, then we would recommend you use our Addition Cure Silicone Rubber which will make a high quality silicone mould
In terms of releasing the finished GlassCast from the mould, when using silicone, the property of silicone is such that it will not stick to the resin and as such no release agent is necessary. For other materials, we would recommend the use of a high quality release agent such as our Easy-Lease Chemical Release Agent which will give a great release and also preserve the gloss finish of the mould itself.
This resin would work fine for small pieces or small jewels up to 15mm in thickness. You can use multiple pours for larger items with this resin but you may find our Water Clear Polyester Casting Resin a better product for larger castings as it is a dedicated Water Clear casting resin for thicker castings up to 75mm per layer.
Yes, certainly! GlassCast is a superb product for encapsulating bottle tops, pennies and other artistic objects for floors, table tops, coasters and other similar projects.
Yes, GlassCast® can be used to create a resin edge on a table like this but it's worth considering that if you simply allow the resin to run down at the edges then it will only be a thin and relatively inconsistent coating on the edges. Also, if you're intending to create a smooth, flat coating over bottletops then you probably need to be thinking about shuttering the edges of the table with some sort of barrier or upstands to contain a deeper coating of resin on the top of the table, allowing the bottletops to be completely covered. In doing so, you will actually prevent the resin from running off the edges of the table and glossing the edges.
To tackle both of these things at the same time you could use strips of plastic that resin won't stick to (like polypropylene for example) to create a barrier all the way round the edge of the tabletop but leaving a gap between the edge of the tabletop and the barrier (of, for example, 3mm). You would then flood-coat the surface and allow the resin to drain off and fill the gap between the table edge and the barrier. Once cured, you could then remove the barrier and you'll be left with a thick glossy edge, as well as top to the table. You would likely need to do some finishing work on the edge of the table (abrasive paper and polishing compound) to really finesse it but this is quickly and easily done.
GlassCast could be marked by hot objects such as very hot drinks (think fresh black coffee, no saucer) and would certainly be marked by a hot saucepans (as any resin surface would). To improve the heat resistance of your GlassCast surface, an elevated temperature post-cure should be undertaken.
Even with the post-cure we would recommend being careful about placing down hot cups and items, ideally allowing them to cool first or use a saucer or place-mat just to be on the safe side.
GlassCast® would be a great table top resin, especially if you wish to encapsulate details on the table surface. It is highly glossy fairly hard wearing and scratch resistant. Should you get any scratches, you can polish them out in most cases.
GlassCast® has a very high level of clarity so would look very good when encapsulating items on top of a glass surface.
GlassCast® offers just about the best UV stability of any epoxy on the market however, that said, it is really intended for indoor use and the testing and confidence we have in it is in relation to a typical indoor environment. If the outdoor application you have in mind is very sensitive to colour and will be exposing the cured resin to direct sunlight in the long term or permanently then there is a possibility of some discolouration. For less critical or sensitive applications or where the UV exposure will be more occasional than permanent then the resin should be fine.
Acetone should NOT be used as a thinner for GlassCast but when used as intended, there should be no reason or need to 'thin' out the resin.
GlassCast resin has been very carefully developed to achieve an excellent surface finish when poured and left to cure, which most epoxies do not do. Addition of any additives or solvents to GlassCast is likely to upset this careful balance.
We would recommend a simple post cure, after 24 hours curing at room temperature, place the item in an oven or environment at a temperature of 60°C for 6 hours to improve heat resistance. Allow the resin to cool fully before putting into service.
Although the post cure did improve heat resistance, in testing after the post cure, hot cups still left a light mark on the resin. As a result, we would still recommend using coasters or place mats with hot cups and plates even with a post cured surface.
Yes you can do that. GlassCast® is easily sanded and highly polishable so you will be easily able to sand it level and polish it back up to a high gloss afterwards.
If the material you will be pouring GlassCast over is porous such as wood, chipboard, MDF or ceramic materials then it is highly recommended to apply a sealing coat before the main pour. Doing so will improve the flatness of the final surface and help to eliminate warping of the substrate after cure.
Mix around 500g of GlassCast per square metre of surface you need to seal. Don’t worry if most of the resin seems to be absorbed by he substrate; this is normal for the sealing coat.
Allow the ‘sealing coat’ to cure before proceeding to the next layer. Depending on the ambient temperature, this is likely to take around 24 - 48hrs.
Full details of the sealing process and further tips for the use of GlassCast® can be found in the detailed Technical Data Sheet.
GlassCast® is highly self degassing which means in most cases there will be few, if any, bubbles to remove. However, if you do have some stubborn bubbles, gently waft a heat gun or hair dryer over the area (taking care not to excessively heat one spot) and the bubbles will rise and pop on the surface solving the problem.
This would really depend on the HDT (heat distortion temperature) of the polyurethane clearcoat. Most clearcoats (lacquers) would not have an HDT that is noticeably higher than the GlassCast. However, if you found a polyurethane with a higher HDT (ideally in excess of possible coffee-cup temperatures) then coating this over the GlassCast could help to improve the temperature mark resistance of the coating.
Remember that if you do accidentally mark a GlassCast surface, the resin polishes really well and so heat-rings and similar can be easily removed.
Yes, you can make a floor from GlassCast in a kitchen or bathroom. As both environments can be quite humid (and also subject to spillages in use), it's essential to ensure the room is fully dried out before applying the resin and, most importantly, allow the resin to *fully* cure before using it again, especially if it's likely to get wet. Even in a warm environment, you should leave the floor for at least several days before use.
ASK YOUR OWN QUESTION
Customer Product Reviews for GlassCast 3 Clear Epoxy Coating Resin
Since our beginning in June 2020, we have been using Glasscast Resin 3. It really can't be beaten on price, quality and delivery!
My favourite Resin to use to create my art -Glass Cast 3!
I use this resin for artwork and usable artwork (trays, coasters etc) and nothing else compares. The work time is spot on, and the versatility in different temperatures and humidities is fantastic; I’ve not had any problems with amine blush with this resin but have with others in the same conditions. My only wish is for Glasscast to bring out a heat resistant top coat!
I love this resin. It's The sixth brand I have tried and I'm now firmly sticking with it. The glasscast 3 gave a totally crystal clear, stunning high gloss, almost mirror finish. It self levelled perfectly despite My slap dash approach to not levelling properly. I clear coated My paintings in one coat and it really does look like crystal clear glass. Best resin I've used and would highly recommend to anyone.
Can’t tell you how pleased I am with my penny floor, great tutorial and very helpful technical support to all my questions over the phone, I was so apprehensive about getting the resin right, as I’ve never done a project like this before, but I mixed and poured the resin today and it looks beautiful like a sheet of glass, thanks for all your help
It's great resin. But please beware, if you measure by weight the V2 has a different ratio of 100:43 - NOT 100:45 like the original version.
Good product and service
Easy to use, great finish
Outstanding customer service, so helpful and gave me all the advice I needed to complete my bottle top bar top. Following their advice the results were fantastic. Highly recommend the product & the team 😊
Brilliant product. Video tutorial shows exactly how to achieve the result you want. After sales online chat very helpful on extra advise needed while using the resin very prompt with answering any question. My wife made a stunning island with breakfast bar using the jaded copper effect, for someone with no DIY experience it turned out amazing and standing proud in our kitchen! She used GlassCast3 and cant wait for her next project.
I was using another epoxy resin for kitchen worktop but needed some more. Delivery was next day as promised. unlike others coming from the EU even though its a UK site. Initially I was concerned as this product viscosity is greater. However the finish is far superior. Thank you easy composites
No problems with this product, it hardens clear as glass.
Great product, was easy to use and the finish very good.
i made a yew resin dinning tabal useing glasscast 50 for the deep pour and glasscast 3 for the finish it worked very well and the results where a stunning peace of art i would recomend this combation for a high gloss finish
GlassCast 3 is so versatile, from coating paintings to creating artwork. The viscosity can be controlled which makes it very adaptable.
I use a combination of GlassCast 50 for the deep pours I do and GlassCast 3 for finishing and flood coats. I love the products and the service I receive from the team. A score of 5 is not high enough for the quality and service you get from the team!
I started using Glass Cart resin after I found the other resins I had tried to lack hardness. I bought Glass Cast Resin following a recommendation from another resin Artist and I have been blown away at how strong the resin is once cured. I have tried the Glass Cast Resin 3 and 10 and I am a huge fan of them both. I would definitely recommend the product.
Great product perfect viscosity for coating, with crystal clear high gloss finish. Highly recommend.
I took the plunge and changed resin company. GlassCast grabbed my attention from the start. Made it really easy to understand which type of resin to use for what job. and I've never looked back! Clear, easy to work with. Minimal bubbles and cures with perfection.
I now use Glasscast for all my resin projects. After trying a few different resins, on the quest for the best one, Glasscast is way above any others. I have used Glasscast 3 for my thinner pours like geodes, and top coating. The shine and glossiness is second to none. I also use Glasscast 10 for my castings of smaller pieces. I won't be using any other brand now that I have found "the one".
I can always guarantee the standard when using GlassCast, it’s the resin I recommend wholeheartedly and I wouldn’t use any other for my business. Resin art and product creation is vastly growing in popularity, so in an increasingly competitive market, I need that confidence in the quality of materials that I’m using. GlassCast 3 is perfect for my Artworks and home decor pieces, and GlassCast 50 never fails me when it comes to casting and preservation products. My only complaint would be that I’m constantly running out, but thankfully they offer speedy delivery also!
I work with this resin daily for my artwork and after trying many different brands this is by far my favourite and the one I choose time and time again. I get perfect results and the service is always brilliant with fast delivery.
This resin is excellent for surface work it gives a high gloss glass finish as advertised. I highly recommend this resin for someone New to resin an those who use resin on a daily basis.
Great product, fast delivery, easy to use and a great final finish.
Good Value and easy to use
so simple to use! we have a beautiful penny floor and so impressed with the results! 100٪ use the YouTube tutorials and read the instructions carefully
Looks great, went on real easy for first time doing it.
Brilliant, perfect for what I wanted to do.
Love the GlassCast range for my projects. Highly recommend.
Great resin for kitchen counters and table tops. We originally purchased this epoxy resin to put on our new wooden countertops, for added protection. We have since covered heavily used table tops in our house with this resin, its expensive, but not as expensive as the furniture its protecting.
Worth it. Nervous but worked really well. Has finished the floor project really well. Was surprised as to how warm the floor now feels.
Amazing Stuff! Two penny floors look amazing.
Great Product
Great product, Looks absolutely amazing and easy to use.
SUBMIT YOUR OWN PRODUCT REVIEW
We publish all reviews for verified purchases. Submit your own review and help other customers with their choices.SUBMIT YOUR OWN PRODUCT REVIEW
We publish all reviews for verified purchases. Submit your own review and help other customers with their choices.Shipping Information
Restrictions
This product is not classed as dangerous goods for transport and can be shipped to all destinations without restriction.
Shipping to EU countries is now done through our European subsidiary based in the Netherlands. All EU customers should use www.easycomposites.eu.
Package Size
There are no package size restrictions or surcharges for this product.
Delivery Cost
To find the delivery cost of this item to your address, add it to your basket and then use the instant shipping calculator on the basket page.
Shipping Information
Restrictions
This product is not classed as dangerous goods for transport and can be shipped to all destinations without restriction.
Shipping to EU countries is now done through our European subsidiary based in the Netherlands. All EU customers should use www.easycomposites.eu.
Package Size
There are no package size restrictions or surcharges for this product.
Delivery Cost
To find the delivery cost of this item to your address, add it to your basket and then use the instant shipping calculator on the basket page.


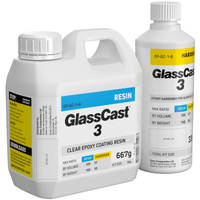
100% SECURE
PAYMENT METHODS


Easy Composites Ltd, registered in England 7486797. All content copyright (C) Easy Composites Ltd, 2025. All rights reserved.