Need any help or advice?![]() +44 (0)1782 454499
+44 (0)1782 454499
PRODUCTS USED IN THIS PROJECT
Although not necessarily an exhaustive list, the following tools and materials, supplied by Easy Composites, were used in this project.
The quantity shown below is the approximate amount used in the project rounded up to the nearest available kit size or quantity.
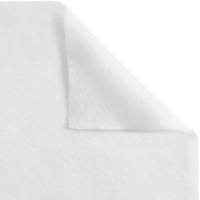
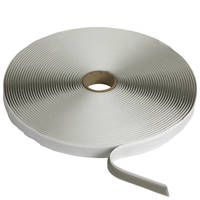
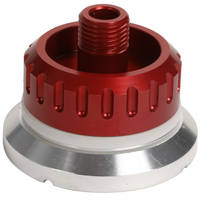
VACUUM BAGGING CONSUMABLES


VIDEO TUTORIAL
How to Find, Fix and Avoid Leaks in Vacuum Bags
Vacuum bagging is an integral part of many composites manufacturing processes, including prepreg, resin infusion and conventional vacuum consolidated hand-layup but getting vacuum bags to seal properly and reliably can be difficult and frustrating, especially for those relatively new to the process.
In this video tutorial and written guide, we use our many years of experience of vacuum bagging to go through all the possible causes of leaks in vacuum bags, how to avoid them in the first place, how to test for them, how to locate them and how to fix them. We will also discuss when to give up and make the decision to re-bag a part.
Why is a sealed bag so important?
If you're reading this article, there's a good chance you already know how important it is to have a fully sealed vacuum bag, but you might not necessarily know why a leaking bag can be such a problem.
The two main reasons why leaks in bags need to be found and fixed are:
A leaking vacuum bag will affect your parts
In general, vacuum bagging processes need the level of vacuum carefully controlled and maintained to achieve good results. In some cases, a small leak may not ruin the part when the pump is running, however the surface finish of the part may be compromised with pinholes and voids.
Pump off processes, like resin infusion, it is essential that the bag is leak tight otherwise the part will almost certainly be extensively damaged and ruined. In such cases it is essential that the bag will be capable of holding vacuum until the resin has cured.
Leaking vacuum bags may damage your pump
For the most common 'rotary vane' type vacuum pumps used in composites, any process which involves leaving the vacuum pump running for the full length of the cure - like OOA prepregs - risks damaging the pump if the vacuum bag isn't properly sealed. This is because vacuum pumps have a lot more work to do when they're pulling against a leaking bag.
For vacuum pumps with oil vapour condensers, like EC4 and EC20, running for long against a leaking vacuum bag will often cause the oil vapour condenser to be overwhelmed, resulting in oil overflowing the collector and thus leaving the pump.
For pumps without oil vapour condensers, like many low-cost air conditioning pumps, running for long periods against an unsealed bag will generate oil vapour and smoke continuously, often filling a room with smoke.
In both cases, there is a risk that the pump will run out of oil whilst still running, which is likely to cause permanent damage.
All the possible causes of a leaking vacuum bag
Pressure loss, over time, in a vacuum bag will always be caused by one of the following:
- Film already punctured
- Leak in the seal
- Puncture during bagging
- Burst during cure
- Leak elsewhere in the system
In this section, we will look at each of these possible causes in detail.
Film already punctured
Due to the high levels of quality control and good quality of vacuum bags such as our VB160 and VB200, the chances of the bag being punctured during manufacture are extremely unlikely and we have yet to see a case where this has happened.
Far more likely is that the bag has been punctured during storage. To prevent this ideally store the film on a dedicated material storage rack such as our Composite Material Wall Roll Rack. If a suitable rack is not available, it is also perfectly acceptable to wrap the film up and store on a shelf.
What is not recommended is storing it on the floor or floor level or in a dirty environment where it can be punctured quite easily.
Leak in the seal on an envelope bag
Generally envelope bagging is commonly used with pre-preg and wet lay vacuum bagging processes. It is important when cutting the film to ensure that the bag is big enough for the size of the mould. Considerable excess film is need to conform to all the contours and details within the mould. A lot of bags come in a lay flat format meaning that the crease can be used to make a bag needing sealing on only three sides. However the principles are the same if the bag in use is open on all four sides.
Applying the gum tape
On an envelope bag with a crease, it is important to ensure the gum tape extends past the crease to ensure that there will be a good seal along the crease line itself.
When applying the tape, it is good practice to tension the film slightly to minimise the number of creases or folds trapped under the film. This can be done by sliding the roll over the film to tension it slightly as the tape is applied.
Corners are generally treated in two ways. Firstly, tear the backing paper at the corner and the tape is then bent around the corner in one piece, secondly cutting and overlapping at the corner. Both methods will form a good seal, however the first method can be slightly quicker.
At this point, the film can be folded over and the seal made on two of the sides leaving one side open to insert the mould, It is easier to seal the edges before putting in the mould as the film will lay much flatter. A common mistake is to remove large lengths of backing paper and doing so will make it harder to tension the film and apply the film to the seal without creases or folds. It is recommended to remove only 3 to 4 hundred mm of film at any one time.
As the film is applied, slightly tension it to ensure there are no creases trapped against the gum tape and work systematically along the length of the seal line.
Inserting the through-bag connector
At this stage the connector is fitted. Insert the bottom half of the connector into the bag in a suitable location. To make the hole in the bag for the top part, the recommended method is to pinch a piece of the film then snip the top off with a pair of scissors. Care needs to be taken to ensure the hole is no bigger than the first rib on the connector base as that is where the seal is formed. The top part of the connector can then be screwed into place. It is important to ensure no creases are trapped under the seal and this can be done by tensioning the bag slightly. The connector only needs to be tensioned to a moderate level by hand to seal properly.
At this point, the bag is now fully sealed using the same method as before. Once fully closed, work around the full length of the gum tape pressing firmly to ensure the gum tape is sealing properly. The best method for this is to pinch and stretch slightly while working along the tape. This ensures any creases are removed. Extra care is to be taken on corners and any areas where gum tape is overlapped.
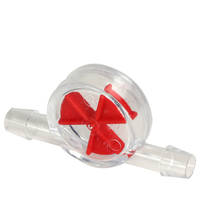
The vacuum pump can now be connected and vacuum pulled on the bag. At this stage, carefully manipulate the bagging film to ensure it is conforming to the surface of the mould. A useful tool during bag pull down is a Vacuum Leak Flow Indicator. The indicator will continue to spin while there is a considerable leak in the seal. Work around the seal carefully pressing tightly until the bag is sealed and the indicator stops spinning. Very small leaks will not show up on the indicator but can be found during the leak test.
Common mistakes
These include not covering the crease with gum tape and not tensioning the tape meaning you end up with gaps and creases on the seal line. Another common problem is the tape wandering off to the edge or inwards as you apply it. This can be easily fixed by pulling the tape off sharply back to where the tape is good, tearing the backing, then redirecting the tape in the correct direction. Any gaps in the tape are simply fixed by adding some more tape to bridge the gap.
As you apply the top layer of film, again wandering of the film on the seal can happen. The fix is similar, sharply pulling the film off the gum tape then carefully reapplying it and gently twisting the film slightly over several cm's to make the curve back on track less likely to leave large ripples. It is also common to reach the end of the film short of the gum tape. This is remedied by creating a small pleat in the gum tape on the lower layer of film to match the distance so the top layer reaches the seal.
Once the bag has been sealed, go around the seal inspecting for defects. Creases or folds can be removed by slightly stretching the film to flatten them out and then pressing firmly on the tape. Likewise, where tape overlaps, the gap can be sealed by pressing firmly on the gum tape to seal it.
Leak in the seal on a toolface-sealed vacuum bag
Tool Sealed bags are commonly used for large bags where the size makes envelope bagging impractical or for Resin infusion. Tool sealed bags are preferred for resin infusion as the flowing resin will flow onto the back and sides of a tool which is envelope bagged.
Preparing the flange
It is recommended to apply the gum tape to the flange of the mould BEFORE any fabrics or materials have been put in the mould. This helps to ensure that the flange does not have loose strands of fibre that could bridge the gum tape and cause a leak. Wiping down the flange will remove any dirt or debris.
Applying the sealant tape
The gum tape is applied in a smooth manner around the flange of the mould. As you do this you will need to include pleats in the gum tape.
Creating pleats
Pleats are necessary to ensure that enough film can be applied to the mould to conform to all the contours and details. This invariably means the film is much bigger than the mould size and it is the pleat that will take up the excess film. Pleats can be made in two ways, as you apply the gum tape to the flange from a piece folded over, or added afterwards as separate pieces of tape folded over to produce the pleat. If you are new to bagging, the second method is easier to do albeit taking a little longer time.
Sealing up the bag
Measure up the bag against the gum tape including the pleats to ensure there is enough bagging film to cover all the mould and pleats. Centre the film on the mould so that the bag can be applied evenly. When applying the bagging film to the gum tape, pleats are best approached by running the film up one side of it, then folding the pleat over to run along the other side. Care needs to be taken as the bagging film is applied to ensure the film does not wander far from the seal on the flange. This is especially easy to happen over the pleats. As with the envelope bag, the film can be steered back in the correct direction to stop this happening.
The top of the pleats are a common place for leaks so extra attention is needed to ensure the film makes full contact with the gum tape. As the seal is almost closed, it is common to end up either with excess bag or the bag being tight. That can be solved by either folding over the pleat to shorten it, or extending the gum tape on the pleat to take up the excess. It does not matter if the excess film is very long as long as it is sealed up neatly.
Inserting resin infusion connector
Now the bag is sealed, the hose can be inserted into the resin infusion silicone connectors. This is done by making a small perforation in the bag. Then cut the hose with a slight chamfer and press firmly into the hole in the bag. Try and manipulate the vacuum bag around the connector by slightly stretching it to remove any creases or folds. This is to ensure the gum tape can effectively seal around the use. Then using a small length of gum tape, seal around the hose. Only a couple of wraps are needed for an effective seal. Excessive gum tape can make it harder to find leaks in that area later on.
Puncture during bagging
Work environment
First of all the workbench needs to be clean and free of dirt and loose strands of fibre that could compromise the seal. Secondly, and especially if you are using an envelope bag, working on a padded surface. On a hard surface, it is possible to pinch and puncture the bag while it is moved or dragged over the surface. A good solution for a temporary surface is some EVA foam from a camping or yoga mat. For a more permanent solution, the sides of the table can also be covered in the foam.
In a professional composites workshop, the traditional way of adding padding to a work bench is to cover it with several layers of breather cloth and then stretching and securing some bagging film over the top. Ready access to these materials makes it convenient as well as effective in such environments.
Mould preparation
Another common source of burst bags is the mould itself. Rough edges and loose strands of fibre poking up on the back and sides of the mould can cause a burst in the bag. So care needs to be taken after trimming to make sure the edges are rounded and smooth and there are no sharp points or strands sticking up on the mould back surface. These are easily removed by sanding.
Appropriate tools
Often when drawing down the vacuum on the bag, it is necessary to press the film and bagging stack firmly into corners and recessed details to avoid bridging. This is commonly done with a variety of tools and these, if used incorrectly, can burst the bag.
Any tools used should be blunt but it still may be necessary to press firmly into the bag. Pressing or rolling the tool is the best method as dragging the tool can wear and nick the film causing a leak. The tool can be further blunted by adding a layer of breather cloth over the tool. If you have pressed too hard or have reason to suspect you may have damaged the bag, mark the area with a marker pen to help locate any leaks if the leak test fails.
Burst during cure
It is possible for the bag to burst during the cure. Common reasons for this include bridging of the bag, features or fasteners puncturing the bag and the shape of the mould itself. These kind of issues more commonly occur on the back of the mould as often less attention has been paid to this area.
Fasteners puncturing the bag
On multi part moulds, it is very common to have fasteners holding the parts together. Nuts and bolts are often used, however care needs to be taken to cut down the exposed stud flush with the nut to avoid there being any sharp edges. Dome nuts are also a good solution to this problem where available. In addition, it is recommended to also apply a small pad of breather cloth over the fastener to further blunt it and further reduce the chance of snagging.
Shape of the mould
Certain features in the mould shape can cause issues when the vacuum is pulled. Deep recesses and tight corners are common places that cause a problem as when the vacuum is pulled, the bagging film may bridge over the corner. As the vacuum level increases, the bag will reach its limit of stretch and may burst in these areas. This is avoided by carefully paying attention to bag placement on the back of the mould as well as the more obvious front.
Leak elsewhere in the system
Even with a good bag, you can still get leaks within the system. All threaded connections and fittings are possible sources of leaks. Carefully check all threaded connections to ensure the thread is properly sealed and leak free.
Quick release connectors
These can leak if the O ring seals are worn or damaged so it is important to regularly inspect the seals for leaks. If there are obvious nicks or damage, the seals should be replaced before using the connector again.
Hose tail barbs
These have the potential to leak if the hose is not correctly fitted. A common mistake is to use a knife to cut off tight hose and in doing so, leave a score mark on the soft brass fitting. This then provides an air path for a potential leak in the future.
Leaks in the mould
It is also possible the mould itself could leak on a tool sealed bag. A properly made mould with a good quality gelcoat is unlikely to leak through the mould itself. However, it is quite common for the flanges to pick up hairline cracks and damage during demoulding that can cause an air path across the seal. Moulds should be carefully inspected before use and repaired if necessary.
Leaks in the rest of the system
Regular inspection of the rest of the system should be done to eliminate any potential leaks so that includes hoses, catch pots and all the way back to the pump. Very small leaks are unlikely to be an issue as the system would still maintain full vacuum and it is downstream of the bag. Also remember to clamp off close to the bag when doing leak tests or finishing off a bagging process so that if there was a small leak in the system, it would not give a false indication of a leak in the bag.
How to check for a leak in a vacuum bag
Checking for an actual leak is the most critical part of vacuum bagging. This can be done in several ways but invariably involves a leak test to get a starting point to gauge the quality of the bag.
Drop test
The drop test is performed by first pulling a full vacuum on the bag. The bag is then clamped off and a gauge used to check for any drop in vacuum indicating a leak. For a typical prepreg or infusion bag, using a simple mechanical gauge, there should be no noticeable movement of the needle over a half hour period.
Connecting a gauge
For an envelope bag, the easiest way to connect a gauge is to connect one directly to the bag using the through bag connector via a quick release connector. The gauge can simply be connected to the bag quickly and easily. For an Infusion bag, a gauge connected to a hose tail barb can simply be connected directly to the hose coming from the bag.
Using a Catch pot for the drop test
Although preferable to directly connect a gauge to the bag, the gauge on the catch pot can also be used. It is essential to clamp between the catch pot and bag for the leak test to ensure the test is showing leaks in the bag not the wider system. A very small leak on the catch pot is not an issue and all that is needed is to quickly pull vacuum on the catch pot at the end of the leak test then shut off the pump. The clamp can then be opened and any change in the needle on the gauge will show that there is a leak in the bag itself.
Digital vacuum gauge
If you are doing a lot of vacuum bagging then a digital vacuum gauge may well be a good investment. The main advantage is the much higher resolution compared to basic mechanical gauges. This means a leak test can be conducted in a much shorter time frame with typically around a minute being all that is needed to detect any leaks.
How to find and fix leaks in a vacuum bag
Ideally at this point, following the leak test, the bag will be leak free. However, if a leak is found, the source will need to be located and the leak sealed before moving on.
Check the seals
The first and most likely place to find a leak is the seals. Carefully work around all the seals and connections in the bag carefully pressing down and working systematically to locate and plug any leaks. In Most cases this will solve most of the leaks likely to be found in the bag.
Plugging suspected leaks
At this stage, any points identified earlier as possible leak spots should be sealed. To do this, carefully stretch out the creases in that area then plug the leak with a piece of gum tape.
Second leak test
At this stage, all the leaks should have been plugged. However it is necessary to confirm this by conducting a second leak test much the same as before.
Further leak identification
The simplest method is to move to a quiet area of the workshop, turn off the pump and listen for the slight hiss that a leak gives. Then locate it and plug as before. However in some cases, certain tools can be used to aid locating the leak.
Stethoscope
A simple, but effective, tool is a stethoscope with a length of tube. This is used by moving the tube end slowly over the seal listening out for the hiss of a leak. If this does not find it, then systematically move the tube end over the bag itself until the leak is found.
Ultrasonic leak detector
These are used in a similar way to a stethoscope passing the tube over the bag and seal listening for the high pitched frequency that a leak gives off. Although they can be useful for finding leaks relatively quickly, they are a quite expensive piece of equipment and as such would not be considered essential, especially when just starting out.
When to give up!
If the leak still hasn't been found, despite all your efforts, there is a point when re-bagging should be considered.
Deciding to re-bag
Time spent
It is easy to fall into a trap of spending a long time looking for leaks. The longer time spent looking, the easier it is to feel invested in the bag and wish to continue looking. However it is wise to set a time limit for leak hunting. A good rule of thumb is to only spend as long looking for leaks as it took to make the bag in the first place. Beyond that, it is better to re-bag as statistically the bag is far more likely to be leak free second time around.Fixing Leaks before continuing
Don't be tempted to continue on with the composite process when you know there is still a leak in the bag. Certainly for resin infusion, it is essential that the bag is sealed properly otherwise there will be problems with the finished part. For other processes like prepreg or vacuum bagging, it might be possible to get away with a very slight leak. However this may compromise the finish of the part and most vacuum pumps do not like running with a leak and may possibly be damaged running with a leak over a considerable time. As such we always recommend fixing any leaks before progressing.
DISCUSSION (4)
Please share any questions or comments you may have about this video tutorial.
OK, well, if you're managing to get away with 90% vacuum then it sounds like you've found a compromise that works for you. For quite a few process, including out-of-autoclave prepreg and - in a lot of cases - infusion, working with only 90% vacuum will result in either pin holes (for OOA prepreg) or could result in voids (for infusion). It should be possible to achieve that 100% seal, which is why we made this video, be we do understand it can be difficult at first.
You still risk air in the laminate with that method but it is a good fix to avoid completely ruining an infusion that is in progress. Ideally always fix leaks before the infusion.
In general use, storage indoors is not a problem in terms of light degradation so a specific cupboard would not be necessary.
LEAVE A COMMENT OR QUESTION
PRODUCTS USED IN THIS PROJECT
Although not necessarily an exhaustive list, the following tools and materials, supplied by Easy Composites, were used in this project.
The quantity shown below is the approximate amount used in the project rounded up to the nearest available kit size or quantity.
VACUUM BAGGING CONSUMABLES
DISCUSSION (4)
Please share any questions or comments you may have about this video tutorial.
OK, well, if you're managing to get away with 90% vacuum then it sounds like you've found a compromise that works for you. For quite a few process, including out-of-autoclave prepreg and - in a lot of cases - infusion, working with only 90% vacuum will result in either pin holes (for OOA prepreg) or could result in voids (for infusion). It should be possible to achieve that 100% seal, which is why we made this video, be we do understand it can be difficult at first.
You still risk air in the laminate with that method but it is a good fix to avoid completely ruining an infusion that is in progress. Ideally always fix leaks before the infusion.
In general use, storage indoors is not a problem in terms of light degradation so a specific cupboard would not be necessary.
LEAVE A COMMENT OR QUESTION
100% SECURE
PAYMENT METHODS


Easy Composites Ltd, registered in England 7486797. All content copyright (C) Easy Composites Ltd, 2025. All rights reserved.