Need any help or advice?![]() +44 (0)1782 454499
+44 (0)1782 454499
PRODUCTS USED IN THIS PROJECT
Although not necessarily an exhaustive list, the following tools and materials, supplied by Easy Composites, were used in this project.
The quantity shown below is the approximate amount used in the project rounded up to the nearest available kit size or quantity.
MATERIALS & CONSUMABLES

VIDEO TUTORIAL
How to Make a Basic Silicone Mould
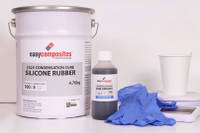
This video tutorial demonstrates how to create a simple silicone one part mould using the CS25 Condensation Cure Silicone Rubber.
The step by step guide shows just how easy the CS25 Condensation Cure Silicone Rubber is to work with whilst producing excellent moulds with a high tear strength, excellent flexibility and low viscosity, which retains it's quality over multiple uses.
Here are the steps in brief:
TUTORIAL BREAKDOWN
1. Materials, tools and preparation
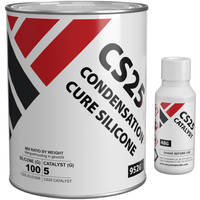
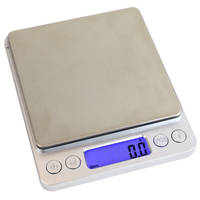
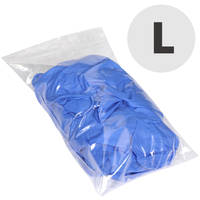
You will need the CS25 Condensation Cure Silicone Rubber and Catalyst, digital scales, nitrile gloves and a mixing cups and sticks.
You will also need a suitable sized container - or you can create your own if you wish and a master part to create a mould from.
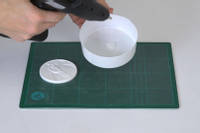
2. Preparing the set-up box
For this project, we used a 3D printed Xencast Coin and cut down a small bucket for the set-up box. Make sure the set-up box is watertight and that you allow for a 10mm gap all around the master - on all sides and above.
Then secure the master to the base of the set-up box using a hot-melt glue-gun - always make sure the glue you use has fully dried before pouring silicone over. You will not need to seal the master or apply a release agent as the coin is made from plastic and is non-porous. Check the technical datasheet regarding the material of your master piece.
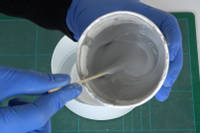
3. Measuring, mixing and pouring the silicone and catalyst
Calculate the amount of silicone rubber and catalyst you will require using digital scales to weigh out the correct amount of silicone into a mixing cup. Then shake the catalyst thoroughly and measure out the correct amount according to the manufacturers instructions. If you are only using a small amount of catalyst it is easier to use a syringe, then add it to the silicone.
Mix the silicone and catalyst together slowly and steadily until you reach a consistent colour and remember to scrape the sides and bottom of the mixing cup to ensure a thorough mix.
You may notice some air bubbles in the mix - you will be able to get rid of those when you pour the silicone.
Then pour the silicone into one part of the set-up box and let it flow naturally around the master, don't pour directly onto the master.
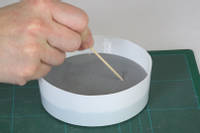
4. Removing air bubbles and curing
Pouring the silicone in a long, high stream will force out most air bubbles and if any persist you can pop them with your mixing stick or a cocktail stick. Alternatively, if you have access to a vacuum degassing system you can remove air bubbles by degassing prior to pouring.
Then leave the silicone to cure for 24hours.
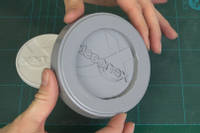
5. Removing the master
Once the silicone has fully cured remove the set-up box carefully. Then remove the master from inside by carefully loosening the sides of the mould from the master and peel one away from the other. If you need to, trim and tidy the mould ready for casting.
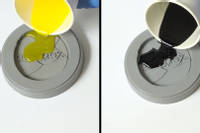
6. Using the mould
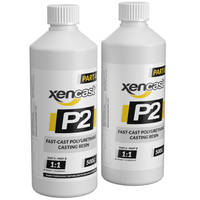
The tutorial shows castings made using the Xencast P2 Fast Cast Polyurethane Casting Resin and yellow and black Translucent Tinting Pigments.
This mould can be used to produce precise replicas of the original part, and is compatible with a range of casting materials including polyester, epoxy and polyurethane resin, urethane foam, wax, casting plaster, Jesmonite, and reconstituted stone and the full range of GlassCast clear epoxies
DISCUSSION (1)
Please share any questions or comments you may have about this video tutorial.
Yes, we do have experience of making reusable silicone membranes for vacuum processes. In general, it is hard to achieve a perfect seal using a silicone vacuum bag, compared to a conventional vacuum bag and sealant tape. For this reason, the usual configuration is to have a vacuum channel and vacuum pump with the sole responsibility of maintaining the seal (the pump is connected to the seal channel and constantly holds the seal channel under vacuum) and then a second pump with a separate connection to the laminate.
Thank you for your suggestion on making a video about this, we will add it to our list of ideas for future videos.
LEAVE A COMMENT OR QUESTION
PRODUCTS USED IN THIS PROJECT
Although not necessarily an exhaustive list, the following tools and materials, supplied by Easy Composites, were used in this project.
The quantity shown below is the approximate amount used in the project rounded up to the nearest available kit size or quantity.
MATERIALS & CONSUMABLES
DISCUSSION (1)
Please share any questions or comments you may have about this video tutorial.
Yes, we do have experience of making reusable silicone membranes for vacuum processes. In general, it is hard to achieve a perfect seal using a silicone vacuum bag, compared to a conventional vacuum bag and sealant tape. For this reason, the usual configuration is to have a vacuum channel and vacuum pump with the sole responsibility of maintaining the seal (the pump is connected to the seal channel and constantly holds the seal channel under vacuum) and then a second pump with a separate connection to the laminate.
Thank you for your suggestion on making a video about this, we will add it to our list of ideas for future videos.
LEAVE A COMMENT OR QUESTION
100% SECURE
PAYMENT METHODS


Easy Composites Ltd, registered in England 7486797. All content copyright (C) Easy Composites Ltd, 2025. All rights reserved.