Need any help or advice?![]() +44 (0)1782 454499
+44 (0)1782 454499
Downloads (1)
| High Temperature Epoxy Mould Kit - Instructions |
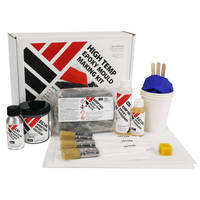
PRODUCTS USED IN THIS PROJECT
Although not necessarily an exhaustive list, the following tools and materials, supplied by Easy Composites, were used in this project.
The quantity shown below is the approximate amount used in the project rounded up to the nearest available kit size or quantity.
MATERIALS & CONSUMABLES


TOOLS & EQUIPMENT


VIDEO TUTORIAL
Hand Laminating a High Temperature Epoxy Mould
In this video we demonstrate how to hand laminate a mould using our EG160 High Temperature Epoxy Tooling Gelcoat and our EMP160 High Temperature Epoxy Mould Making Paste. The resultant mould can be used for out-of-autoclave (OOA) Pre-preg use as well as other applications where high temperature tooling may be needed.
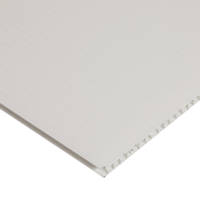
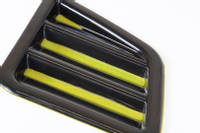
For this tutorial, we are making a mould of some bonnet vents so we can eventually make carbon fibre versions of the vents using an OOA pre-preg. The pattern was pre-prepared using the original vents, our Fluted Signboard to make the Baseboard/flanges and the Soft Filleting and Filling Wax to fill the gaps in the vent and edges. Several applications of Easy-Lease Chemical Release Agent were applied before the pattern was then ready for the mould making process.
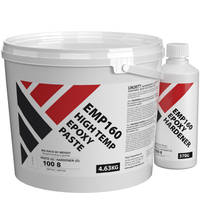
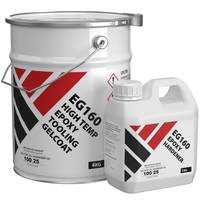
We then applied the EG160 High Temp Epoxy Tooling Gelcoat in two separate coats. A thin third coat is used as a coupling coat between the gelcoat and moulding paste. The EMP160 Epoxy Moulding Paste was then mixed and applied before the mould was left to fully cure. Once fully cured, the moulds were then removed from the pattern and given an oven post-cure before final trimming before being put into service.
TUTORIAL BREAKDOWN
1. Prepare the pattern
We have taken the original vent and mounted it to some polypropylene Fluted Signboard to use as a base plate and flanges. All the gaps around the edge and the vent voids in the middle were filled and smoothed out using Filleting wax. The Pattern was then prepared with EasyLease Chemical Release Agent ready for the moulding process to begin.
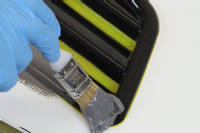
2. Apply the first layer of EG160 tooling gelcoat
Mixing up the first layer of Epoxy Tooling Gelcoat, it is brush applied evenly to the part and some of the baseboard to make the flanges. Take care to ensure an even layer is applied approximately 0.5mm thick.
The gelcoat is then allowed to part cure until what is known as the B stage. This is when, with a gloved finger, you can press on the gel lightly and it only leaves a slight mark on the gel but no gel residue on the glove. At this point we are ready for the second coat of gelcoat.
3. Apply the second layer of EG160 tooling gelcoat
At this stage we can apply the second coat of gelcoat which is mixed up and applied the same as the first, aiming for an even layer around 0.5mm thick. Like the first layer, this coat is left until it is at the B stage of curing.
4. Apply a thin application of EG160 to act as a coupling coat
Next we mix up a small batch of the gelcoat and brush it in a very thin layer all over the surface. This is to act as a coupling coat between the gelcoat and the moulding paste. The gel is not left to cure this time as we are going to move over to applying the paste directly onto the wet gelcoat layer.
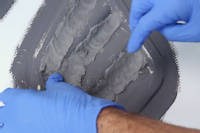
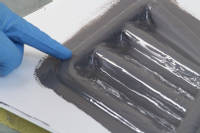
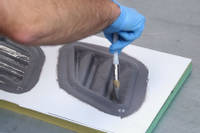
5. Apply EMP160 epoxy laminating paste
The moulding paste forms the main reinforcement for the mould itself. The paste is measured out and then a well is formed in the middle. The hardener is poured into this well. The paste is then kneaded, folded and thoroughly mixed to blend in the hardener until we are left with a even consistency paste.
The paste is then applied to the mould, initially filling in the inner part of the mould in the fine detail and corners. This is to ensure there are no voids or gaps between the gelcoat and paste. The paste is applied all over the whole surface and smoothed and patted down until a smooth even coating has been applied.
6. Allow the mould to fully cure at room temperature
EG/EL/EMP160 can be cured to a demouldable state in 24hrs at 25C but at this stage can be brittle and prone to cracking during demoulding of more complex mould shapes. Therefore, in most cases, it is recommended to conduct the initial cure at 40C (whereby the cure time can be reduced to 12hrs). Conducting the initial cure at 40C is low enough to avoid distortion of the pattern whilst still curing the resin to an adequately non-brittle state to demould without risk of damage.
Recommended: 12hrs @ 40C
Alternative: 24hrs (min) @ 25C - Warning: Resin will be very brittle before post-cure
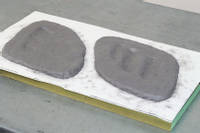
Once fully cured, the mould is carefully removed from the base board and the pattern and filleting wax removed from the mould surface. The mould is cleaned and inspected ready to move on to the post cure.

7. Post-cure at high temperature
Now that the mould has been cured and demoulded from the pattern, we need to conduct a post cure. This is done to develop the high temperature properties in the mould necessary to enable its use with out of autoclave pre-preg. This is done by returning the moulds to the oven for the post cure cycle.
A stepped postcure, as per the TDS, is used to allow the mould to develop its temperature resistance gradually without any risk of the mould distorting or softening during the process. Once the postcure cycle has achieved its final step, the moulds are then allowed to cool to room temperature. After some final tidying and trimming of the mould edges, they are now ready to be used to create some stunning pre-preg parts.
DISCUSSION (0)
Please share any questions or comments you may have about this video tutorial.
LEAVE A COMMENT OR QUESTION
Downloads (1)
| High Temperature Epoxy Mould Kit - Instructions |
PRODUCTS USED IN THIS PROJECT
Although not necessarily an exhaustive list, the following tools and materials, supplied by Easy Composites, were used in this project.
The quantity shown below is the approximate amount used in the project rounded up to the nearest available kit size or quantity.
MATERIALS & CONSUMABLES
TOOLS & EQUIPMENT
DISCUSSION (0)
Please share any questions or comments you may have about this video tutorial.
LEAVE A COMMENT OR QUESTION
100% SECURE
PAYMENT METHODS


Easy Composites Ltd, registered in England 7486797. All content copyright (C) Easy Composites Ltd, 2025. All rights reserved.