Need any help or advice?![]() +44 (0)1782 454499
+44 (0)1782 454499
PRODUCTS USED IN THIS PROJECT
Although not necessarily an exhaustive list, the following tools and materials, supplied by Easy Composites, were used in this project.
The quantity shown below is the approximate amount used in the project rounded up to the nearest available kit size or quantity.
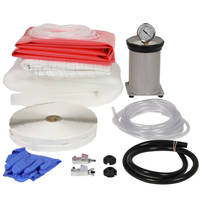
INFUSION EQUIPMENT & CONSUMABLES

VACUUM BAGGING CONSUMABLES
REINFORCEMENTS
MATERIALS & CONSUMABLES


TOOLS & EQUIPMENT


VIDEO TUTORIAL
Perfect Resin Infusion for Cosmetic Carbon Fibre Parts
Detailed video tutorial demonstrating the perfect technique for epoxy resin infusion to produce a professional quality carbon fibre part.
In the how to do resin infusion tutorial we explain how to position elements of the resin infusion system including resin feed spiral and infusion connectors, along with explaining what the different consumables used for resin infusion are and where they should be positioned.
The end result is a carbon fibre part with a flawless surface finish, without the need for a gelcoat or clearcoat, with similar fibre ratio and mechanical performance to prepreg (dry) carbon fibre.
TUTORIAL BREAKDOWN
1. Preparing the mould
The first stage is to prepare the mould by applying the release agent to the mould surface. In this case we are using a modern chemical release agent, Easy-Lease, due to its superior release properties, ease of use and semi-permanent nature.
On a new mould, you will need 6 layers of Easy-Lease applied with a 15 minute wait between coats and 1 hour wait after the final coat before use of the mould.
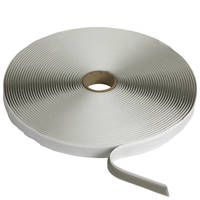
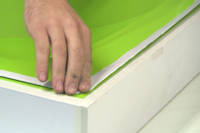
At this stage we are also going to be applying Vacuum Bagging Gum Sealant Tape around the flange of the mould. This tape is used to form a seal between the mould flange and the Vacuum bagging film. Be careful to ensure there is no dirt or strands of fibre or hair trapped under the gum tape as even a tiny hair can be enough to cause a small leak in the bag.
2. Laying up the fabric
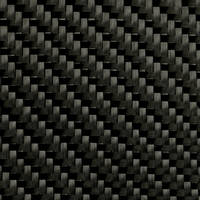
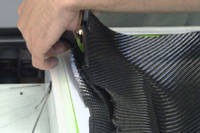
The fabric being used in this tutorial is 3 layers of our top quality Carbon Fibre 2/2 Twill 3k 210g giving an overall part thickness of approximately 0.75mm.
Carefully lay the first layer of fabric into the mould taking care not to distort or pull the fibres. Gently press it into all the corners of the mould, then carefully trim the edge of the fabric making sure the fabric finishes inside of the gum tape on the flange. Then using some masking tape, tape down the edges to help hold it in place. Repeat with the second and third layers of fabric.
3. Positioning the vacuum bagging consumables
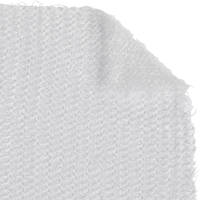
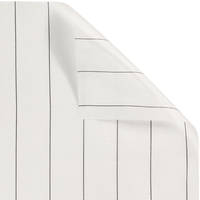
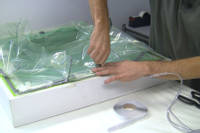
The bagging stack for Resin Infusion is specific to the job with each layer having its own purpose. The first layer to go onto the fabric is the PP180 Peel Ply which is designed to aid removal of the rest of the bagging stack once the infusion is complete and cured. The peel ply is simply laid into the mould then cut to size and taped into place. Take care to ensure there is enough material in the mould so that it does not bridge during the later vacuum bagging.
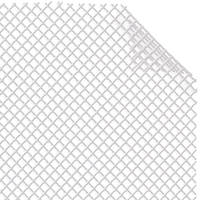
Then add the FM100 Infusion Mesh in a similar way to the peel ply. Due to the springy nature, it can help to cut it in the corners to help it conform to the mould shape.
The Resin Spiral is then cut and taped down to the resin feed side of the mould. It's purpose is to transport the resin from the resin feed evenly along the length of the mesh. Straighten out the spiral and hold it in place using masking tape. Then place the Resin Infusion Silicone Connector centrally onto the resin spiral.
The final step before finishing with bagging material, is to set up the vacuum port. Cut two thin strips of Infusion Mesh and place them on top of each other at the opposite end of the mould to the resin feed. This is to help form a path for air and resin to flow to the vacuum outlet. Then place the another Resin infusion silicone connector in the middle of the mesh strips.
4. Making the vacuum bag
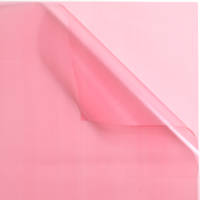
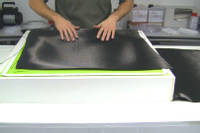
Prepare the VB160 Vacuum Bagging Film by cutting a piece significantly over size for the size of the mould. This is to ensure you have enough bagging material to fit in the mould. The excess length is taken up with pleats in the bag.
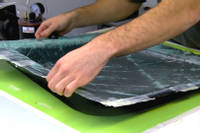
Starting in one corner of the mould, removing the gum tape backing as you go, apply the film evenly and smoothly to the tape ensuring there are no creases in the film and no fibres or materials are trapped under the tape. Depending on the size of the mould and piece of film, you will need to make pleats to take up the excess bagging material as you go along the gum tape edge. Try to evenly space these around the mould. To do this, cut a small length of gum tape and apply one end to the gum tape on the flange. Run the film up the loose piece of gum tape, then removing the backing, fold over the top slightly to seal it, and run the film back down the reverse of the tape until you are back on the flange.
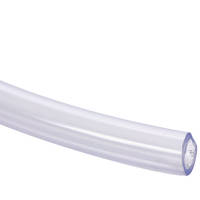
Continue around the mould edge until the bag is fully sealed onto the flange. The last step is to connect up the resin and vacuum ports. To do this, cut the required lengths of 6mm ID PVC Vacuum Hose, then wrap a length of gum tape around the end of the hose, leaving around 10mm exposed. Then, very carefully, snip a small hole in the bag above the Resin Infusion silicone. Push the hose end through the hole and into the hole in the silicone connector. Pull the film tight around the connector and press the hose and gum tape into place. Press the gum tape down onto the film to seal the hose to the film. Repeat for the vacuum port resin infusion connector.

5. Pulling a vacuum and leak testing
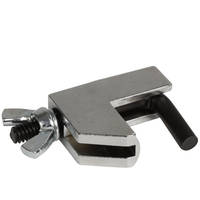
First off, use a Resin Infusion Line Clamp to close off the resin feed.
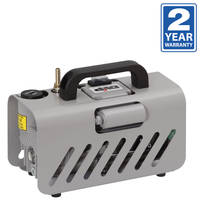
Set up your Compact Composites Vacuum Pump and Resin Infusion Catch-Pot then connect the vacuum feed line to the catch pot inlet and connect the catch pot to the vacuum pump hose tail barb. You are now ready to pull down the bag.
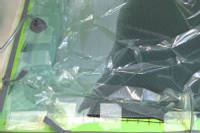
Switch on the pump and open the valve on the pump to evacuate the air from the vacuum bag. As you do so, move the bagging material around to ensure it gets into all the corners and recesses of the mould to avoid any bridging of the bagging material. It can help to shut the valve occasionally to give you time to do this while the bag is still at partial vacuum and the material can be easily moved around.
As the bag almost reaches full vacuum, now is the time to find and fix any leaks. The gauge on the catch pot may not yet be at full vacuum, indicating you have a leak, or you may even be able to hear a leak. Work around the gum tape pressing down firmly as you go to ensure the gum tape is fully sealed. Also check the vacuum and resin ports in the same way. Keep working around until all leaks have been found and sealed. Once full vacuum has been achieved, you are now ready to conduct a leak test.
Clamp off the vacuum line between the mould and the catch pot, then shut the valve on the pump and switch it off. Leave the bag for 15 minutes to conduct the leak test. This is to ensure there are not any further tiny leaks in the bag. After 15 minutes, open the line clamp between the bag and catch pot, carefully looking for any change in the needle on the gauge which would indicate a leak. If there is a leak, you need to find it and seal it before repeating the leak test. Once happy you have a sealed bag, you can move on to the infusion itself.
6. Infusing the resin
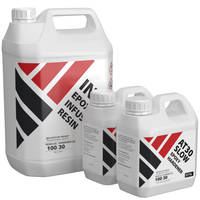
Using the table in the Resin Infusion Starter Kit Instructions, calculate how much resin you will need to use for your infusion, based on number of layers of fabric and surface area of the mould. Using good quality digital scales, weigh out our specialist IN2 Epoxy Infusion Resin taking care to exactly follow the mixing ratio on the bottles. Using a suitable mixing stick, thoroughly mix the resin, taking care reach the sides and bottom of the mixing pot. Once mixed, you can allow the resin to stand for a few minutes to allow some of the bubbles to naturally degas.
Put the resin feed hose into the resin jug and, using a spare resin infusion line clamp, clamp it gently to the side of the jug so it does not move. Switch on the pump and open the pump valve. Gently open the resin feed line clamp to allow the resin to enter the mould.
The resin will flow into the fabric and across the mould. Keep allowing the resin to flow until resin reaches the Resin Infusion Catch pot, then clamp off the resin feed line. Wait around 10 seconds then clamp off the vacuum line between the mould and the catch pot. You can now shut the vacuum pump valve and turn off the pump.
7. Remove vacuum bagging materials and demould the part
First of all, undo the line clamps and pull the hoses out of the bag. Then, starting at one edge, pull the gum tape and vacuum bag off the part. The Vacuum bagging film will not stick to the resin so should come off relatively easily. Remove the silicone connectors for later re-use.
Now you are ready to demould the part. Lift the edges of the part to help demould and break the part free from the surface. If necessary, work around the flange gently lifting it in places using thin mixing sticks or plastic wedges until the part releases from the mould. Then cut the peel ply edge into strips and rip off each thin strip of peel ply and mesh. You can then trim the part and put it to use!
DISCUSSION (16)
Please share any questions or comments you may have about this video tutorial.
It depends how thick or big it is. Certainly if the extra reinforcement is very thick or an odd shape, it may be more efficient to do it as a forged part then bond into place afterwards.
LEAVE A COMMENT OR QUESTION
PRODUCTS USED IN THIS PROJECT
Although not necessarily an exhaustive list, the following tools and materials, supplied by Easy Composites, were used in this project.
The quantity shown below is the approximate amount used in the project rounded up to the nearest available kit size or quantity.
INFUSION EQUIPMENT & CONSUMABLES
VACUUM BAGGING CONSUMABLES
REINFORCEMENTS
MATERIALS & CONSUMABLES
TOOLS & EQUIPMENT
DISCUSSION (16)
Please share any questions or comments you may have about this video tutorial.
It depends how thick or big it is. Certainly if the extra reinforcement is very thick or an odd shape, it may be more efficient to do it as a forged part then bond into place afterwards.
LEAVE A COMMENT OR QUESTION
100% SECURE
PAYMENT METHODS


Easy Composites Ltd, registered in England 7486797. All content copyright (C) Easy Composites Ltd, 2025. All rights reserved.